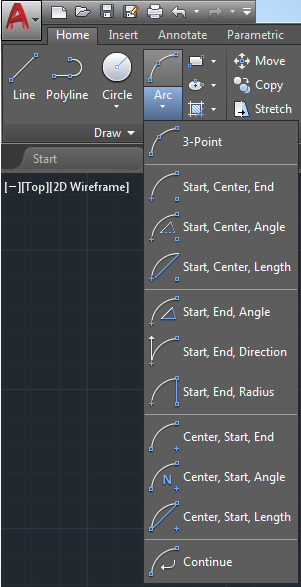
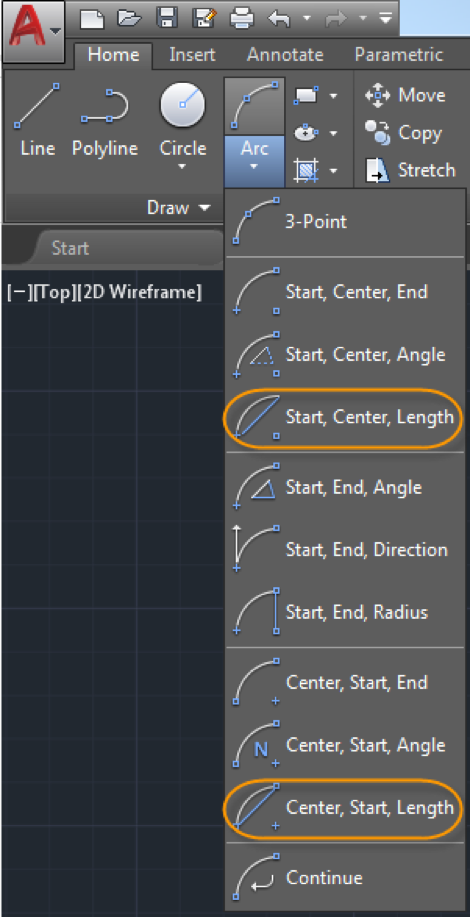
If you’ve ever taken a good look at the AutoCAD Arc command, you might have found the many options a bit overwhelming. It makes you wonder if the programmer that created it got paid by the option! But, believe it or not, each of these options has a purpose. Which one is most appropriate for you to use depends on what you’re trying to accomplish and, maybe more importantly, what you already know. With these pointers you’ll be mastering the Arc command in AutoCAD in no time.
Let’s start with the 3-Point method because it’s the default option and easiest to understand. You simply pick three points to define the arc you want to create. The first point specifies the start of the arc, the second point can be anywhere on the arc, and the third point specifies the end of the arc. The arc draws clockwise or counterclockwise depending on the points you pick. This method can be especially useful when sketching or tracing geometry.
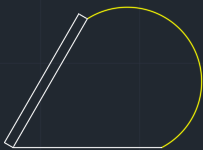
While 3-Point might be the easiest method, it’s not always the most appropriate. For example, if you draw the arc for a door symbol by randomly picking the second point, you could end up with a funny looking door!
The last option on the Arc menu is Continue. This method enables you to easily draw an arc that is tangent to the last line, arc, or polyline that was drawn. Like the 3-Point option, this method is good for sketching. It’s similar to drawing a polyline using the Arc option. In fact, if you find yourself creating more than one tangent arc, you may want to consider using the Polyline command instead.

Before using the other Arc options, it’s important to realize that they typically draw counterclockwise.
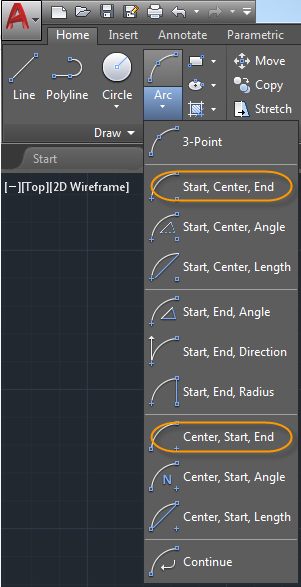
There are nine Arc options left and they all look very similar. How do you know which one to use? It depends what you know. If you look at the door example, keeping in mind that the arc will draw counterclockwise, you may or may not know the angle but you definitely know (and can snap to) the start, center, and end points.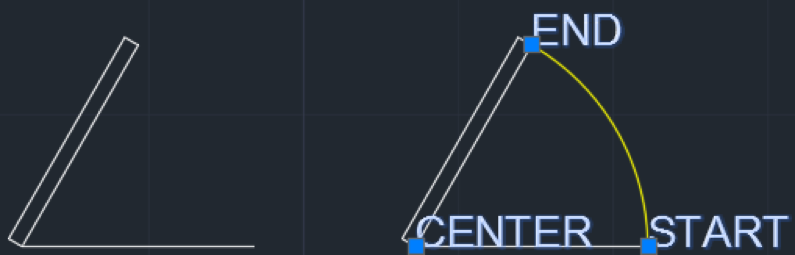
So, either Start, Center, End or Center, Start, End will work fine in this case. The only difference is the order in which you pick the points.
If you forgot about arcs drawing counterclockwise and started with the other end of the arc, you’ll notice it drawing the wrong way. No problem! Simply hold down the Ctrl key to change its direction.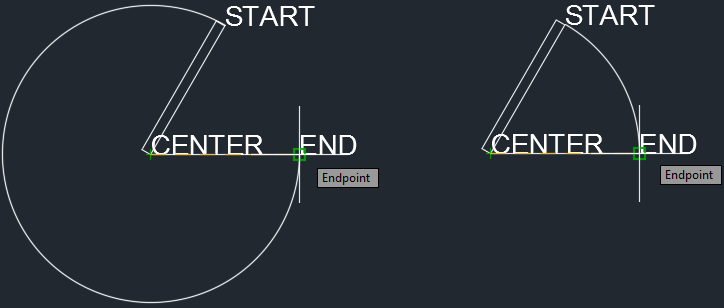
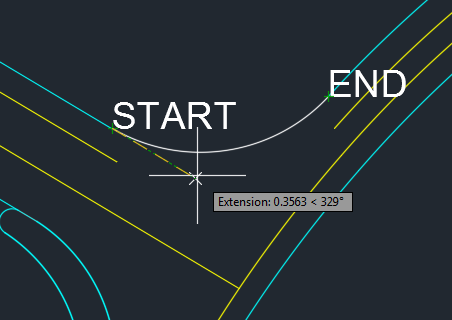
In this example of a road design, we know the start and end points for the arc but we don’t know the center.

To figure out which option to use, look at the other options that include start and end. Do we know the included angle? The radius? Maybe. Those options are pretty clear so I won’t go into them here. Instead I’ll focus on Direction. This option begins the arc tangent to a specified direction. Perfect! Being a road, we probably want the arc intersection to be tangent!
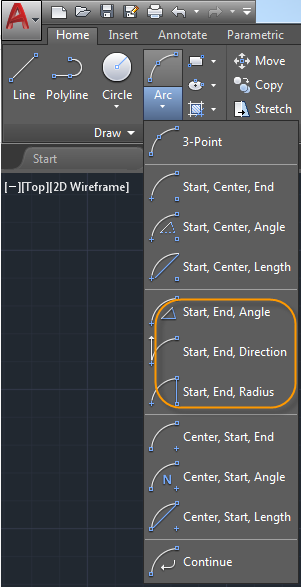
After picking the start and end points, we can specify the tangent direction using the Extension object snap from the existing line.
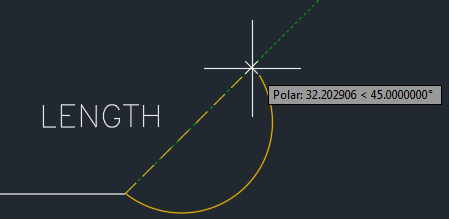
Out of that long list of options, the only one we haven’t touched on is length.
At first glance you might think “length” is referring to the distance along the arc itself, but it’s actually referring to the chord length which is the distance between the start and end points. After specifying the start and center points for the Arc, you can specify the chord length to determine the endpoint.
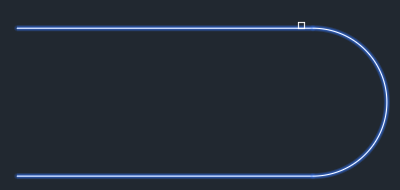
Hopefully that gives you a better understanding of the many methods for creating an arc using the AutoCAD Arc command. Before I go, though, I want to offer a quick tip for creating a tangent arc between two parallel lines. You can, of course, use the Arc command as I’ve described. However, the quickest method is to use the Fillet command! It doesn’t matter what the fillet radius is set to. Simply select the first parallel line near the end where you want the arc, and then select the other parallel line. Voila! A tangent arc with only two picks and minimum thinking!