The latest in your mastery of sheet set studies awaits (and if you’re just joining us, you can go back and study up!) Now it’s time to take a look at how to plot using any page setup in AutoCAD.
You can create any number of named page setups and easily restore them for any layout. For example, you might create one named page setup called Final Plot that plots the layout to PDF format on a D-size sheet at a scale of 1:1, and a second one called Test Plot that plots the extents to your LaserJet on a letter-size sheet, scaled to fit.
You are probably familiar with the Page Setup Manager but you may not have used it to save a named page setup. The Page Setup Manager automatically displays when you try to access the page setup for a model or layout tab. By default, AutoCAD creates an unnamed page setup for the current tab. If you select the Modify button, you can change the page setup options for that particular layout (or model). However, without using named page setups, you have to repeat the process for every layout. Using named page setups, you can set the options one time and then easily apply them to any layout. The process for creating named page setups is simple. Once they are created, named page setups will save you clicks and time!
1. From the File menu, choose Page Setup Manager. You can also right-click on the model or layout tab to find the Page Setup Manager.
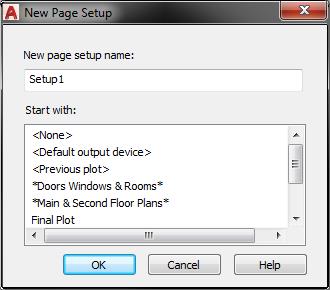
2. Choose New.
3. In the New Page Setup dialog box, enter the name of the page setup. Possible names might include: Test Plot, Final Plot, PDF, DWF Monochrome, etc.
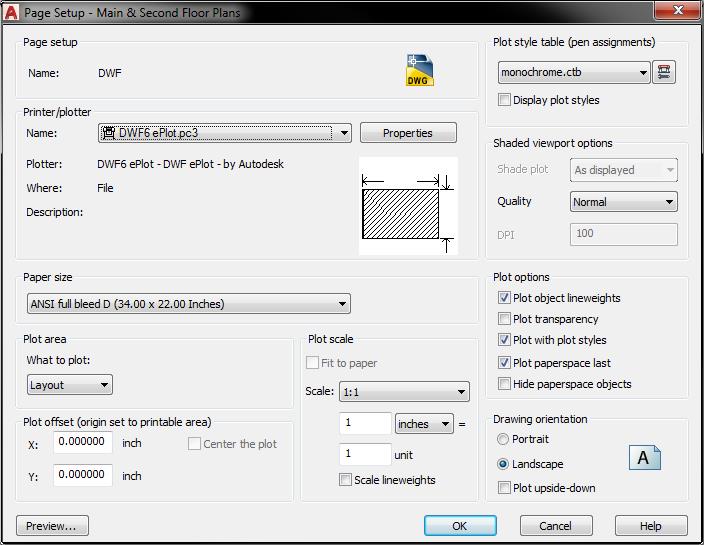
4. In the Page Setup dialog box, specify the device and other page setup options and then choose OK.
5. Continue to create new page setups for the various page setup configurations you might need.
6. In the Page Setup Manager, select the named page setup you want to use for the current layout (or model) and choose Set Current.
All of the named page setups are saved in the current drawing but you can use the Import option to access named page setups from other drawings. Ideally, you would create all of your named page setups in a template file so that they are automatically included in new drawings and easily accessible from a central location to import into existing drawings.
Imagine that a design partner sent you a set of drawing files with 100 sheets. You want to plot all of the sheets to fit on a letter-size paper using your LaserJet. Unfortunately, each of those 100 layouts has been saved to plot to E-size paper on a DesignJet. Has this ever happened to you? What do you do? Using traditional methods, you probably open a drawing, select the layout, choose Plot, set the device, set the paper size, set the plot area, set the scale, and send it to the plotter. And then, repeat the same process 99 more times! If you are a full-time plotter, you might think of it as job security! Otherwise, you probably consider it an incredible waste of your valuable time!
Sheet set manager enables you to use named page setups to quickly plot an entire sheet set (or any selected sheets within it) to any page setup configuration. When you create a new sheet set, AutoCAD uses a default template file for the named page setups. If you already have a template file for creating new drawings, you can use that same template file to store your named page setups. If you’ve been following along with this process, you created a template file in “How to Create New Sheets in AutoCAD.” You can use that same template file for named page setups or you can use a completely different file.
First, you need to assign your sheet set to use your template file for page setups. It doesn’t matter if your template file doesn’t yet contain named page setups.
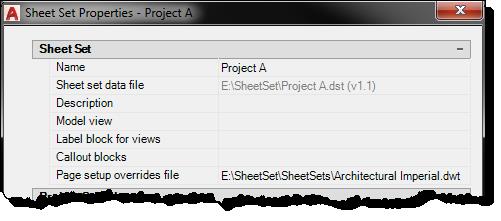
1. In the Sheet Set Manager, right-click on the sheet set title and choose Properties.
2. Click on the Page Setup Overrides File. The browse button will display within the field.
3. Select the browse button and navigate to the template file you want to use for named page setups.
4. Select the template file and choose Open. If the template file you selected does not contain page setups a warning dialog box will display. Select OK to dismiss the warning dialog.
5. In the Sheet Set Properties dialog box, choose OK.
Then, you need to create named page setups. If your template file already contains named page setups, you can create additional ones or modify the existing ones.
1. Right-click anywhere in the sheet list and choose Publish > Manage Page Setups. If your template file already includes some page setups, they will be displayed in the Page Setup Manager.
2. In the Page Setup Manager, choose New.
3. In the New Page Setup dialog box, enter a name for the page setup. Possible names might include: Test Plot, Final Plot, LaserJet Letter-size, DesignJet E-size, E-size Monochrome, etc.

4. In the Page Setup dialog box, specify the device and other page setup options and then choose OK. The named page setup is automatically written to the template file. This is one of the few sheet set functions that might write information to an existing file without you knowing it. The only other ones are the “hints” that were described near the end of “Creating a New Sheet Set.”
5. Continue to create new page setups, modify existing ones, or import named page setups from other files. All of the page setups in the template file will be available for you to use when plotting from the Sheet Set Manager.
6. Close the Page Setup Manager
Now that your template file includes named page setups, you can easily plot your sheet set to any configuration that is stored in the named page setups.
1. Right-click on the sheet set title or any combination of sheets that you want to plot.
2. Choose Publish > Publish Using Page Setup Override. Notice the page setup options that you created.

3. Select the named page setup that meets your need for the current plot.
Think of how much time you will save by not having to open and reconfigure every layout each time you want to plot to a different device, scale, etc. And, since these name page setups are saved in a template file, the next time you create a sheet set, the process will be even easier. Just use the same template file!
What’s Next?
In the next article, it’s time to explore an entirely new realm of sheet sets: Implementing sheet sets for maximum efficiency. Take all of your sheet set mastery and really start putting it to work for you. Remember, you can always catch up on the entire Mastering AutoCAD Sheet Sets series!