When it comes to manufacturing, we love to see plenty of detail in CAD model. But there are times when all that complexity in your parts and assemblies is not necessary. It may have a negative impact on performance when working in very large assemblies or running an FEA study. You may also be concerned with your intellectual property getting in the wrong hands when sharing your data outside the walls of your organization.
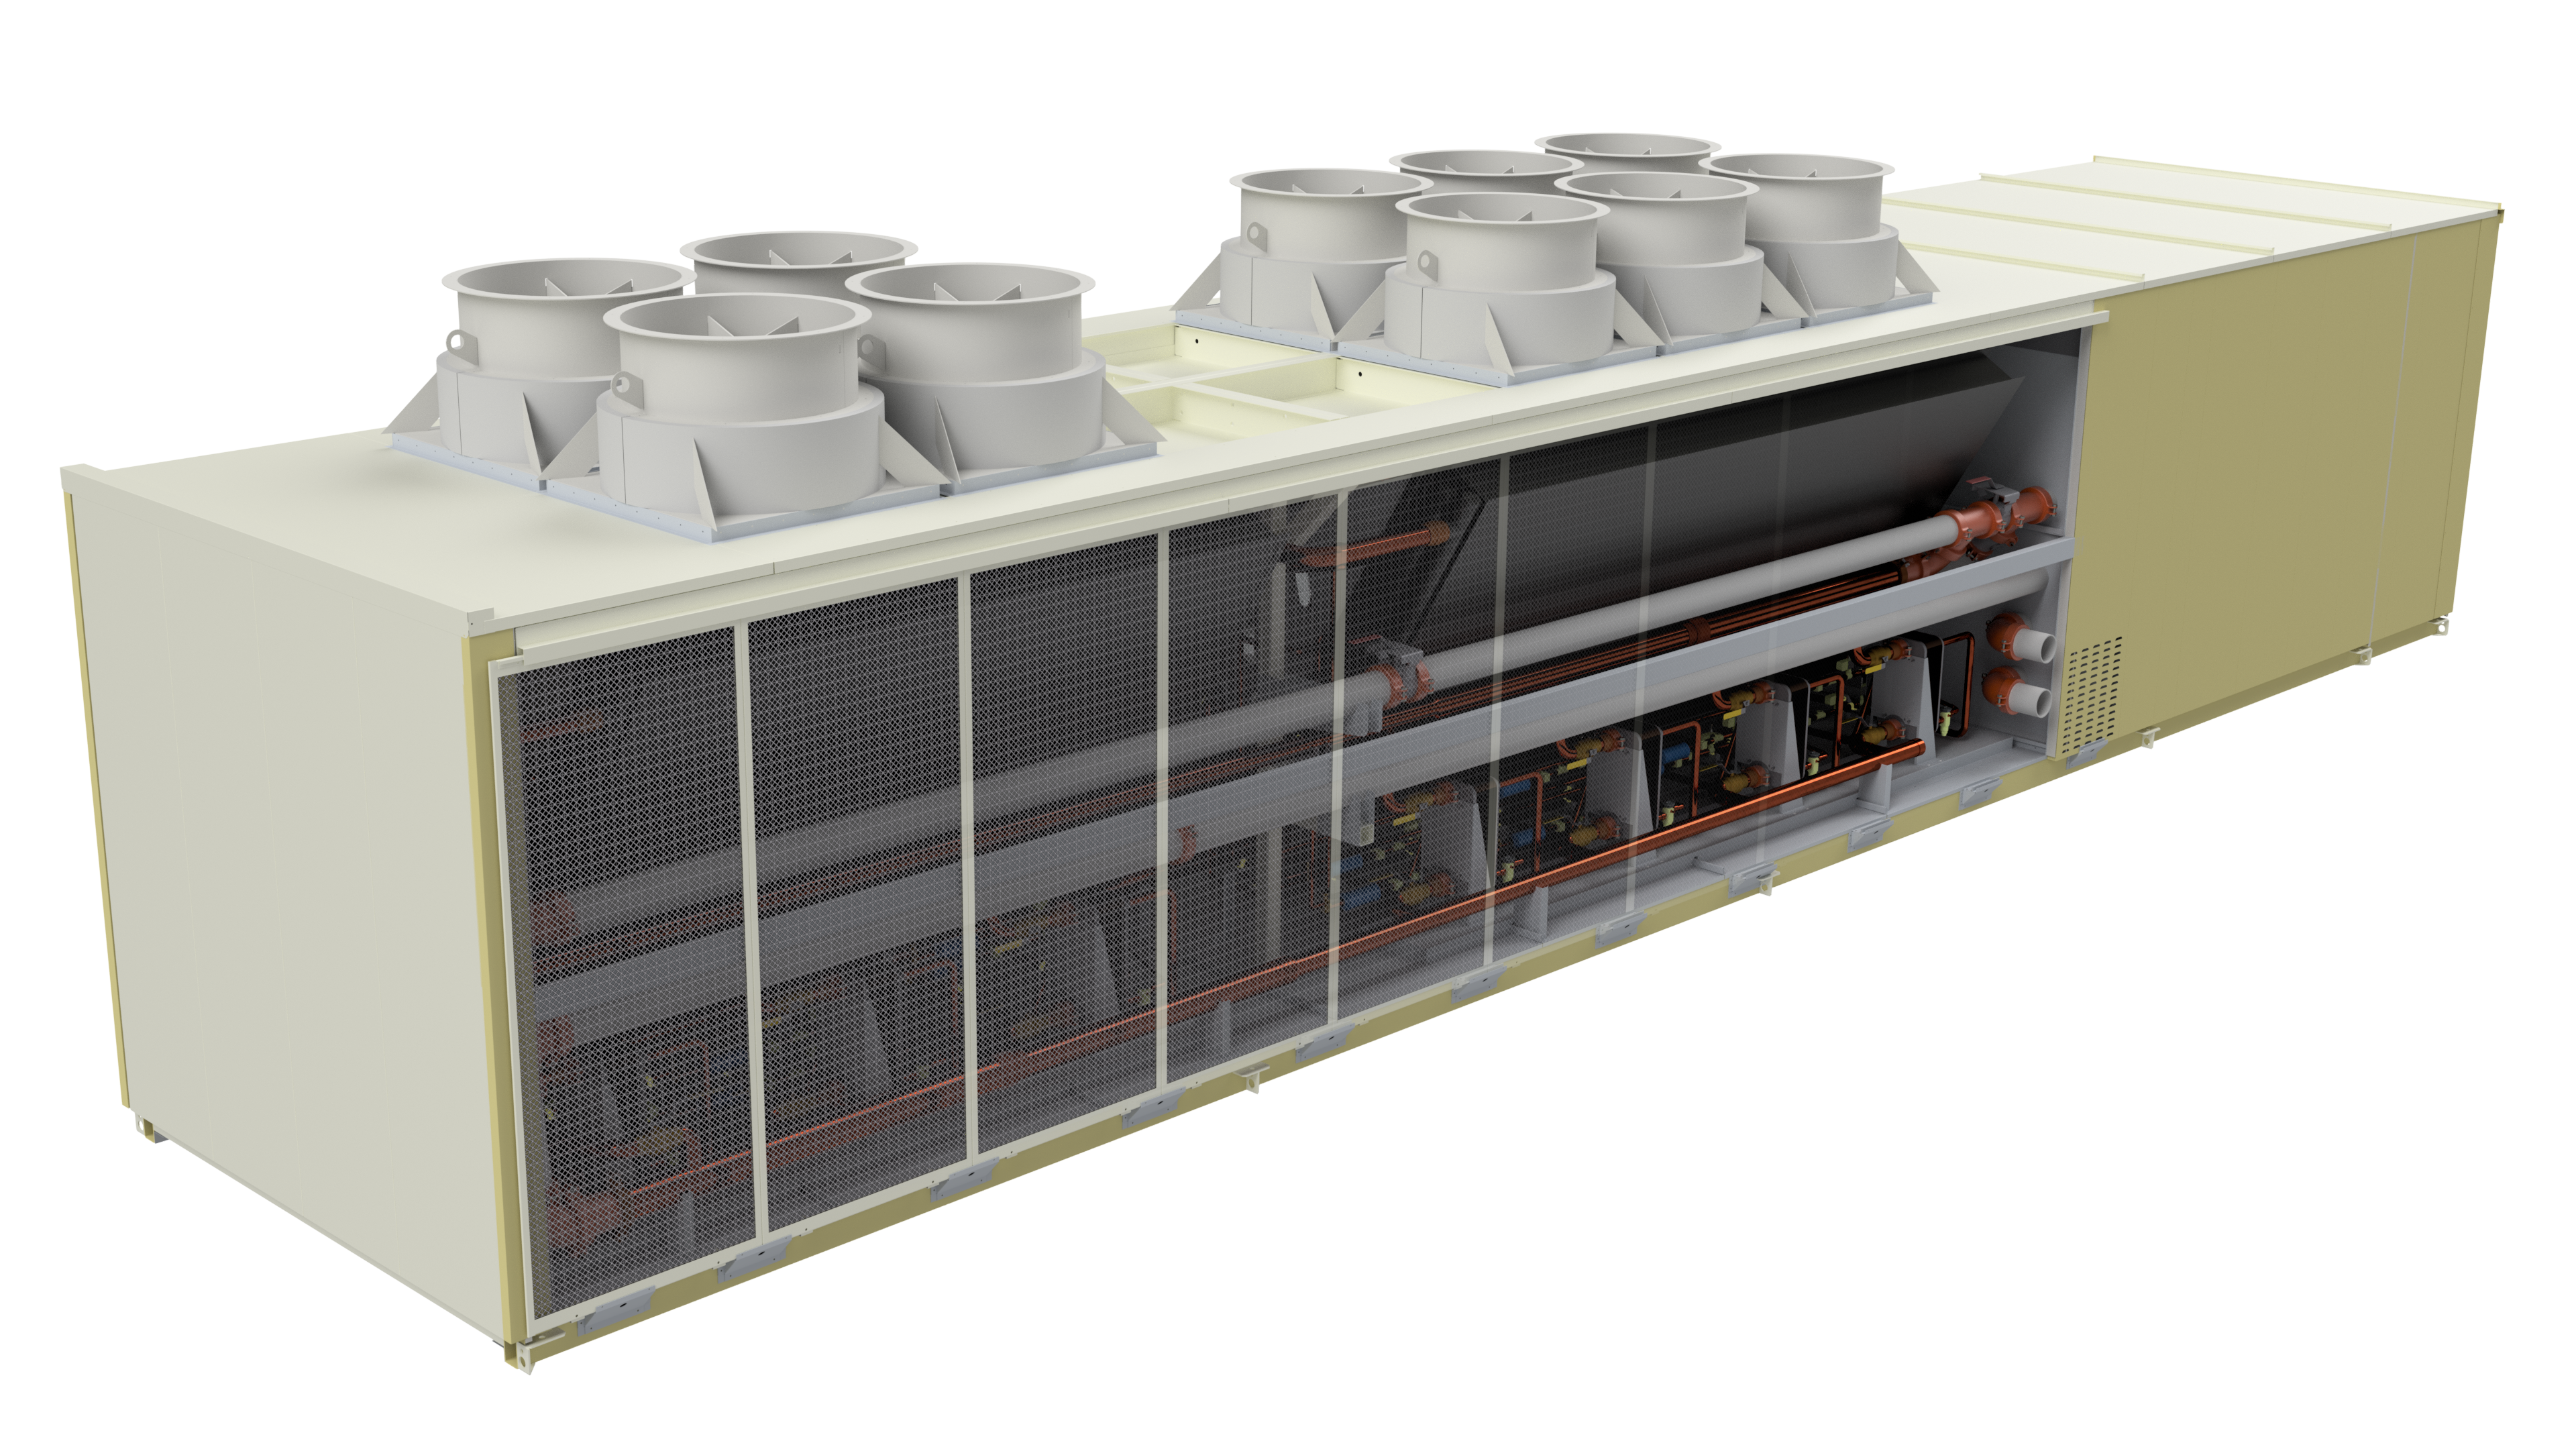
The answer to this problem, of course, is simplification of your design. Several years ago, this was a time consuming manual process done in the CAD system. The developers at Autodesk Inventor recognized the need to automate the task. There is a quick and intuitive approach to remove unnecessary components and features from your assemblies. The result is a lightweight part that maintains an associative link back to the assembly. Here is an example of an HVAC unit.
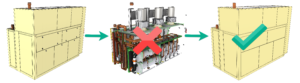
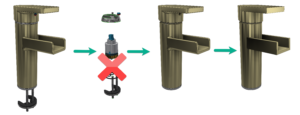
It’s difficult to see in the previous image, but there are hundreds of holes that have been turned off. Even the filleted edges for the sheet metal bends can be removed to reduce the size of the simplified part model. How long does it take to remove all those parts and features? Would you believe it processes almost instantly! Here is another example demonstrating the simplification of detailed features such as fillets and chamfers.
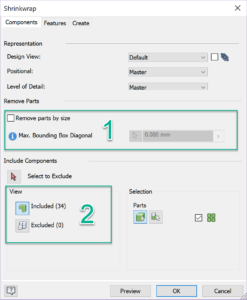
This is all accomplished by accessing one feature called Shrinkwrap. It automates the process of simplifying your assembly, but it leaves room for your input along the way. Let’s look at some of the available options.
1. Remove parts by size – Quickly remove all components that are smaller than a specified size.
2. View “Included” and “Excluded” – View and select components to remove or add back in.
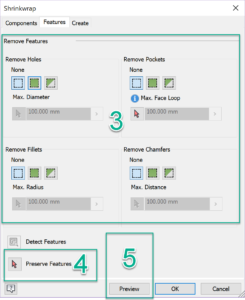
3. Remove Features – Remove all holes, pockets, fillets, or chamfers. Use the 3rd option to specify the size limit of the features you would like to remove.
4. Preserve Features – Manually select the features you would like to keep. For example, your customer may need hole locations to match in their design.
5. Preview – You can preview the model at any time before you fully commit to the simplified part.
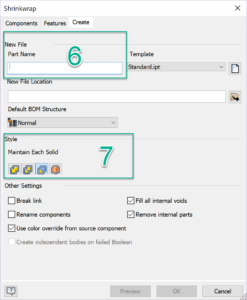
6. New File – Your assembly will be saved as a single part file.
7. Style – Be sure to select the preferred style. Do you want a single solid body, multi-body, or one composite surface feature? Determine which one works best for you or your customer.
Once your assembly is simplified and saved as a part, it’s ready! In about one minute you have a 3D model that can be used in larger overall assemblies to save on performance. It can be meshed and solved several times faster which will enable you to test more design ideas. Finally, it produces a model that you can send to your customer without the fear of giving away your intellectual property. Remember that the simplified part maintains an associative link back to the assembly, and the shrinkwrap options are editable even after the part is created.
If you would like to see this quick tip in action, check it out on YouTube! Happy Shrinkwrapping!
Jim
 Jim Byrne joined Autodesk in 2013 on the design and manufacturing marketing team. Prior to joining Autodesk, Jim worked at a local reseller for 14 years selling and supporting CAD, Simulation, and data management solutions. He also has three years of experience in the industry as a machine designer.


Add comment
Connect with: Log in
There are no comments