
In this post we’ll focus in on filleting best practice. We will learn the best way to set fillets up, and we’ll find out what to do when our fillets go wrong.
What is a fillet?
In real life, we create a Fillet (Internal) or Round (External) using a machine tool to ‘soften’ the sharp edges of our product. The Autodesk Inventor fillet tool is designed to replicate this.
The fillet tool creates a set of curvature continuous faces which connect to the existing faces (Read post 01 for a definition of ‘Curvature Continuous’).
Fillets have a regular cross section. This method of calculating fillets is known as the ‘Rolling Ball’ method. You can imagine a ball being rolled along to faces so that the ball is always tangent to the faces, with a new face being created as the ball rolls along.
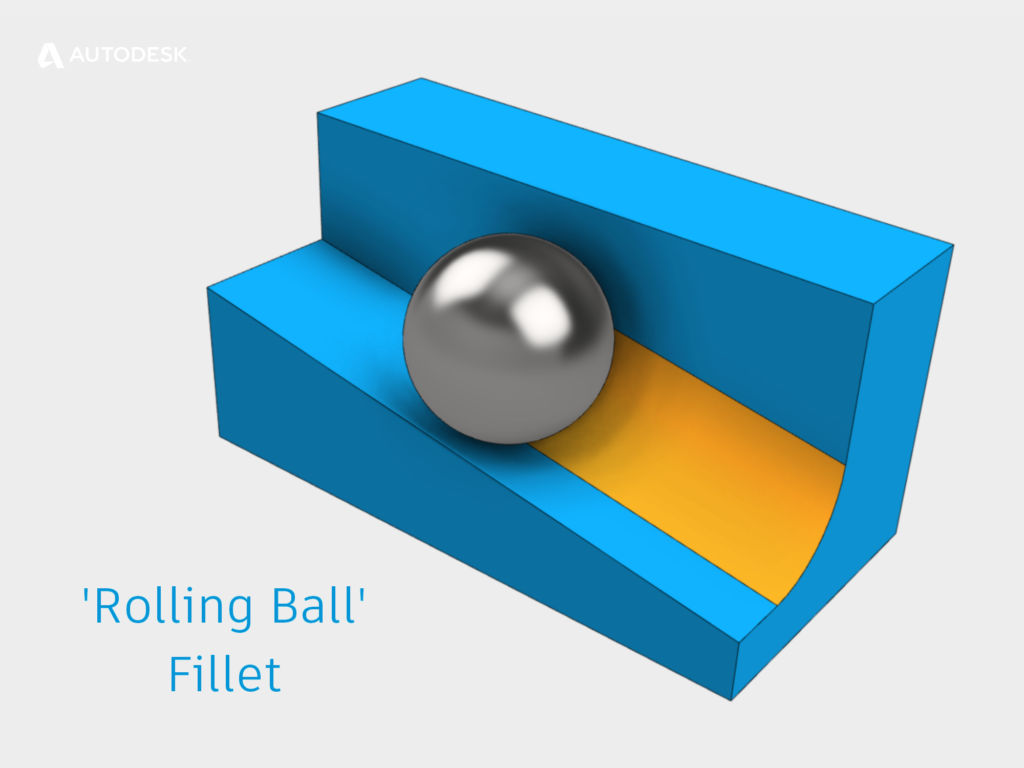
A ‘Rolling Ball’ Fillet in Autodesk Inventor.
What is Best Practice when Filleting?
The first piece of advice is to save your edge consuming features such as fillets and chamfers toward the end of the modelling process. This will help you to avoid problems with projected geometry losing the edges that you have projected.
Break single fillet features into multiple fillets.
Although you can define one fillet feature that contains multiple fillets of different radii, it’s probably a better idea to create multiple fillet features. If you create one fillet feature containing multiple fillet definitions, and your fillet fails, it can be hard to know which fillet was causing the problem.
Creating fillets of the same size individually can also help your colleges downstream. Often fillets are not needed for CAM programming. Creating fillets of different rads’ as separate features will allow you CAM buddies to suppress the fillets they don’t need.
Big before small
Create the fillets with the biggest radius first, then follow up with fillets that have a smaller radius.
Concave before convex
Try creating your concave fillets before your convex fillets (Rounds).
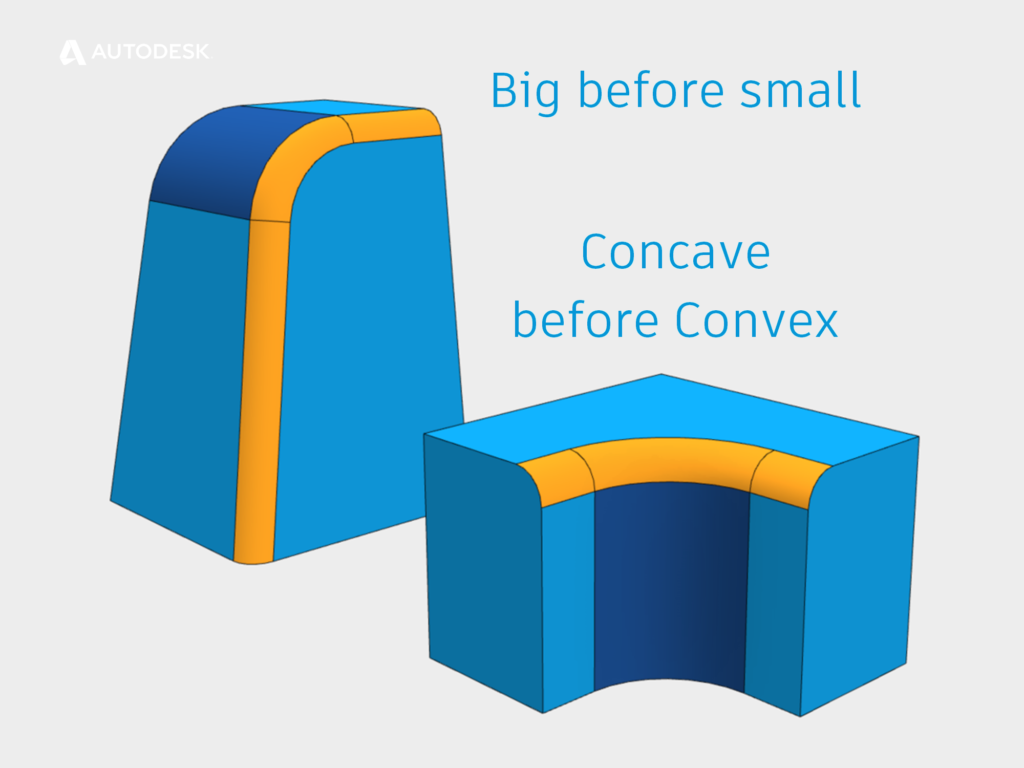
Filleting best practice – order of creating fillets.
Filleting failure tips
Automatic edge chaining
If you are fillet up to a complex junction. Try turning off ‘Automatic edge chain’. This will allow you to pick each edge individually. If you see a preview, that edge isn’t the problem! When the preview disappears, you have the culprit.
Face fillet
If edge filleting isn’t working, try a face fillet instead. The face fillet option uses a different algorithm to the edge fillet command. Face fillets will automatically find all faces which are tangent to the original faces and work out where the fillet should go without worrying about the edges.
Roll along sharp edges
If your fillet runs past another edge which is closer than the radius of your fillet, you may get a failure. Try turning on the ‘roll along shape edges’ option to help you out.
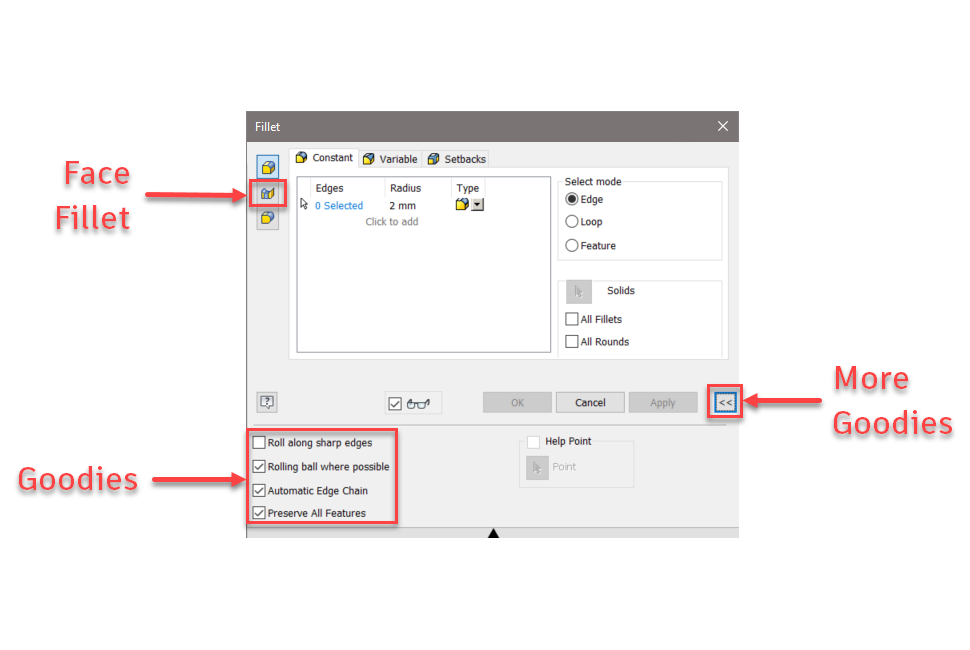
Autodesk Inventor Fillet command options.
Get Smart with Inventor Part Modeling
Did you find this post helpful? If you’d like to learn more about Autodesk Inventor and the way Inventor creates 2D and 3D shapes for you, click the links below to read this five-part series from the start!
- 3D Modelling Terminology
- Every Shape is a Sweep
- The Secrets of Lofting
- Loft Verses Patch
- Filleting Best Practice (This Post!).
And please feel free to share this series with your colleagues and friends.
Paul Munford
This blog post is based on an Autodesk University class, originally by Jake Fowler and later updated by Inderjeet Wilkhu and Paul Munford. You can watch a recording of the class, and download a handout that goes with this presentation from the Autodesk University website here:
Autodesk University Online: The Inventor 7 Deadly Sins of 3D Part Modeling


Add comment
Connect with: Log in
There are no comments