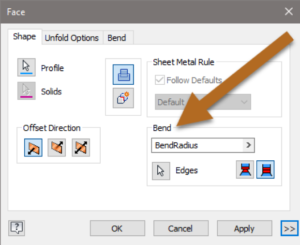
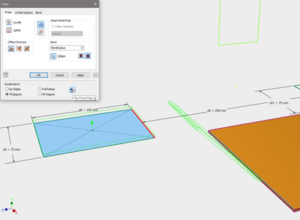
If you’re anything like me, you’ve probably used the sheet metal face command thousands of times to create simple extrusions to start your sheet metal parts. And while there’s nothing wrong with using the command that way, you may be missing out on half of that commands full potential to create more complex designs faster and with fewer features. Inside of the face command is a Bend option in the lower right-hand corner of the toolbox allowing you to select edges.
This option allows you to connect the current face you’re creating with existing edges. Depending on the options you select, you can get drastically different results. In the bend area of the dialog box, you have 2 options, The default is Extend Bend Perpendicular to Side Face, and the other option is Extend Bend Aligned to Side Face. Extend Bend Perpendicular to Side Face Only adds or removes material where the flanges connect. Extend Bend Aligned to Side Face will move the entire edge you’re selecting.
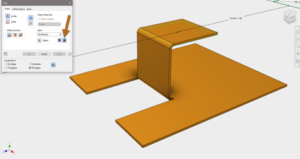
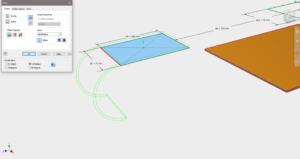
If you expand out the dialog box, you can see when creating a double bend; you have 4 options. Fixed Edges is the default option and connects the current face closest edge to the selected edge.
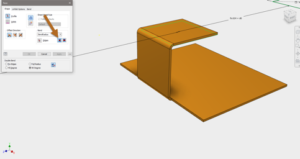
The next option is to create a 45 Degree between the two faces. You can use the Flip Fixed Edge tool to change which edge stays stationary and which edge moves to create the necessary geometry.
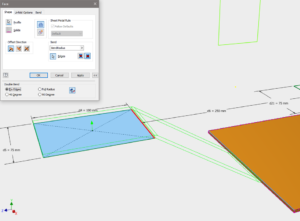
The next option is Full Radius, this creates a radius connection between your two faces. You may need to use the Flip Fixed Edge tool to get the correct edge selection.
The final option is 90 Degree. You may need to use the Flip Fixed Edge tool to get the correct edge selection.
For even more control and options for Bend creation, be sure to check out the Bend tab. Here you can adjust the relief shape, bend transition, and relief dimensions.
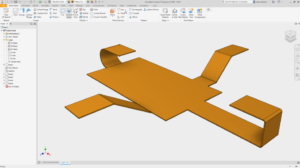
The coolest part about this Bend option inside of the Face command is that it eliminates the need to create a separate bend feature between 2 existing faces. This option allows you to create geometry quicker with fewer features.
Check out the video to see these options in action…
Written by:
Luke Mihelcic
Technical Marketing Manager Luke has been involved with design, engineering, and analysis since 1995. His career started in telecommunications designing mobile production equipment. He has taught design at Pittsburgh Technical College, spent 10 years as an application engineer, and currently over 8 years with Autodesk creating technical and marketing content. His various roles as educator, end-user, and provider give Luke a unique perspective on identifying, understanding and helping solve engineering challenges.


 Luke has been involved with design, engineering, and analysis since 1995. His career started in telecommunications designing mobile production equipment. He has taught design at Pittsburgh Technical College, spent 10 years as an application engineer, and currently over 8 years with Autodesk creating technical and marketing content. His various roles as educator, end-user, and provider give Luke a unique perspective on identifying, understanding and helping solve engineering challenges.

Add comment
Connect with: Log in
There are no comments