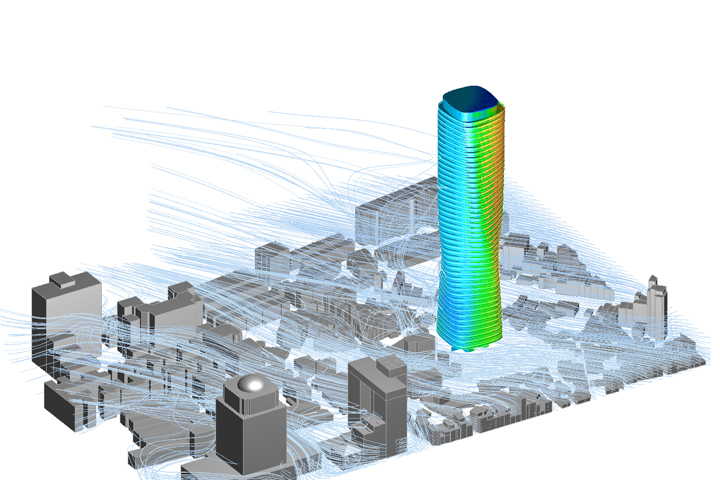
High winds can be very destructive because they generate pressure against the surface of a structure. In structural engineering we call the intensity of this pressure the wind load. The effect of the wind is dependent upon the size and shape of the structure. Calculating wind load is necessary for the design and construction of safer and more wind-resistant buildings.
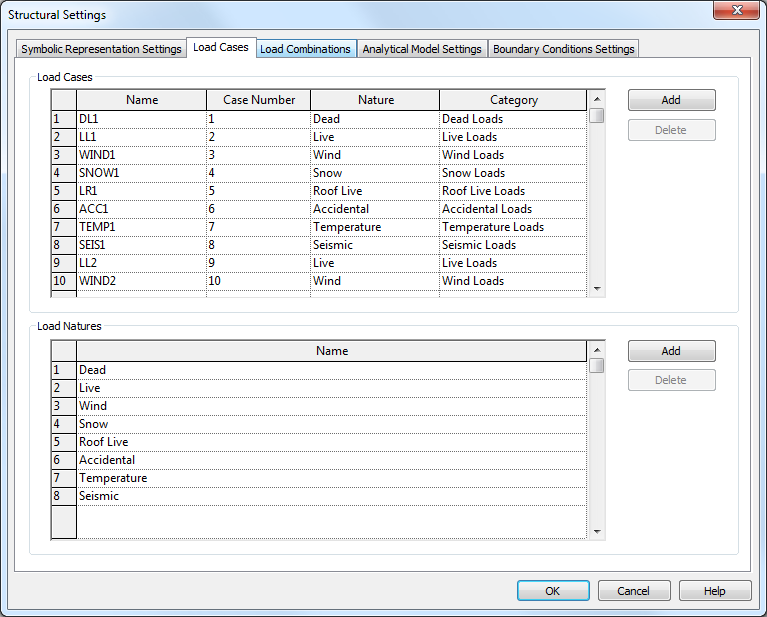
In Revit, depending on the load duration and type, different natures of loads can be created (dead, live, wind, etc.). Structural engineers can add, delete and modify parameters of any defined load case.
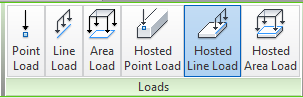
Then various types of loads (nodal, linear, planar) can be applied to a structure and assigned to previously defined load cases.
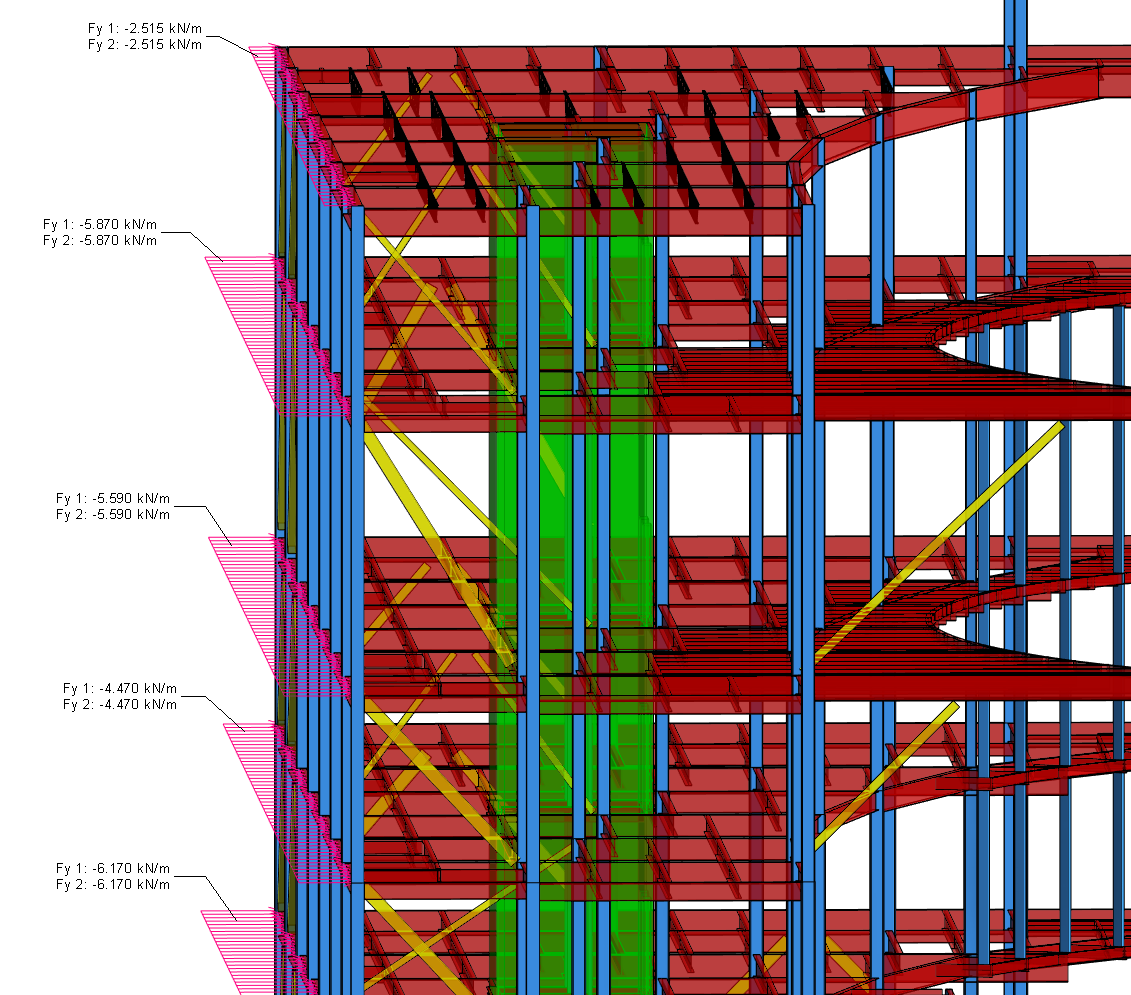
Recently when I was applying wind loads to my structure I needed to add them to over 70 structural beams—and this was only for one building elevation! That means a lot of clicks and my finger was getting tired. Moreover, because the building stories each had different heights, on each floor I had to have different wind load values and I needed to calculate the right load distribution to beams for each instance.
This is a common problem for many structural engineers, and in cases like this it is possible to find the right tools at the right time to aid in the structural design process. Robot Structural Analysis Professional provides the Cladding tool for applying loads and helping to streamline the process. The Cladding tool is an auxiliary object used to define loads. Structural Engineers can take advantage of cladding when generating bar loads from planar objects and snow/wind loads in 3D geometry. This tool is very productive and it saves a lot of time when working on the analytical model.
In Revit there are not built-in native tools which would help us generate such loads. These wind loads need to be distributed/calculated and applied manually which can be a very tedious process and prone to errors.
Knowing the tools available to me in Robot and Revit, I started thinking how I could improve applying wind loads in Revit for this particular project and future ones.
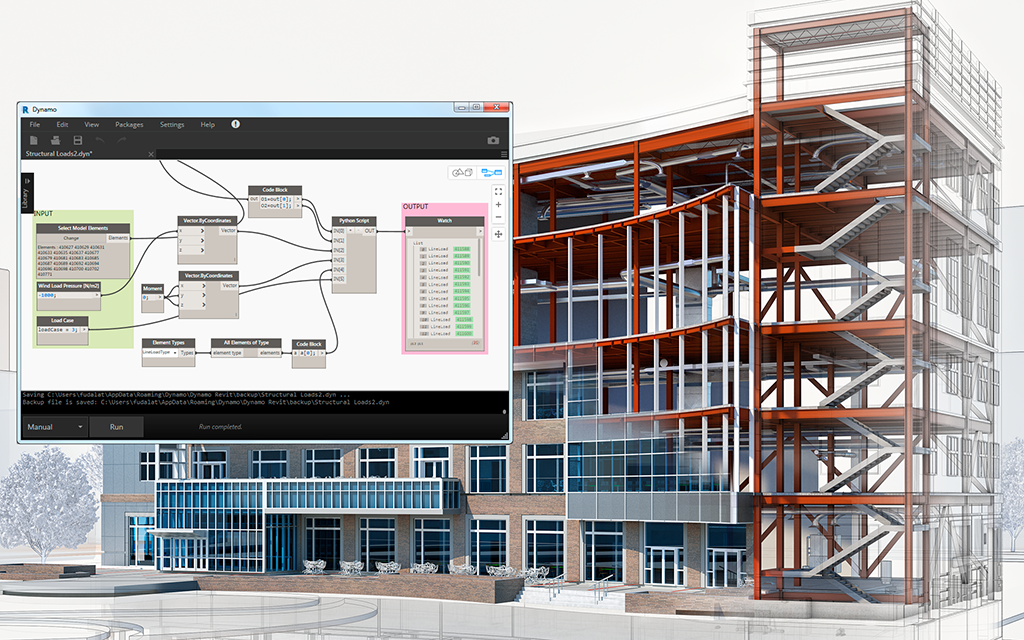
This is an instance where Dynamo for Revit comes in handy.
I made two assumptions:
Wind load pressure is constant along a height of a building and linear load values should be calculated automatically based on the building’s geometry.
Linear wind loads should be added to the analytical model automatically. They should be also assigned to the appropriate load case.
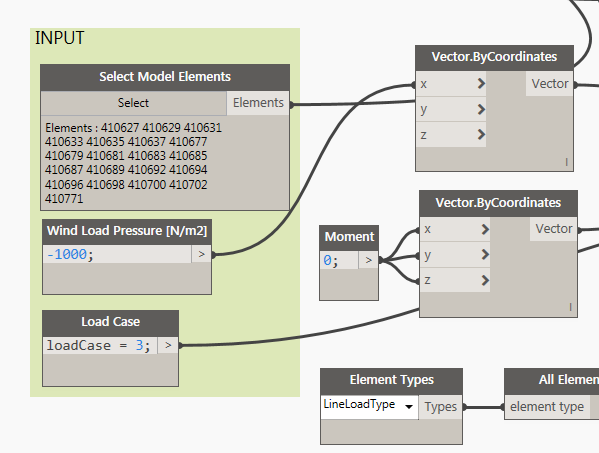
I ended up with a Dynamo script with the following input parameters:
List of analytical elements selected in Revit
Wind load pressure value [N/m2]
Revit load case (ID number)
In my script before I start adding loads to the model I need to calculate their appropriate values.
First I filter out elements I select. In my Revit window selection I can have beams and columns but because I will be generating loads only on structural beams I need to have analytical beams objects kept in my list of analytical elements only.
Visual programming has many advantages. It allows you to create programs without learning special syntax in an intuitive visual interface. However, a visual program sometimes can become cluttered, and can at times fall short in functionality.
Python offers much more achievable methods for writing conditional statements (if/then) and looping. Python is a powerful tool that can extend the capabilities of Dynamo and allow you to replace many nodes with a few concise lines of code.
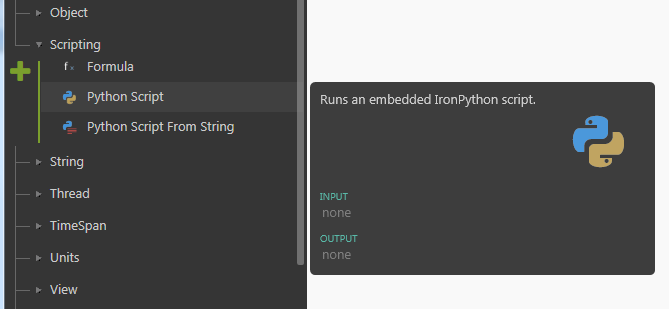
Like code blocks, Python nodes are a scripting interface within a visual programming environment. The Python node can be found under Core>Scripting in the library.
Double clicking the node opens the python script editor (you can also right click on the node and select Edit…).
This short Python script allows me to filter out the selected elements.
Next I convert analytical model sticks to curves.
Then I need to find Z-coordinates of the selected elements and create a sorted list of unique Z coordinates. It gives me a list of levels where my structural beams are defined.
Associate Levels to Analytical Model Sticks.
Associate Load Distribution Distances to Levels
Next script associates load distribution distances to analytical beams.
With such defined two output lists I am ready to start applying loads to the analytical elements.
You are probably wondering which Dynamo nodes we can use to create structural loads in Revit… Actually Dynamo does not have such nodes but we can do it using the Revit API.
Now that I have demonstrated how to use Python scripts in Dynamo, let’s take a look at connecting Revit libraries into the scripting environment. To import the Revit nodes, Revit elements, and the Revit document manager, I only have to add a few more lines.
This gives me access to the Revit API and offers custom scripting for any Revit task. By combining the process of visual programming with Revit API scripting, collaboration and tool development improve significantly.
OK – Now it’s time to create some wind loads and apply them to appropriate elements and the load case. The below script demonstrates ways how to implement Revit-specific operations from Dynamo using Python.
The only thing left to do is to run this Dynamo script and see results in Revit:
With this solution you can quickly apply loads to your structural elements. Watch the Dynamo script in action:
By clicking subscribe, I agree to receive the AEC newsletter and acknowledge the Autodesk Privacy Statement.
Success!
______
Cookie preferences
Your privacy is important to us and so is an optimal experience. To help us customize information and build applications, we collect data about your use of this site.
Learn more about the Third-Party Services we use in each category, and how we use the data we collect from you online.
Strictly necessary – required for our site to work and to provide services to you
Qualtrics
W
Akamai mPulse
W
Digital River
W
Dynatrace
W
Khoros
W
Launch Darkly
W
New Relic
W
Salesforce Live Agent
W
Wistia
W
Tealium
W
Upsellit
W
CJ Affiliates
W
Commission Factory
W
Google Analytics (Strictly Necessary)
W
Typepad Stats
W
Geo Targetly
W
SpeedCurve
W
Qualified
#
Improve your experience – allows us to show you what is relevant to you
Google Optimize
W
ClickTale
W
OneSignal
W
Optimizely
W
Amplitude
W
Snowplow
W
UserVoice
W
Clearbit
#
YouTube
#
Customize your advertising – permits us to offer targeted advertising to you
Adobe Analytics
W
Google Analytics (Web Analytics)
W
AdWords
W
Marketo
W
Doubleclick
W
HubSpot
W
Twitter
W
Facebook
W
LinkedIn
W
Yahoo! Japan
W
Naver
W
Quantcast
W
Call Tracking
W
Wunderkind
W
ADC Media
W
AgrantSEM
W
Bidtellect
W
Bing
W
G2Crowd
W
NMPI Display
W
VK
W
Adobe Target
W
Google Analytics (Advertising)
W
Trendkite
W
Hotjar
W
6 Sense
W
Terminus
W
StackAdapt
W
The Trade Desk
W
RollWorks
W
Are you sure you want a less customized experience?
We can access your data only if you select "yes" for the categories on the previous screen. This lets us tailor our marketing so that it's more relevant for you. You can change your settings at any time by visiting our privacy statement
Your experience. Your choice.
We care about your privacy. The data we collect helps us understand how you use our products, what information you might be interested in, and what we can improve to make your engagement with Autodesk more rewarding.
May we collect and use your data to tailor your experience?
Explore the benefits of a customized experience by managing your privacy settings for this site or visit our Privacy Statement to learn more about your options.