In this post of the Structural Precast series I would like to touch upon the topic of segmentation of precast walls.
Segmentation of precast walls can be done automatically or manually. Before we run the automatic segmentation we should check and adjust the Configuration Settings.
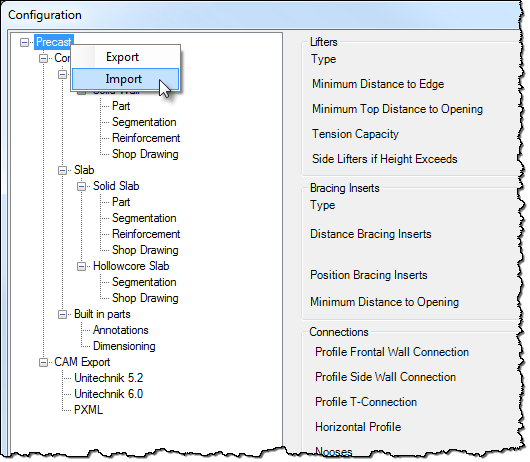
The Configuration settings can be imported or exported via XML files to easily share the rules across several users, working on the same or different projects.
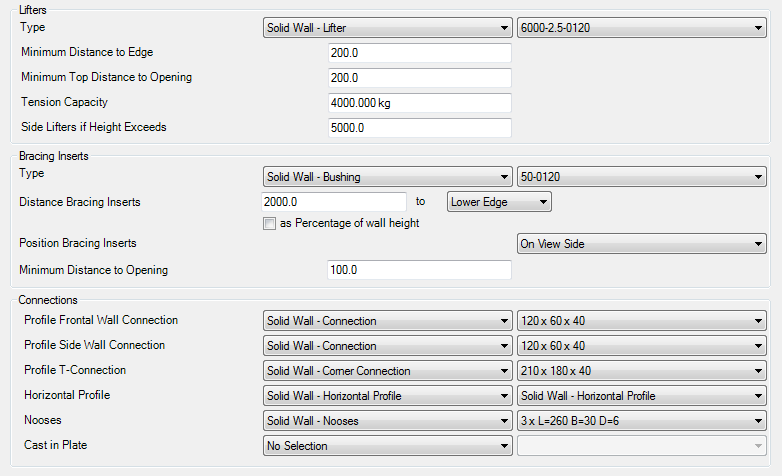
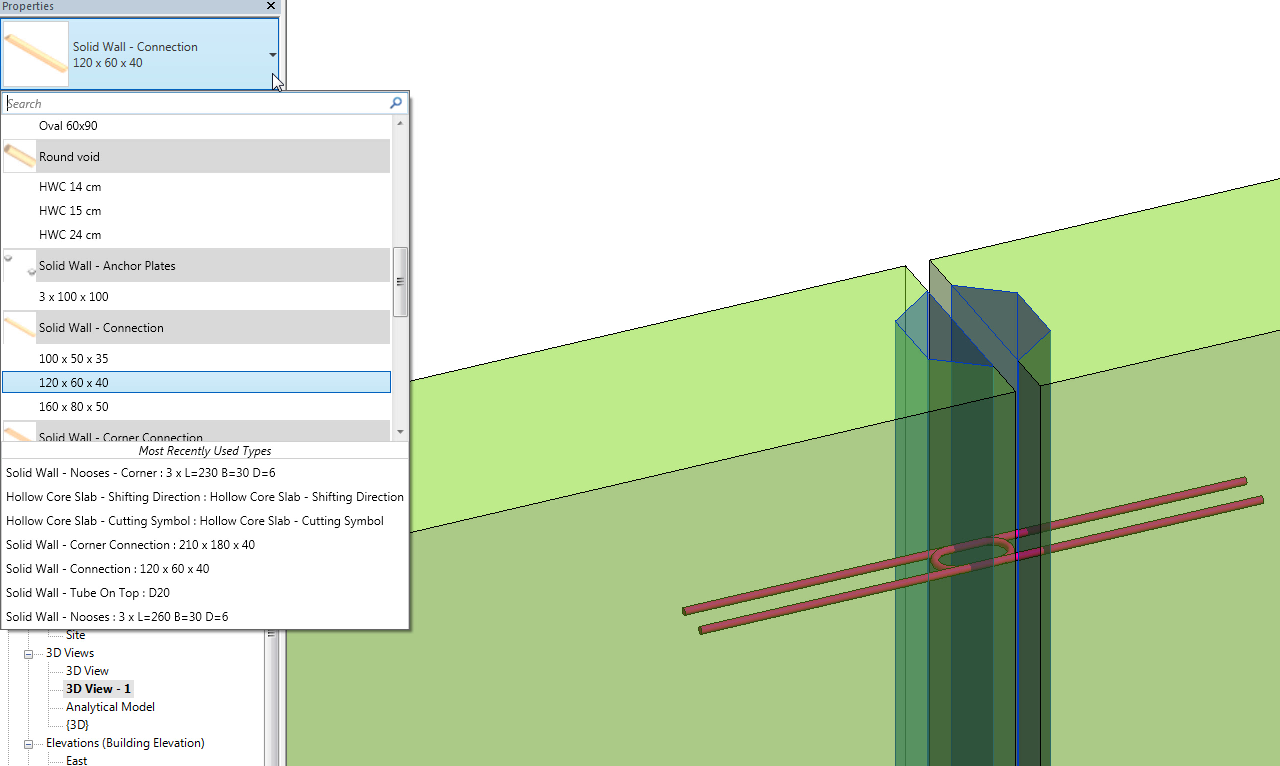
On the Part Tab we set up Lifters, Bracing Inserts and Connections. Here we decide what types of elements will be used and their positions within precast assemblies.
All the connections and built-in parts are Revit families and can be customized according to the project’s requirements.
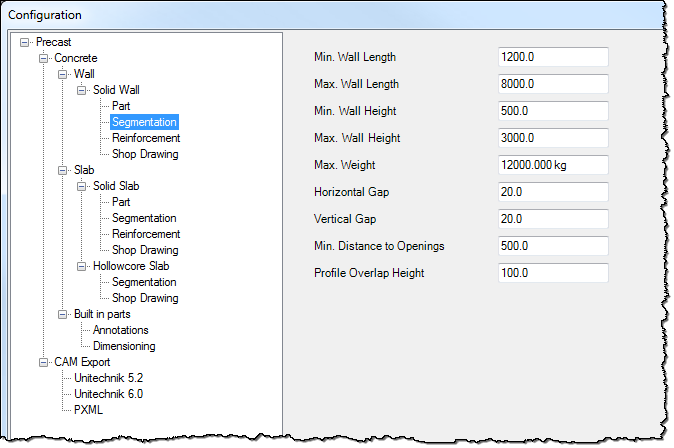
On the Segmentation Tab we define rules for splitting based on fabrication, transportation or other functional requirements.
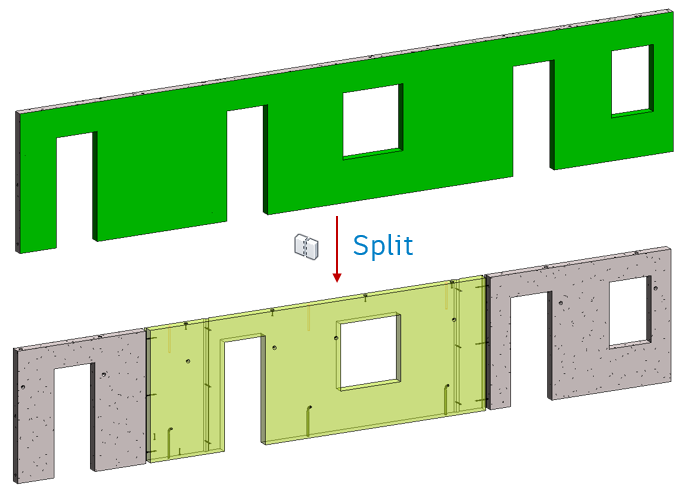
To execute a segmentation of walls we need to select all the walls and press the Split command. During this command, the precast wall assemblies are created. Lifters, bushings and connection are created according to the rules from the Configuration settings.
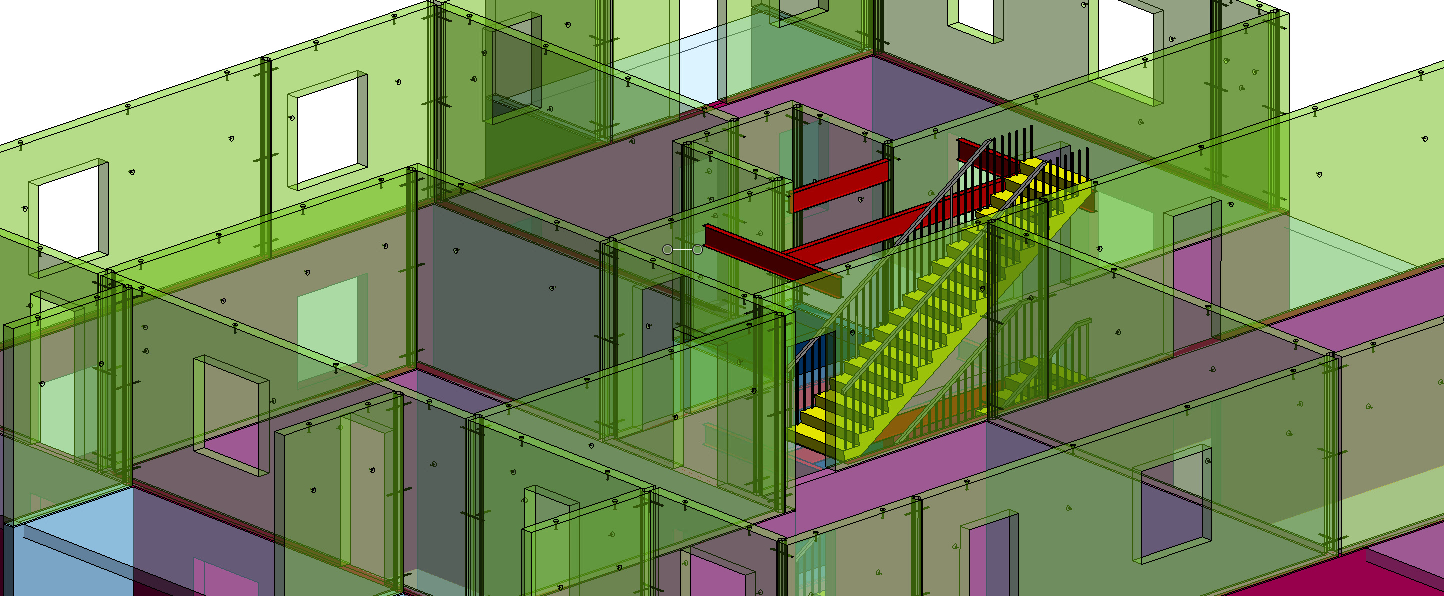
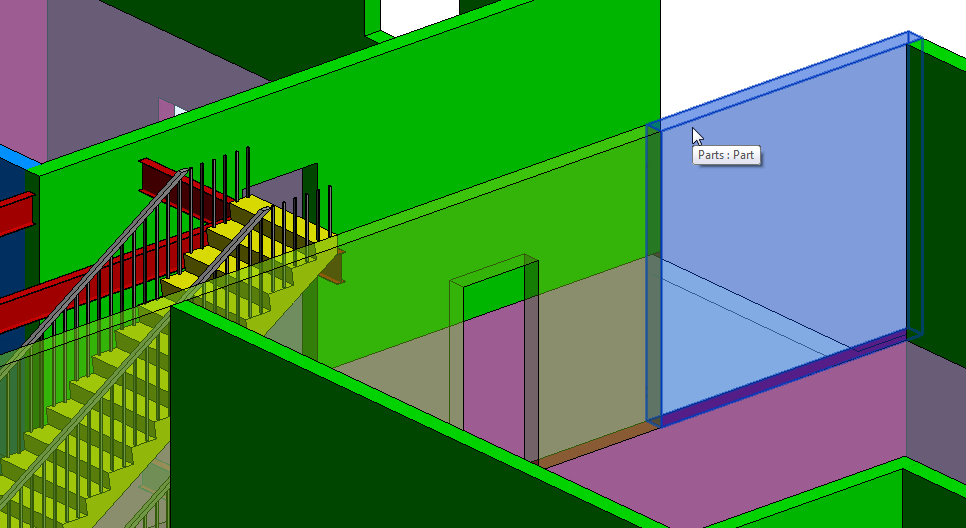
Just after the wall segmentation we can see both the original elements and parts that have just been created.
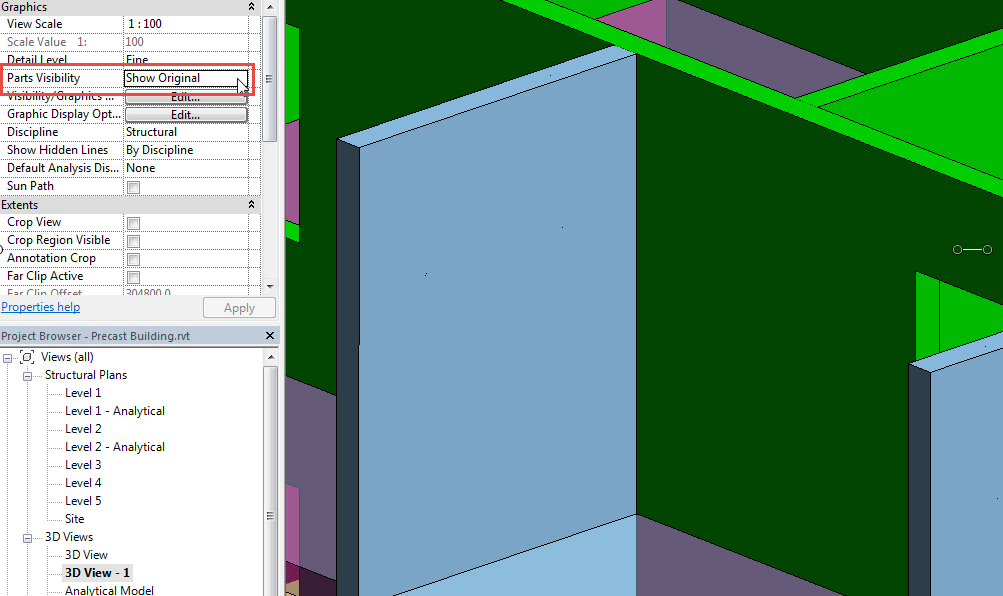
We can display parts only to better review the outcome of the Split.
Switching between different LODs (Level of Development) is pretty easy and fast so we can review the original elements at any time.
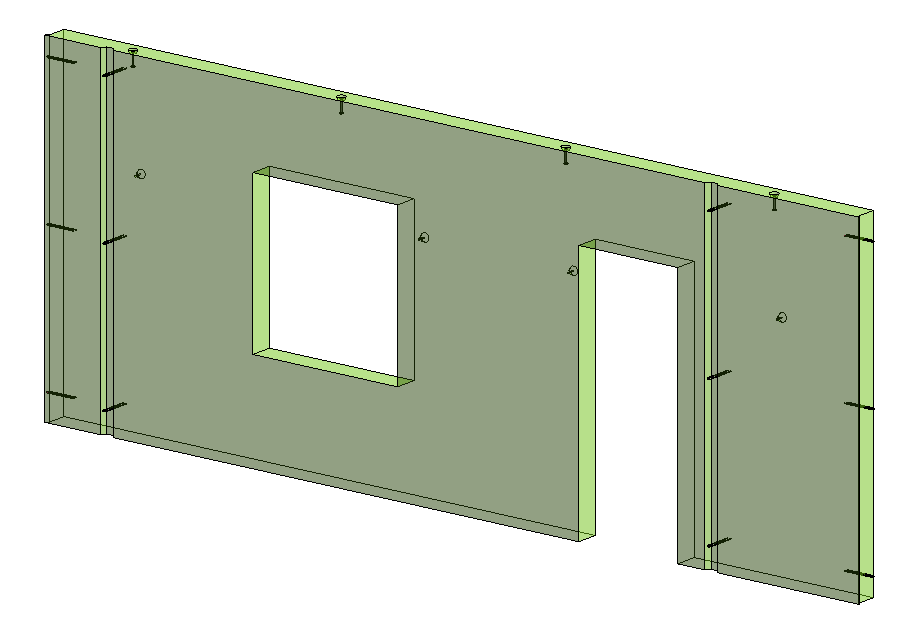
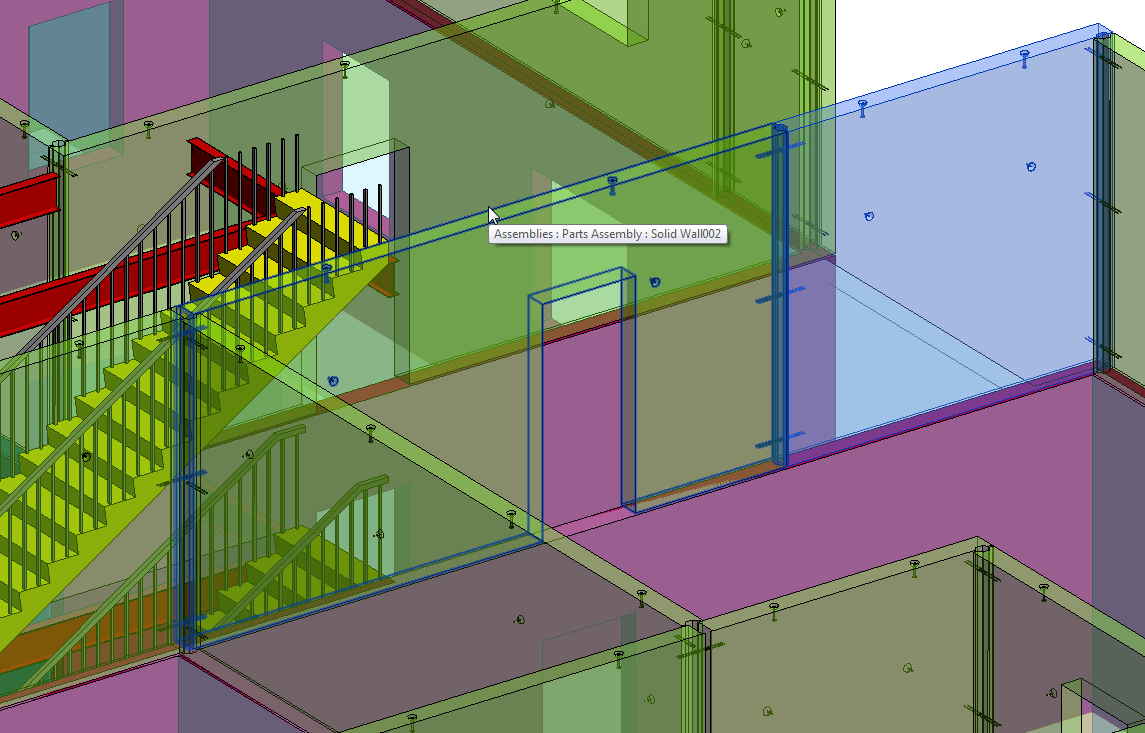
As an outcome of the Split command we get wall parts, lifters, bushings and connections grouped automatically into a precast assembly.
Watch video:
When a custom segmentation is performed, it often does not allow for clear mathematical rules and we cannot apply rules specified in the Configuration. At this point we need to perform the manual segmentation of the original walls.
The manual segmentation is performed starting directly from the original, unsegmented element.
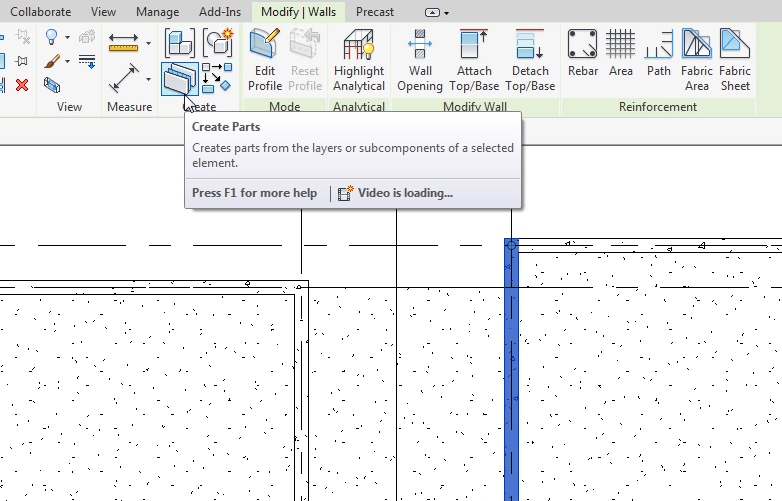
First, we need to convert a wall into Revit Parts.
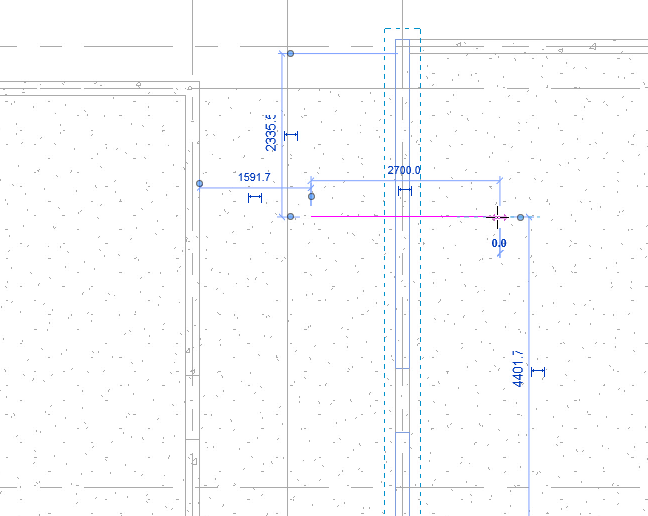
Next, we define a division line or lines. Drawing such division line(s) we can very precisely determine where a segmentation should occur.
Once manual segmentation is complete, the “Split” command can be used to convert the parts into precast assemblies.
Now on this floor we have a mixture of original walls and parts we just created manually.
IMPORTANT TO NOTE: If the original wall is selected, instead of the manually created parts, the manual segmentation is overridden and the wall is segmented according to the Configuration settings. That’s why it’s important to make sure the original element is not selected but only parts.
If one part is still larger/heavier/etc. than the specifications indicated in Configuration Settings, it will be further divided, respecting those rules.
Let’s see the outcome of the segmentation in this case.
Another way we can control the segmentation of elements is by a manual adjustment of parts after the segmentation.
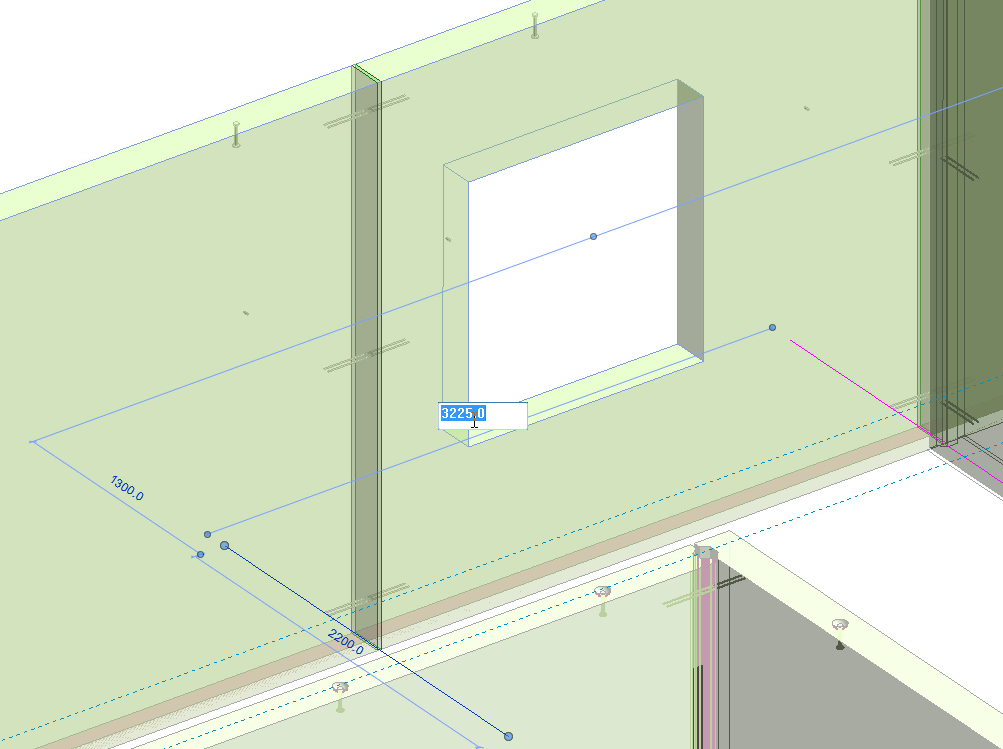
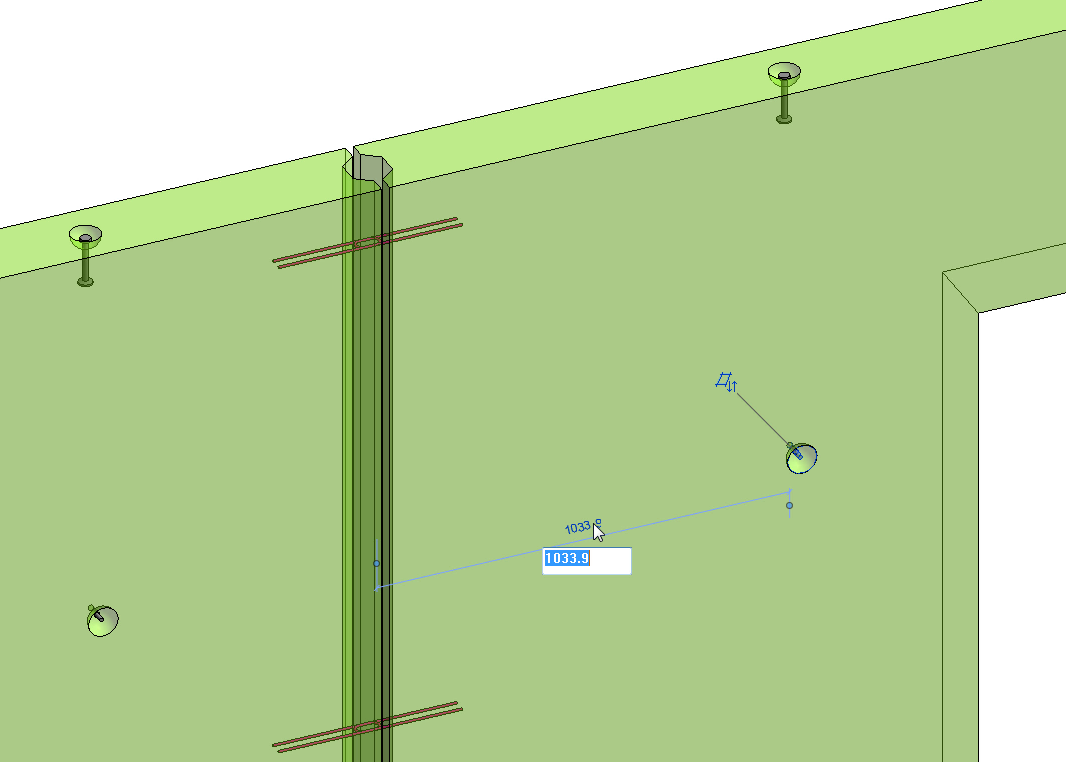
In this case we select a part and edit a position of a division line – this can be done very precisely too. Once the part is updated, the entire assembly and connections, lifters, and bushings are updated as well.
We can also manually adjust a position or a type of individual elements within an assembly. In this case I am changing a position of one of the bushings.
In the similar way, we can update lifters and connections within a precast assembly.
Watch video:
For more posts on structural precast in Revit, check out these past articles on BIM and Beam:
By clicking subscribe, I agree to receive the AEC newsletter and acknowledge the Autodesk Privacy Statement.
Success!
______
Cookie preferences
Your privacy is important to us and so is an optimal experience. To help us customize information and build applications, we collect data about your use of this site.
Learn more about the Third-Party Services we use in each category, and how we use the data we collect from you online.
Strictly necessary – required for our site to work and to provide services to you
Qualtrics
W
Akamai mPulse
W
Digital River
W
Dynatrace
W
Khoros
W
Launch Darkly
W
New Relic
W
Salesforce Live Agent
W
Wistia
W
Tealium
W
Upsellit
W
CJ Affiliates
W
Commission Factory
W
Google Analytics (Strictly Necessary)
W
Typepad Stats
W
Geo Targetly
W
SpeedCurve
W
Qualified
#
Improve your experience – allows us to show you what is relevant to you
Google Optimize
W
ClickTale
W
OneSignal
W
Optimizely
W
Amplitude
W
Snowplow
W
UserVoice
W
Clearbit
#
YouTube
#
Customize your advertising – permits us to offer targeted advertising to you
Adobe Analytics
W
Google Analytics (Web Analytics)
W
AdWords
W
Marketo
W
Doubleclick
W
HubSpot
W
Twitter
W
Facebook
W
LinkedIn
W
Yahoo! Japan
W
Naver
W
Quantcast
W
Call Tracking
W
Wunderkind
W
ADC Media
W
AgrantSEM
W
Bidtellect
W
Bing
W
G2Crowd
W
NMPI Display
W
VK
W
Adobe Target
W
Google Analytics (Advertising)
W
Trendkite
W
Hotjar
W
6 Sense
W
Terminus
W
StackAdapt
W
The Trade Desk
W
RollWorks
W
Are you sure you want a less customized experience?
We can access your data only if you select "yes" for the categories on the previous screen. This lets us tailor our marketing so that it's more relevant for you. You can change your settings at any time by visiting our privacy statement
Your experience. Your choice.
We care about your privacy. The data we collect helps us understand how you use our products, what information you might be interested in, and what we can improve to make your engagement with Autodesk more rewarding.
May we collect and use your data to tailor your experience?
Explore the benefits of a customized experience by managing your privacy settings for this site or visit our Privacy Statement to learn more about your options.