Portal Frame with Structural Analysis for Dynamo Package – Part 01

Tomasz Fudala Tomasz Fudala June 24, 2019

2 min read

In my previous post I showed you how to create a fully parametrized portal frame geometry in the Dynamo environment.

After the Dynamo geometry is set, you can create the analytical model representation of this geometry in the Robot Structural Analysis Professional environment.

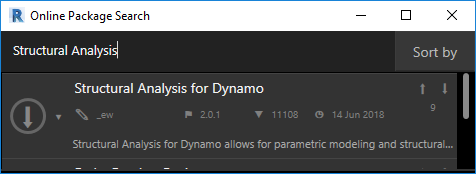
The Structural Analysis for Dynamo package enables parametric modeling and structural analysis workflows in Dynamo and Robot Structural Analysis Professional.

First, install the package.  If you have never installed any package you may find this blog post useful.

Based on the Dynamo geometry, structural engineers can create an analytical model, and apply section shapes and boundary conditions such as supports and releases.

Engineers can also automatically apply structural loads which recalculate every time the structural geometry changes.

Structural engineers can review the results of this analysis in the Robot Structural Analysis environment or they can retrieve the results within the Dynamo environment.

With the Structural Analysis for Dynamo package, structural engineers can optimize their existing structural workflows or create new workflows that will improve their productivity.

Dynamo for Robot Structural Analysis helps users not only generate structural geometry but also:

Assign structural properties such as: section shapes, materials, releases etc…

Create load cases and apply various types of loads:
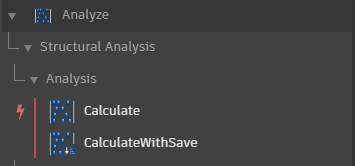
Run calculations:

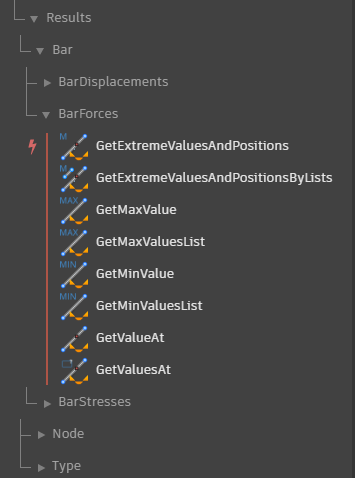
And finally, display and retrieve results of structural analysis:

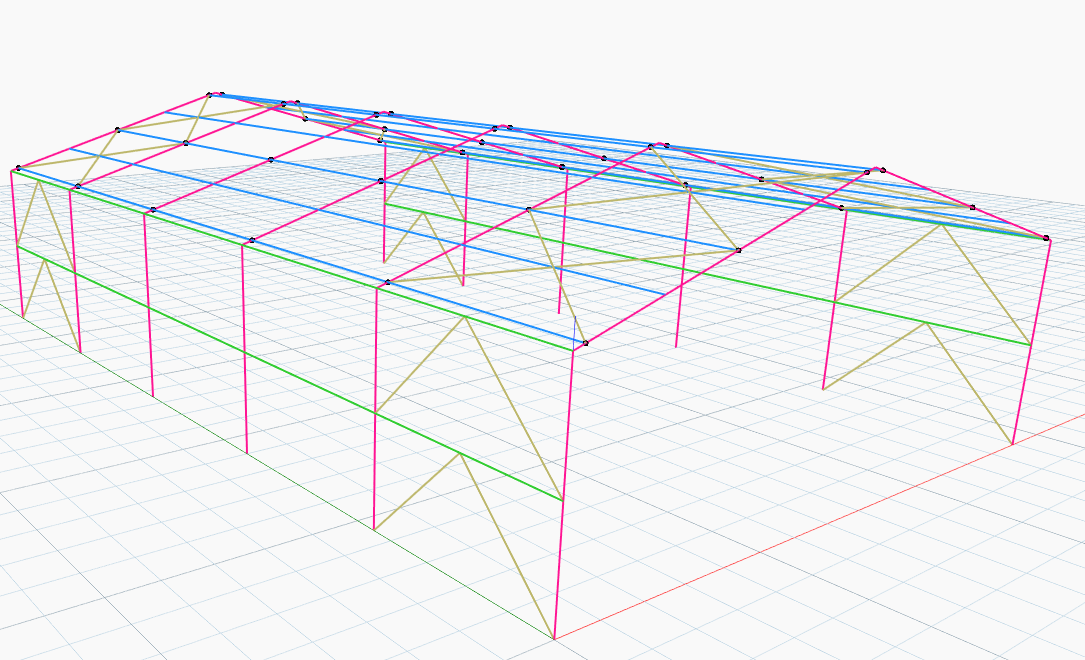
I would like to show you the process in the following example of a parametric portal frame.

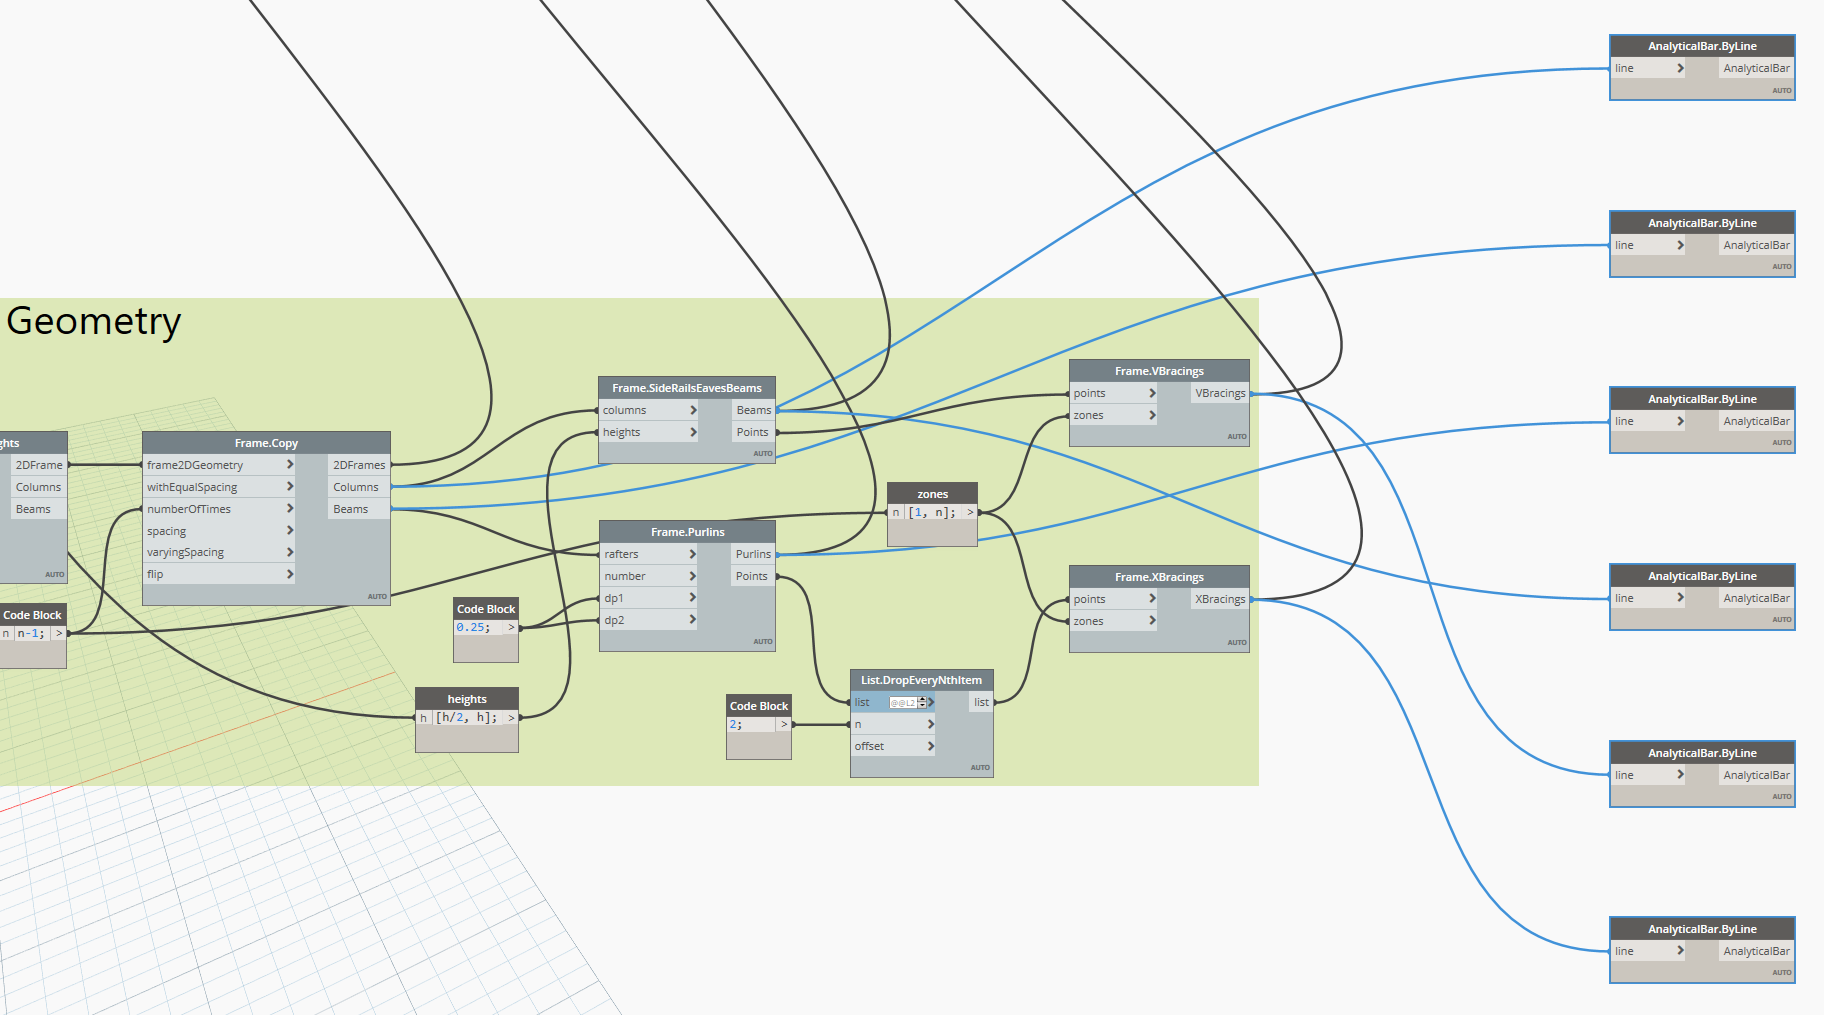
First, let’s create the analytical model representation of Dynamo geometry in the Robot Structural Analysis Professional environment.

We need to connect the Dynamo geometry I covered in the previous post with the AnalyticalBar.ByLines nodes.

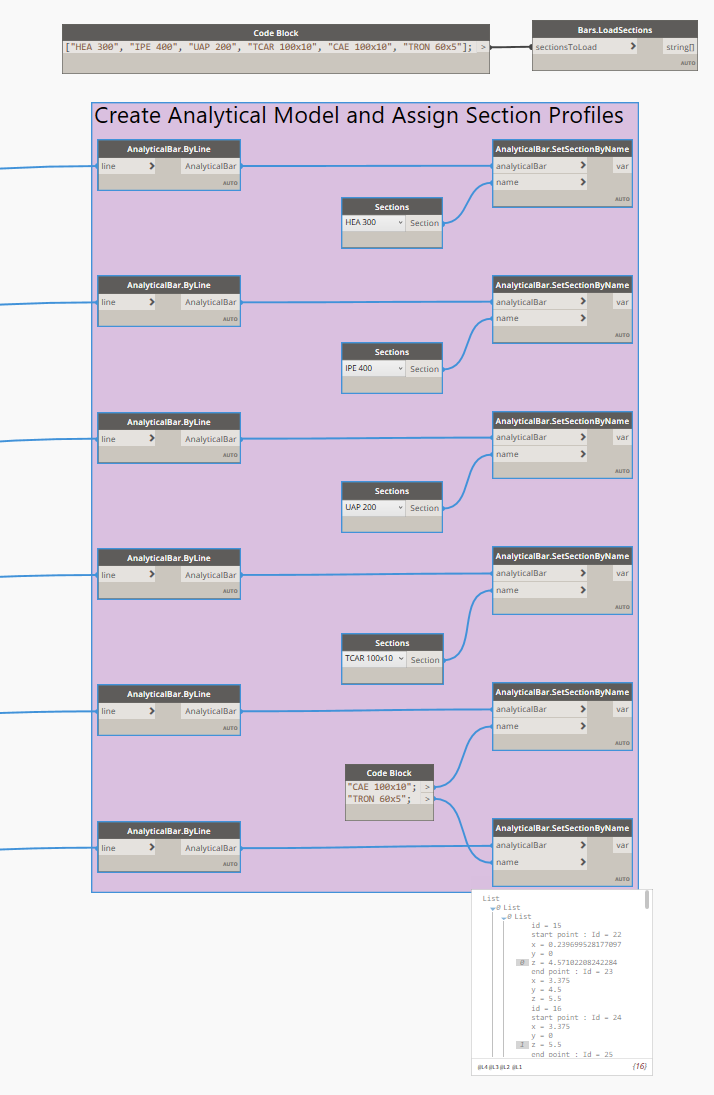
Before you assign cross-section properties to the analytical members, you need to make sure the sections are loaded in Robot. This can be done in the Robot project file you use, but this can also be performed in Dynamo with the Bars.LoadSections node for steel or timber sections.

If the sections are available in the active Robot project, then you can start assigning the right sections to the right analytical bars with the AnalyticalBar.SetSectionByName node.

Let’s test it and click the Run button to see what we’ve got in the Robot environment.

In the next blog post I will continue this example and:

@TomekF

Get AEC updates in your inbox

By clicking subscribe, I agree to receive the AEC newsletter and acknowledge the Autodesk Privacy Statement.

______
icon-svg-close-thick

Cookie preferences

Your privacy is important to us and so is an optimal experience. To help us customize information and build applications, we collect data about your use of this site.

May we collect and use your data?

Learn more about the Third Party Services we use and our Privacy Statement.

Strictly necessary – required for our site to work and to provide services to you

These cookies allow us to record your preferences or login information, respond to your requests or fulfill items in your shopping cart.

Improve your experience – allows us to show you what is relevant to you

These cookies enable us to provide enhanced functionality and personalization. They may be set by us or by third party providers whose services we use to deliver information and experiences tailored to you. If you do not allow these cookies, some or all of these services may not be available for you.

Customize your advertising – permits us to offer targeted advertising to you

These cookies collect data about you based on your activities and interests in order to show you relevant ads and to track effectiveness. By collecting this data, the ads you see will be more tailored to your interests. If you do not allow these cookies, you will experience less targeted advertising.

icon-svg-close-thick

THIRD PARTY SERVICES

Learn more about the Third-Party Services we use in each category, and how we use the data we collect from you online.

icon-svg-hide-thick

icon-svg-show-thick

Strictly necessary – required for our site to work and to provide services to you

Qualtrics
W
Akamai mPulse
W
Digital River
W
Dynatrace
W
Khoros
W
Launch Darkly
W
New Relic
W
Salesforce Live Agent
W
Wistia
W
Tealium
W
Upsellit
W
CJ Affiliates
W
Commission Factory
W
Google Analytics (Strictly Necessary)
W
Typepad Stats
W
Geo Targetly
W
SpeedCurve
W
Qualified
#

icon-svg-hide-thick

icon-svg-show-thick

Improve your experience – allows us to show you what is relevant to you

Google Optimize
W
ClickTale
W
OneSignal
W
Optimizely
W
Amplitude
W
Snowplow
W
UserVoice
W
Clearbit
#
YouTube
#

icon-svg-hide-thick

icon-svg-show-thick

Customize your advertising – permits us to offer targeted advertising to you

Adobe Analytics
W
Google Analytics (Web Analytics)
W
AdWords
W
Marketo
W
Doubleclick
W
HubSpot
W
Twitter
W
Facebook
W
LinkedIn
W
Yahoo! Japan
W
Naver
W
Quantcast
W
Call Tracking
W
Wunderkind
W
ADC Media
W
AgrantSEM
W
Bidtellect
W
Bing
W
G2Crowd
W
NMPI Display
W
VK
W
Adobe Target
W
Google Analytics (Advertising)
W
Trendkite
W
Hotjar
W
6 Sense
W
Terminus
W
StackAdapt
W
The Trade Desk
W
RollWorks
W

Are you sure you want a less customized experience?

We can access your data only if you select "yes" for the categories on the previous screen. This lets us tailor our marketing so that it's more relevant for you. You can change your settings at any time by visiting our privacy statement

Your experience. Your choice.

We care about your privacy. The data we collect helps us understand how you use our products, what information you might be interested in, and what we can improve to make your engagement with Autodesk more rewarding.

May we collect and use your data to tailor your experience?

Explore the benefits of a customized experience by managing your privacy settings for this site or visit our Privacy Statement to learn more about your options.