In the Part 1 of this topic I demonstrated how to leverage the portal frame Dynamo geometry to create its analytical model representation in Robot Structural Analysis Professional. I also introduced the Structural Analysis for Dynamo package that enables parametric modeling and structural analysis workflows in Dynamo and Robot Structural Analysis Professional.
I ended the workflow at the point where the analytical model with sections assigned was generated in Robot environment. Now, I still need to set a few things up before I run analysis and retrieve results.

Supports and bar end releases
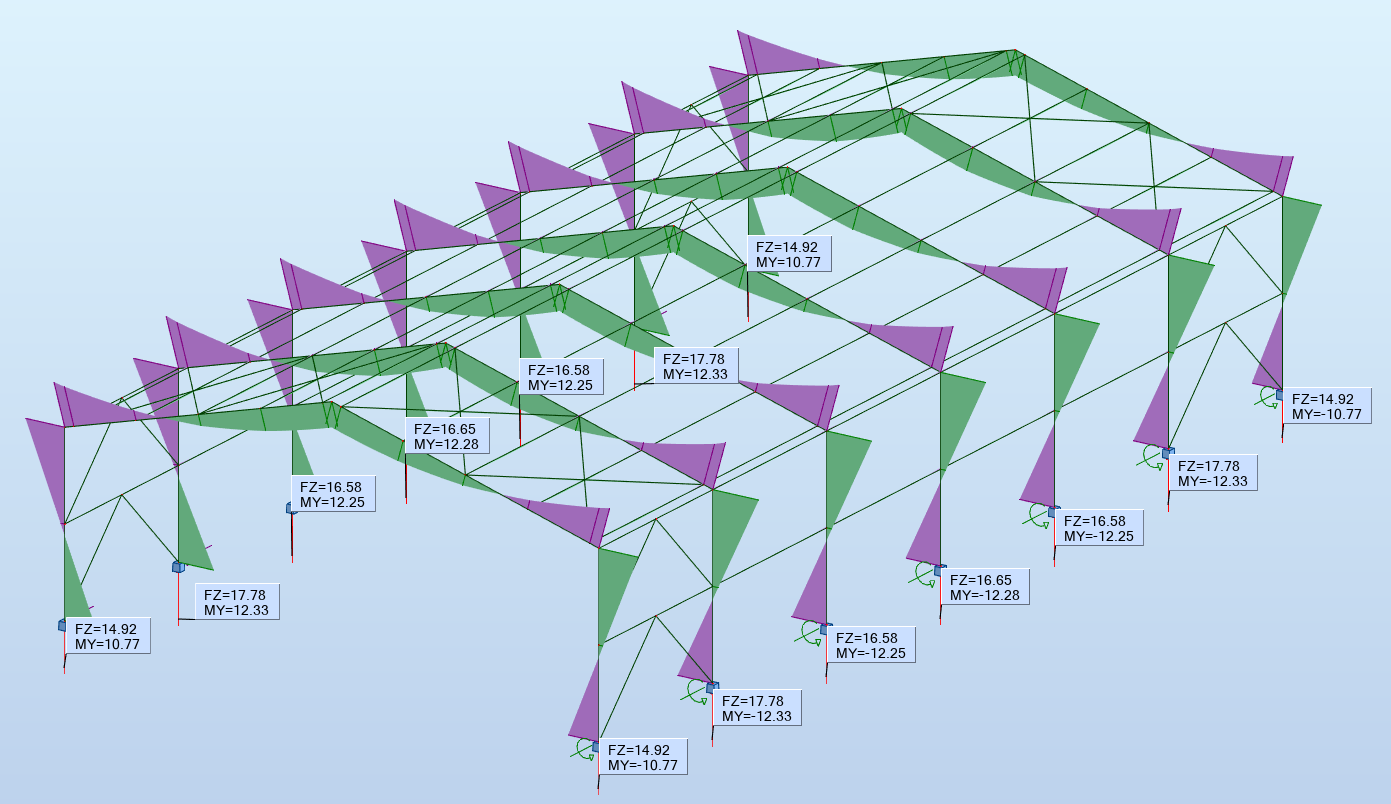
The boundary conditions are the most important characteristics to focus on for the simulation of a structure. The boundary conditions are the places where the structure interacts with the environment either through the application of an external force or through some restraint that is imposing a displacement. The most common displacement boundary conditions in structural analysis are those that restrain the movement of the structure in one or more degrees of freedom at a point. These restraints are also called supports. They will define the behavior of a structure, and in Robot, it is necessary for them to be defined.
In the next step in my script, the supports are defined by the AnalyticalNode.SetSupportByName node. In this case the supports are set to analytical nodes. The nodes can be detected using the AnalyticalBar.StartNode or AnalyticalBar.EndNode nodes, depending on which side of the element needs support.

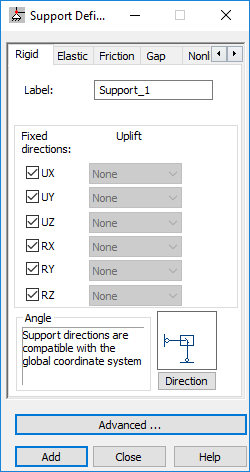
The support name is a string referring to the Support label available in Robot. Make sure the support label is available in Robot. This can be checked in Supports dialog (Geometry -> Supports) in Robot.
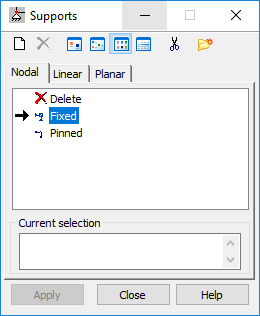
In the case support is not available, you can define one yourself using the New button in the dialog box. That is where you need to set the conditions of the support.
In the case no release conditions are defined, Robot assumes elements of the structure are perfectly fixed. The bar end releases are optional, but in the case of my portal frame bracings, they are indispensable. They can be set up in the same way as supports, but in this circumstance, you use the AnalyticalBar.SetReleaseByName node instead.
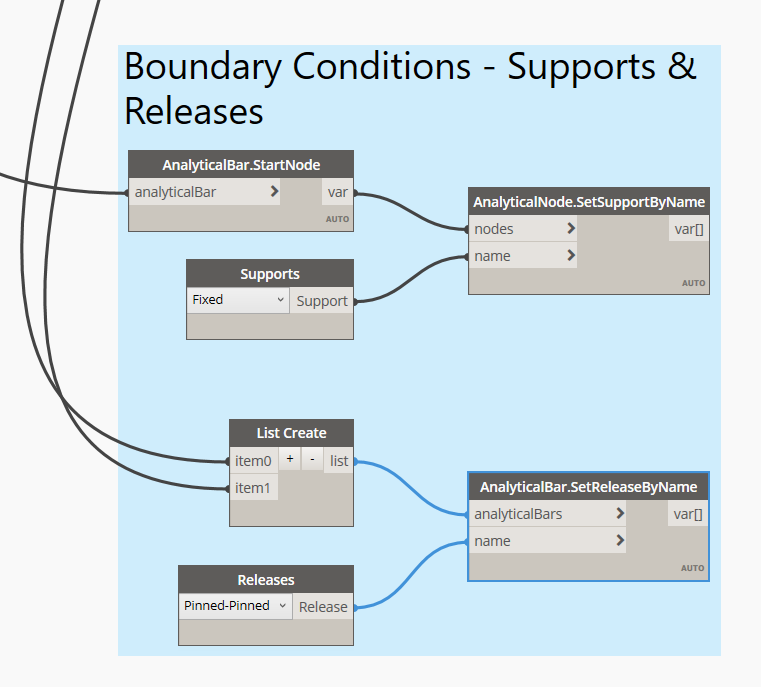
The input for this node is AnalyticalBars. The direction of an analytical bar is very important for the definition of releases. In the case of an asymmetric release (i.e. fixed at the start, pinned at the end), you need to make sure you are using the right order in Dynamo to create the geometry lines. The way they are created will define the local x-direction of the analytical bar (i.e. the choice of start and endpoints with the LineByStartPointEndPoint node).
Similarly in the supports case, the release name is a string referring to the Release label available in Robot so make sure the label is available in the Robot environment.
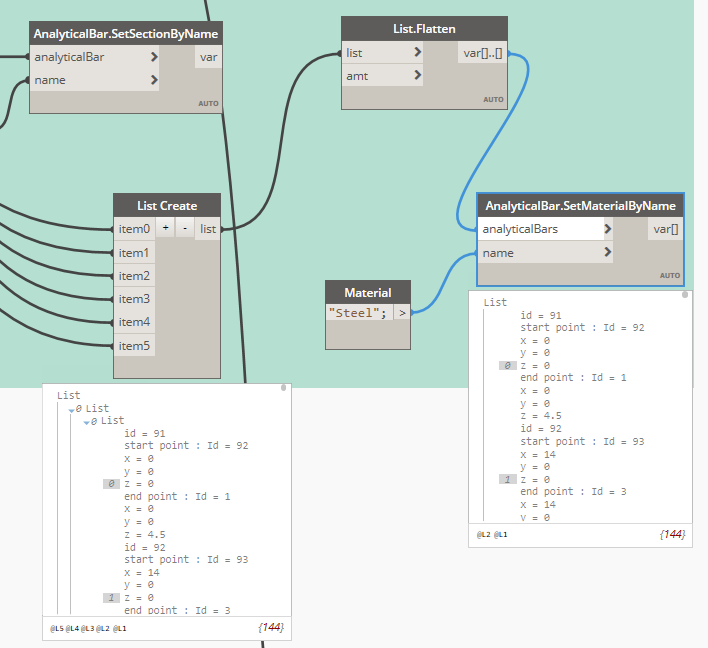
Structural Materials
The package also allows you to set up the structural material. Make sure the material label is available in the Robot environment.
Creation of load cases and loads
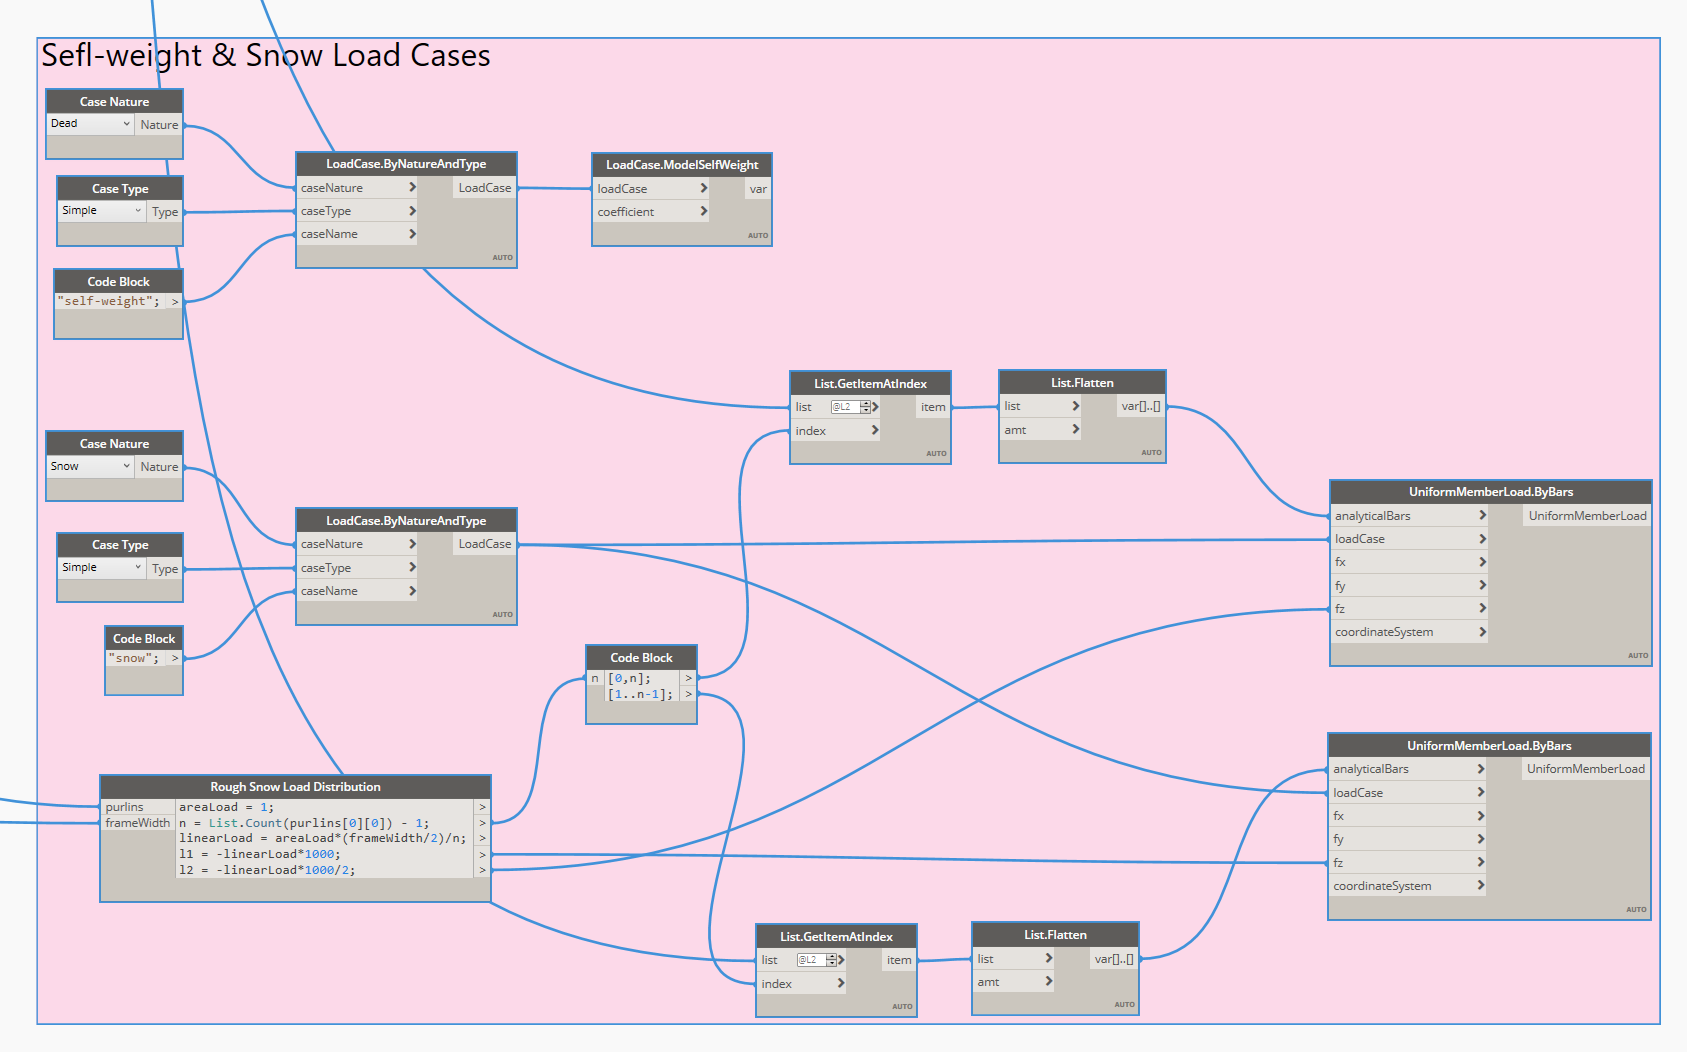
The next step is the definition of load cases in Structural Analysis Professional. These load cases contain the structural loads which will be applied to the structure later. Depending on the load duration and type, different natures of loads can be created (dead, live, wind, etc.) by structural engineers.
A load case can be created with the LoadCase.ByNatureAndType node. This node requires three inputs:
- Case Nature: dead load, live load, wind, snow etc…
- Case Type: At this moment there is only the “simple” option available.
- Case Name: This is a string representing the name of the load case in Robot Structural Analysis Professional.
Engineers can also automatically apply and recalculate structural loads every time the structural geometry changes.
Analysis
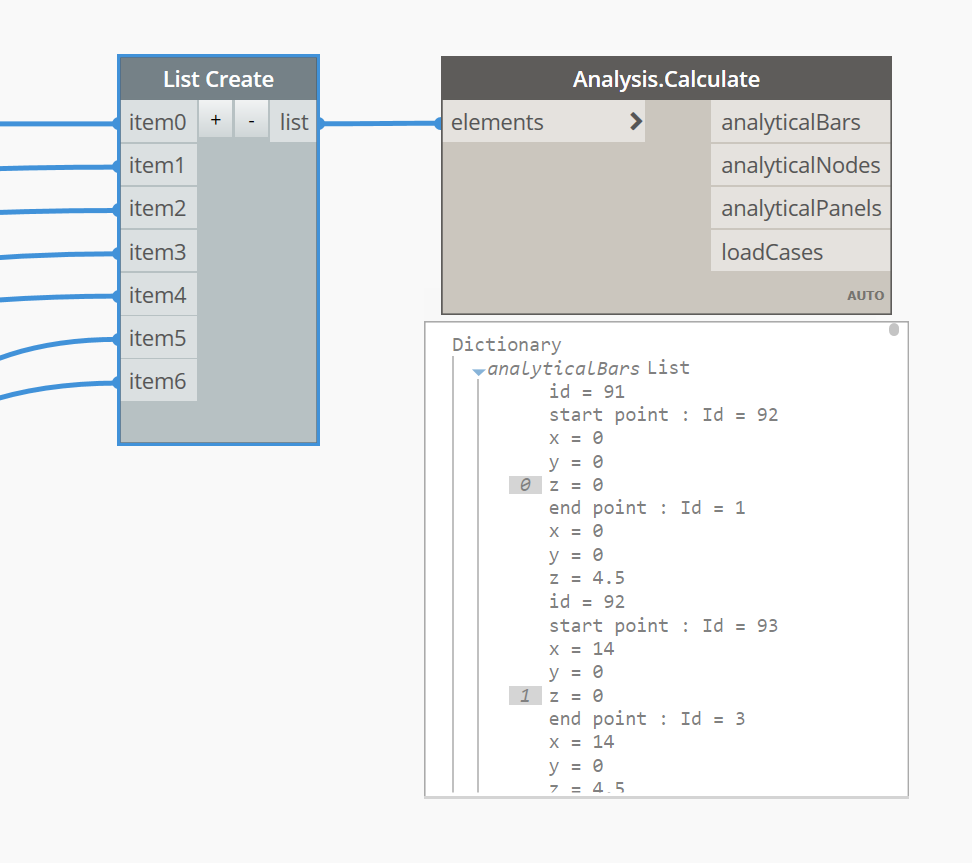
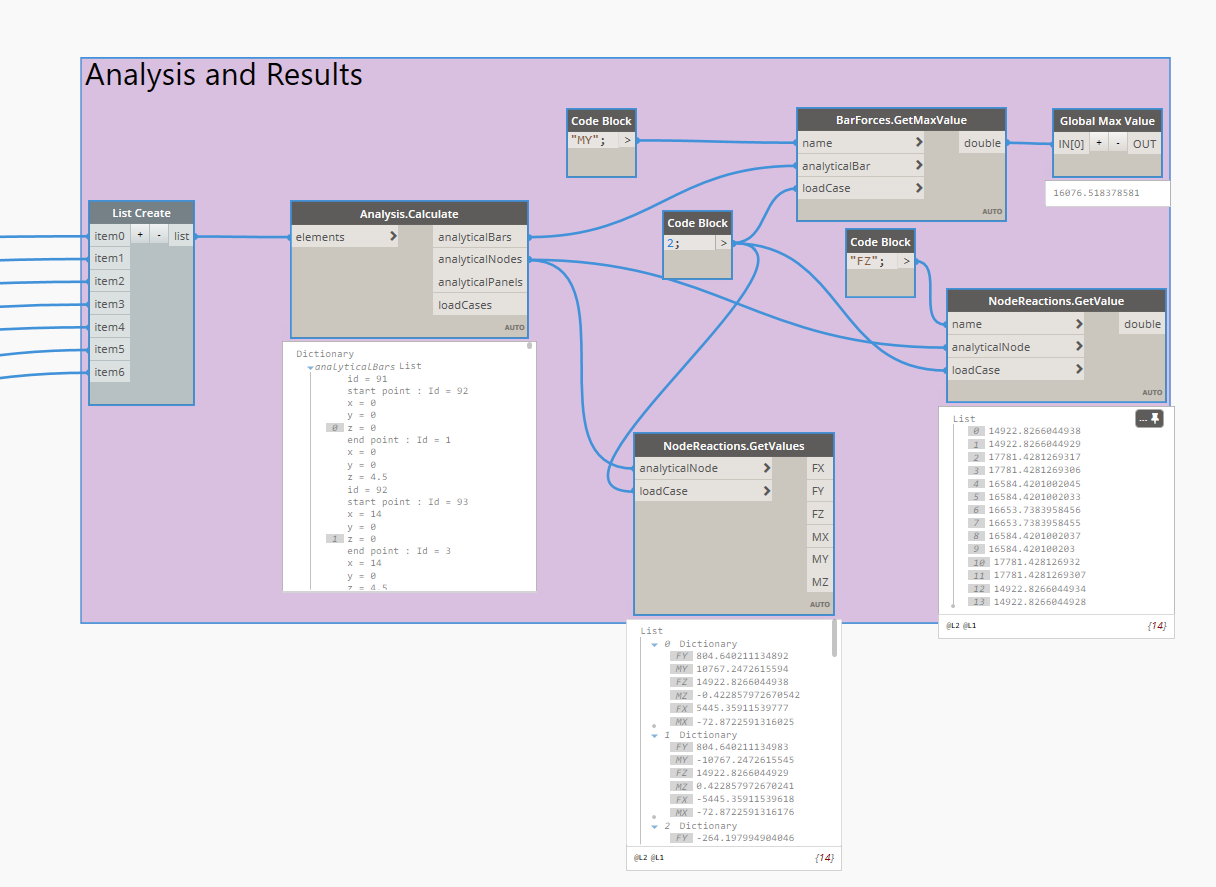
The next step is the most important one, and also the step that needs a bit of your attention before you go to work with it. The Analysis.Calculate node is the step that starts the analysis in Robot. It’s advised to only connect this node when your analysis model is set up completely (geometry, sections, loads and boundary conditions).
First create a list which contains the following elements:
– All analytical bars (and panels if they exist in the model) that are generated
– The analytical nodes with supports applied (take the output from the AnalyticalNode.SetSupportByName node)
– All defined load cases
– All load definitions (except for the LoadCase.ModelSelfWeight node, only superimposed loads).
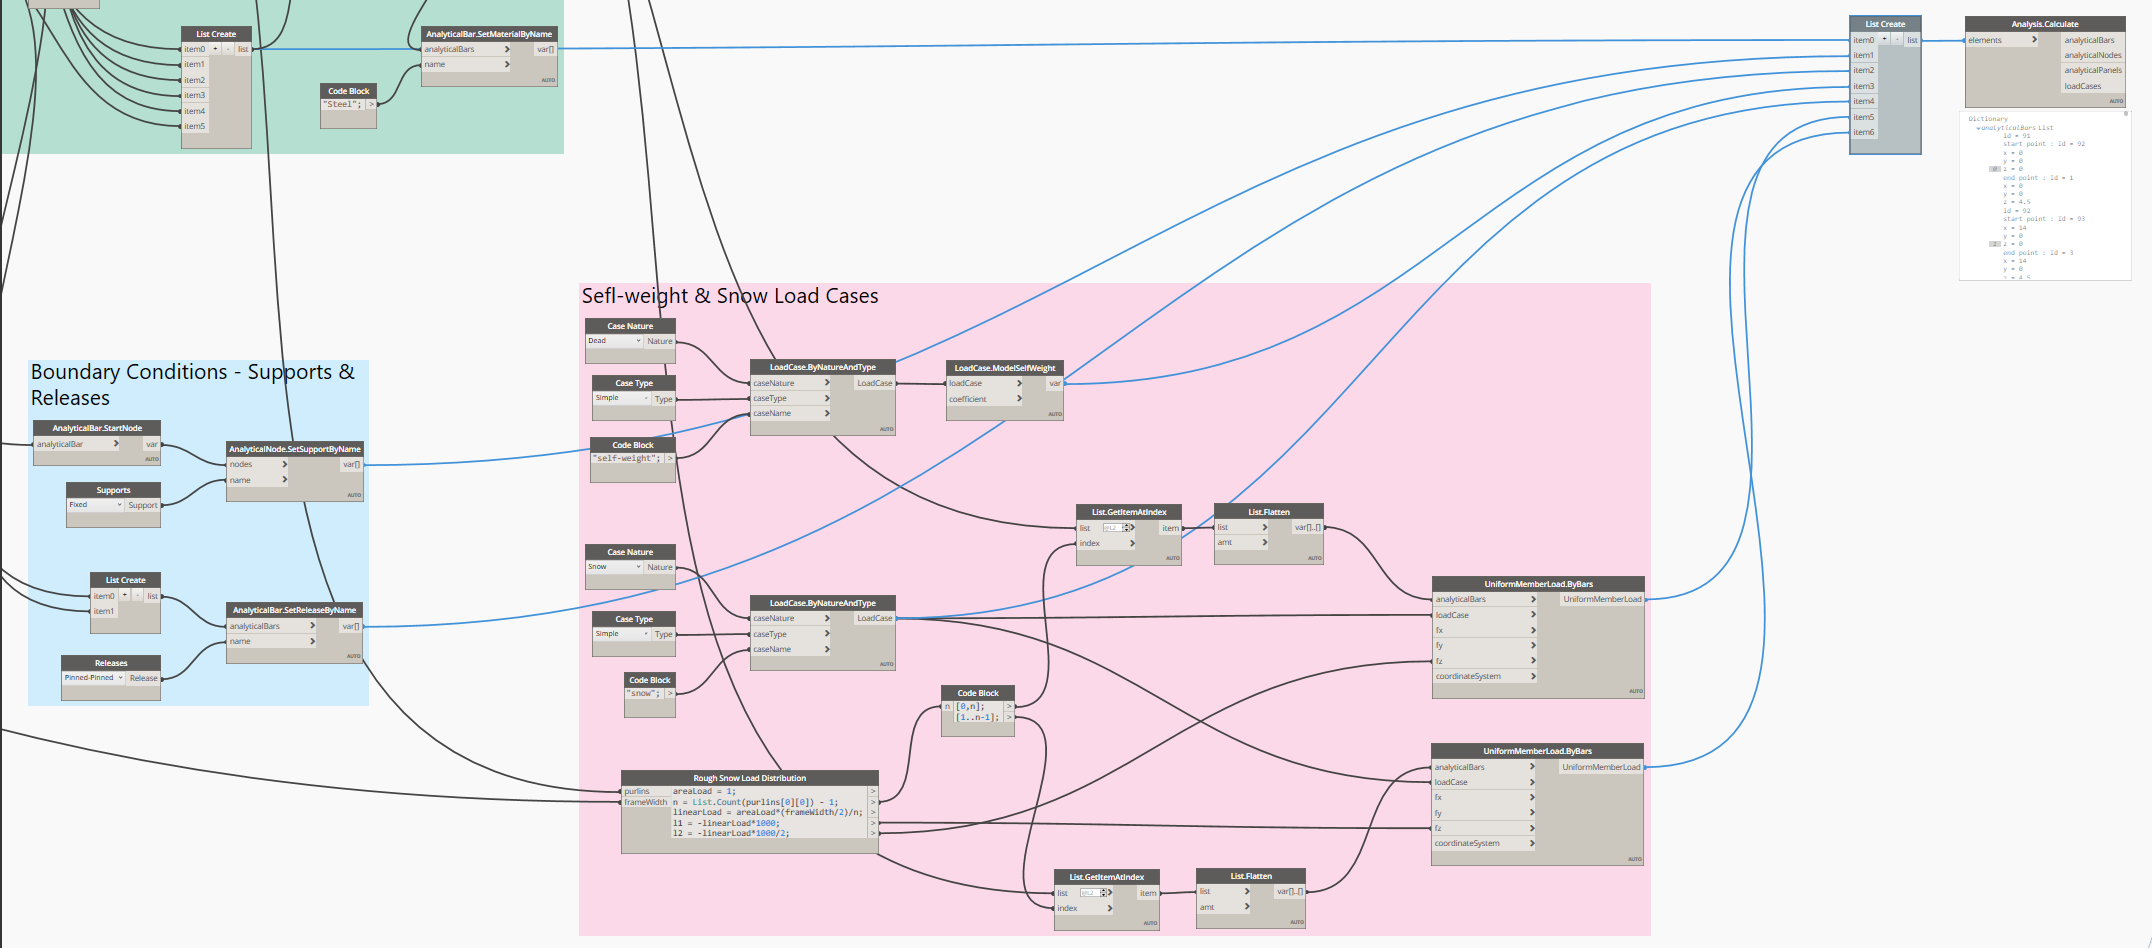
All analytical objects that are not part of the input list will be removed from the calculation model. Now, we are ready to run the script and see how Robot calculates the structure.
Results
The output of the Analysis.Calculate node contains 4 separated lists with elements classified by category (bars, nodes, panels and load cases). At the outputs of this node you can connect the Result nodes. Depending on which type of results you want to request, different inputs are needed. But all the result nodes have one thing in common, which is the loadCase input. This needs to be an integer representing the LoadCase.ID of a defined load case.
Conclusion
Dynamo for Robot Structural Analysis enables the analysis of more design options, more complex structures, and more resilient structures. Based on the Dynamo geometry, structural engineers can create an analytical model, apply section shapes and boundary conditions, such as supports and releases. Engineers can also create structural load cases and automatically apply loads, which can be recalculated every time the structural geometry is changed. Once the analysis is done, structural engineers can review the results of the analysis in Robot Structural Analysis or they can retrieve the results within Dynamo.
Using Dynamo, structural engineers produce optimized designs faster, with an integrated design and analysis workflow that allows them to iterate through design options faster and more fluidly, enabling them to win more work and stay competitive.