I know what you’re thinking: “How has it taken you 3 episodes to get to Super Mario Brothers?!?” Calm down. I haven’t seen you requesting it any more than other games, so it had to wait it’s turn! But here we are, using Autodesk Nastran In-CAD to determine if Mario smashes blocks with his head or with his fist. Let’s get started!
Like always, you need to design your stage. What’s more iconic than than 1-1? Be honest, you’ve died on that first goomba more times than you’d like to admit. That’s when you press reset or put in a new cartridge. Anyway, this time instead of using Autodesk Fusion 360, I’ve choosen to create the model directly in Autodesk Inventor, since Nastran In-CAD is…well, in this CAD pacakge. Side note, it’s also able to be directly inside of Solidworks. If you want to grab my Mario model, feel free to jump over to the Fusion 360 gallery and download it.
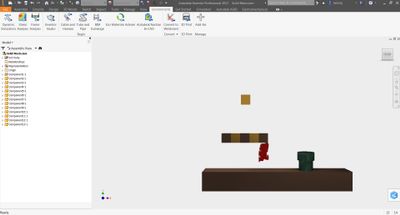
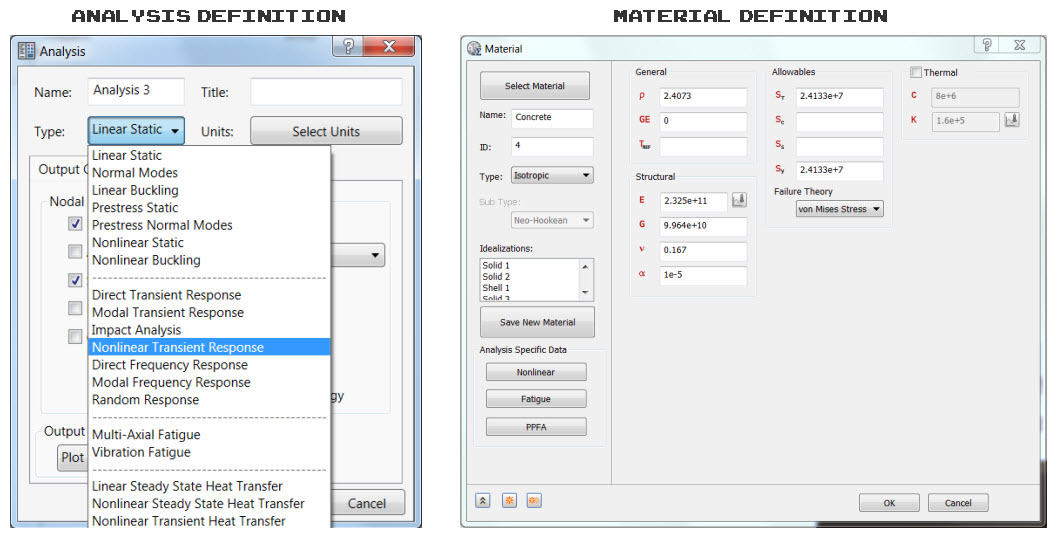
Once inside of Inventor, just click on the Environments tab and choose Autodesk Nastran In-CAD. The first thing once in the proper environment is to set the analysis type. You can choose to edit your analysis type or click on New and change the Type to Nonlinear Transient Response. Next, working left to right, the material needs to be defined. To keep things simple I have decided to model everything out of concrete. Mario is a pretty tough dude, so this doesn’t seem like a real stretch.
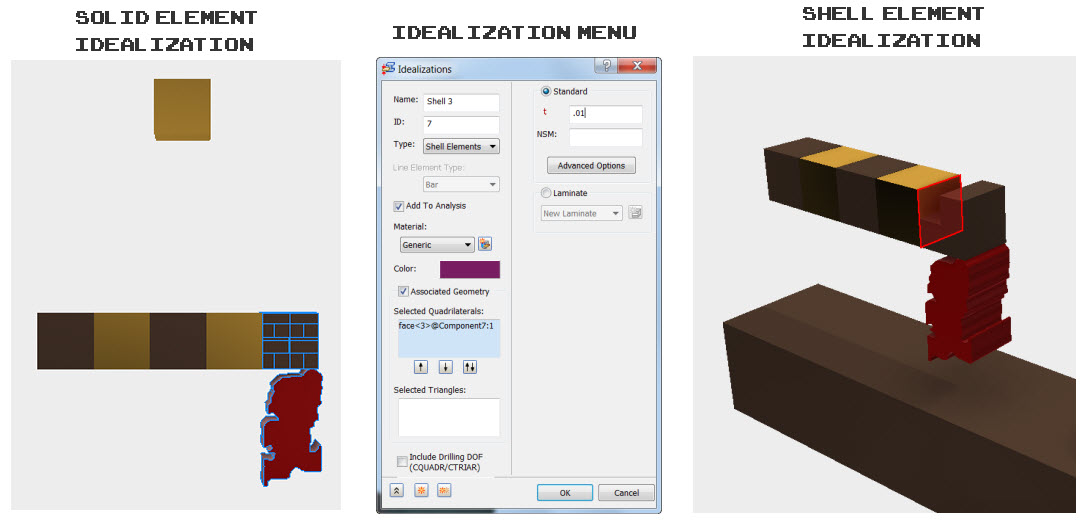
So here’s a tricky part about In-CAD. Just because you have defined concrete as a material that you’re going to use, you still have to apply it to the parts you’re interested in. You do this in the Idealization button. In that menu choose the material to be concrete, check the box for associated geometry and select the body that makes up Mario and the four pieces of brick directly above him and press OK. To continue the tricky behavior, we’re going to again go into the Idealization menu, and this time change the Type to Shell Element, choose concrete as the material and zoom into the left surface of the bricks that Mario is breaking. With it highlighted in red (it can be tough to get it) select the surface and press ok. I know, you got an error message. That’s because I didn’t tell you to define the thickness to 0.01. OK, do that and now you’re set to move on.
Now for our loads and boundary conditions. Choosing the Constraints button, zoom in to the edge of the shell element that we defined, select it and make sure all degrees of freedom are fixed. Next, click on Loads, change the Type to Initial Condition and the Sub Type to Velocity. Use a value of 100cm/s in the Y direction, select Mario and click OK. Simple!
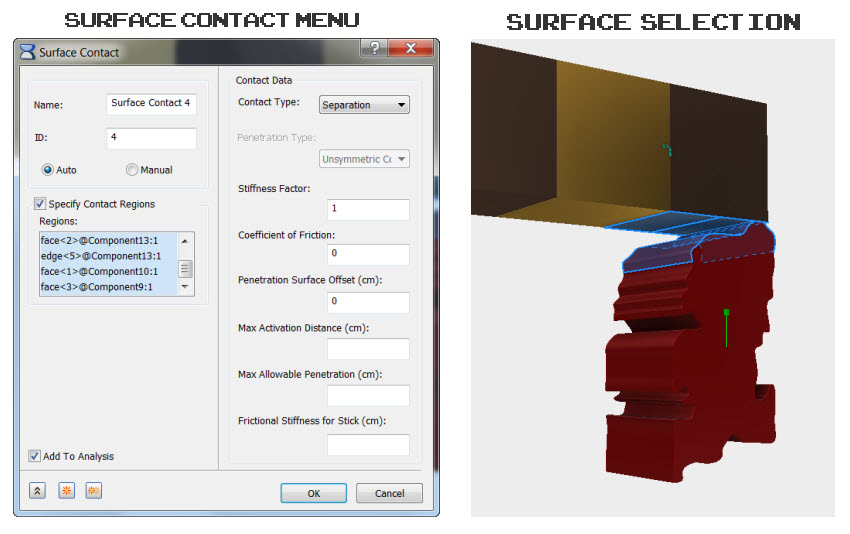
One of the last major steps is defining surface contact. Now this can often be a difficult part for many analyses and can also cause your analysis to run forever. Fortunately, this model has taken the advice from The Barrels of Kong and we have simplified Mario into 1 part as well as are eliminating all but 5 parts from the analysis. Under Surface Contact we are able to choose Manual, and then check the box to Specify Contact Regions. Select the surfaces that make up Mario’s fist and head, as well as the two bottom brick surfaces that he is hitting and press OK. Repeat these steps again, but this time choose all of the surfaces of the four parts that Mario will be hitting and press OK.
Just a few more steps left. Let’s jump into the damping menu first. Right click on Damping in the model tree to your left, apply a value of 1000 to each field and click OK. This will help stabilize the model for running. Normally you would have the software determine an accurate range for you or you would already have this information available. Next, right click on Dynamic and define your analysis parameters. Change the Cycle Dependent to Time Step (I find this easier to understand), enter the Number of Timesteps to 50 and the Duration to .005. This means Mario will be in motion of 0.005 seconds, and that time will be broken into 50 little movements to aid in the analysis process.
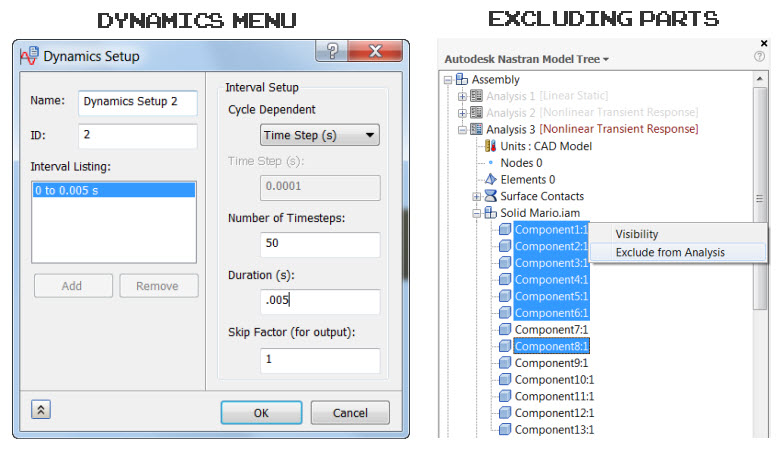
All that’s left is to exclude parts that we’re not interested in. Select components 1 through 8 in the model tree, unselect component 7, right click and choose Exclude from Analysis. We’re now ready to run. This will also automatically mesh the parts that are still included in the analysis. Let’s check out the results!
And there we have it! As you can clearly see, Mario initially smashes the block with his fist, but the block cracks and he hits it with his head as well. I guess everyone is right on this long running debate! If you didn’t get a chance to see the video, here’s the full workflow. Also, if you enjoyed it, feel free to share it on Facebook, Twitter or Pintrest. See you again next week for another exciting 8-bit Simulation!

(0)