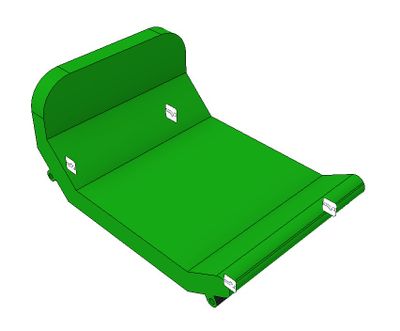
I know, Mario Kart isn’t exactly 8-bit, but it’s such a great game that I thought we could squeeze it into the series anyway. Regardless of which character you use, all of their (very similar) karts could use some optimization. My go to guy was always Koopa Troops, so I thought I would use generative design inside of Autodesk Inventor Professional to see how he could get the winning edge of Mario and the rest of the competition.
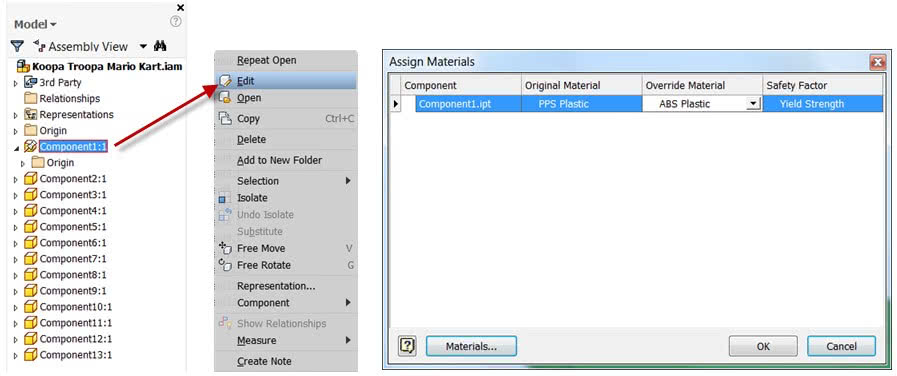
To begin, with the model open in Autodesk Inventor, we’ll have to find the body of the kart in the model tree and choose to edit it. Currently generative design only works with single parts, and since this is the heaviest in the assembly, it is a good place to start. With it open, press the shape generator button in the ribbon and start by defining a material. If this was already defined in the design the material will carry over. Otherwise, choose your material from the drop down to replace the default steel. An important note, no matter which material you pick, your results will be the same. Since we are just looking to reduce the weight of the kart by a given percentage, and stress isn’t yet taken into account, this is more of a formality.

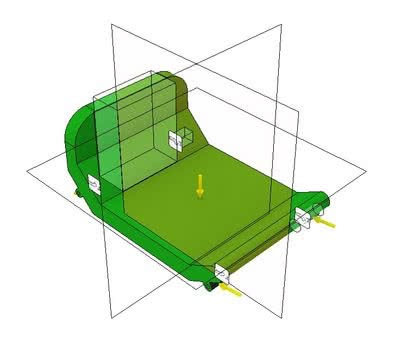
After material definition, it is time to define boundary conditions and loads. A fixed boundary condition can be placed at each interior surface where the axel goes through the brackets of the body, assuming them to be rigid. Next, a load can be applied on each cylindrical surface where the axel will push on the brackets when hitting bumps. A pressure can be added to the seat of the cart where Koopa Troopa sits. We’ll ignore the chance of getting hit by a shell at this time!

We also have the ability to preserve regions to ensure that they are not affected by the removal of material from the body. Defining a region around the two brackets on either side of the kart will make sure they remain intact. From the ribbon you can choose symmetry, making the resulting mesh the same on both sides of the kart when the shape generation is finished. The last region to preserve is a portion of the back of the seat so Koopa Troopa has a place to rest his back and attach what appears to be the exhaust system.

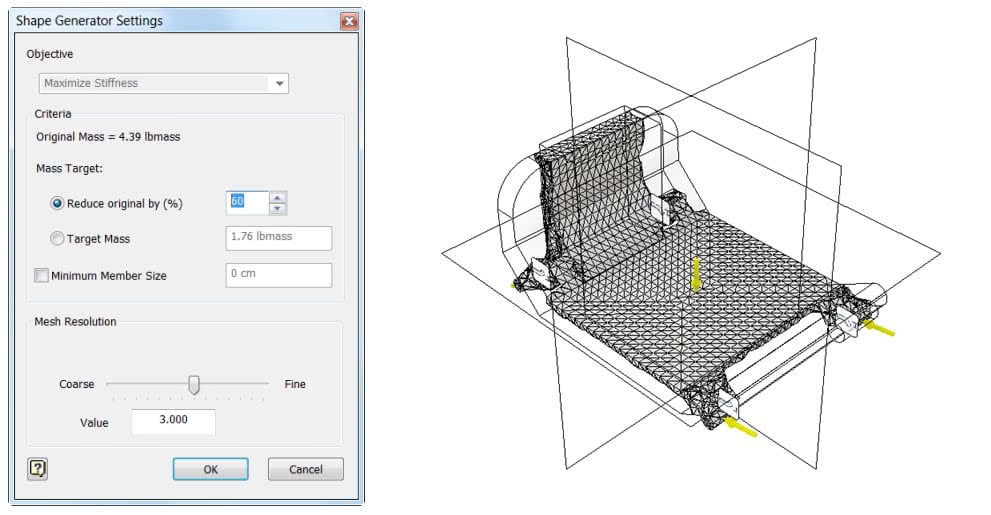
All that is left is to enter the shape generator settings where we can choose how much weight we want removed from the kart. For this example, let’s go with the default of 60% and see what happens. We could also use the option of designing for a target mass. Pressing OK and then running the analysis will result in our new design.

With the new shape of the body created, we could now edit the existing design to match the suggestions, or export this body for use. Typically to have a cleaner look, editing the geometry is the way to go. Take a look at the video below to see the above workflow completed in just a couple minutes.