Data & Process
-

Doing More with Your Data: Extending Beyond Engineering with Autodesk Vault PLM
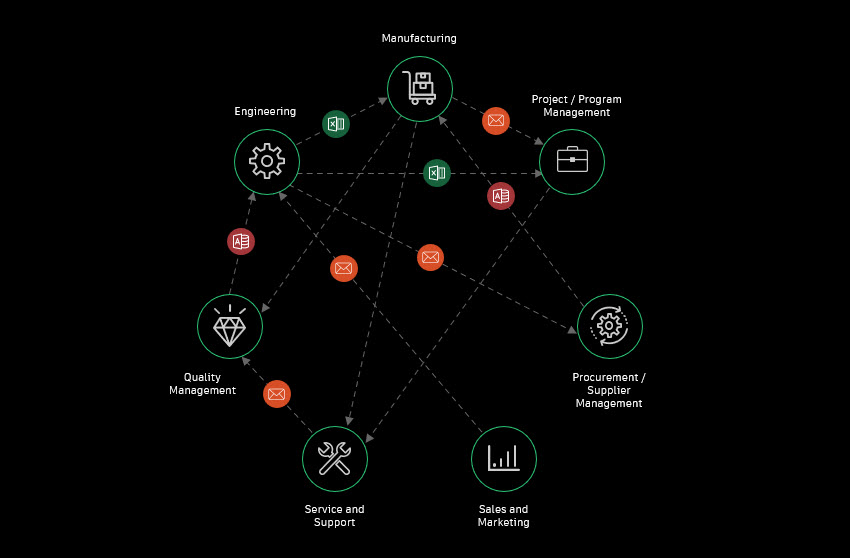
Autodesk Vault PLM enhances data integration across various departments, enabling streamlined processes, improved collaboration, and data-driven decision-making to optimize product development and organizational efficiency. Data is one of the most powerful assets in manufacturing, driving innovation, efficiency, and a competitive edge. While engineering departments have long used data to design and develop products, other departments…
Autodesk Vault
-

The Value of Autodesk Vault Items in your Digital Transformation Journey
Streamline product development with Vault’s Item-centric model—better BOMs, smoother collaboration, faster integration.
Data & Process
-

How PLM Helps Achieve Sustainability Goals
Explore how PLM enhances sustainable product design by improving data visibility, lifecycle assessments, and collaborative decision-making throughout the product lifecycle. Sustainability is no longer a peripheral concern in product development. Environmental responsibility is now driving how engineers and designers approach everything, from material selection to end-of-life planning. As global regulations tighten and consumer expectations evolve,…
Data & Process
-

Unlocking Efficient BOM Management with PLM
Unlocking efficient BOM management with PLM is essential for modern product development, as it integrates CAD and BOM information, automates workflows, and provides lifecycle visibility, enabling businesses to make better decisions faster and deliver high-quality products efficiently. We’ve all heard the saying “Putting the cart before the horse,” which perfectly explains the way many businesses…
Autodesk Fusion Manage
-
A Guide to New Product Introduction (NPI) with Autodesk PLM and PDM
PLM streamlines new product introduction (NPI) by centralizing data management, enhancing collaboration, automating low-value tasks. Integrating tools like Autodesk Fusion Manage and Vault improve efficiency and agility in product development. In today’s fast-paced market, efficiently managing the lifecycle of a product from conception to retirement is crucial. Product Lifecyle Management (PLM) is powerful tool that…
Data & Process
-

NPI: Elevating Product Introduction with Cloud PLM
New product introduction (NPI) is streamlined and optimized with cloud-based PLM solutions like Autodesk Fusion Manage, which enhance collaboration, data management, real-time analytics, scalability, and security, ensuring efficient and successful product launches. Every manufacturer faces the challenges associated with bringing new products to market and in many cases, it can be a make-or-break situation. The…
Data & Process
-

Engineering Data Management: Ensuring Efficiency and Innovation
Engineering data management involves systematically handling engineering data to improve collaboration, productivity, and innovation. Learn more about what EDM is and the various Autodesk solutions that can help. Engineering data management is an important aspect of the manufacturing and product development processes. It involves the systematic handling of engineering data, including design files, specifications, and…
Data & Process
-

New Product Introduction (NPI): Move Faster with PLM
Explore the importance of New Product Introduction (NPI) and what a modern PLM system can offer, focusing on three critical process improvements: agility, collaboration and efficiency. Product Lifecycle Management is a must-have in today’s competitive, ever-evolving manufacturing landscape. PLM can help you accelerate product development, enhance supply chain agility, foster collaboration, and minimize time wasted…
Data & Process
-

Streamline your Supply Chain Management with Autodesk’s Fusion Manage for PLM
Autodesk Fusion Manage is a cloud-based PLM solution that streamlines supply chain management, driving efficiency and savings. Product Lifecycle Management (PLM) is integral to managing a product from inception through design and manufacturing, to service and disposal. Autodesk’s PLM solution, Fusion Manage streamline this process, ensuring that every phase is meticulously documented, analyzed, and optimized.…
Data & Process
-

Understanding the Cost of Poor Quality (COPQ) in Manufacturing
Explore how the Cost of Poor Quality (COPQ) affects manufacturing operations, how to calculate COPQ, and how tools like Autodesk Vault and Fusion Manage can help reduce it by integrating quality control into the entire product lifecycle. In a highly competitive market, manufacturers feel the pressure to deliver reliable, defect-free products. However, despite technological advances…
Design & Engineering
-

Mastering New Product Introduction (NPI)
Explore how successful New Product Introduction (NPI) relies on structured processes, lifecycle tracking, and digital tools like Fusion Manage and Vault PLM to facilitate development and guarantee product success. Bringing a new product to market demands coordination across engineering, operations, supply chain, and marketing teams. Beyond a great product idea, success hinges on a structured…
Data & Process
-

PLM for Sustainability – Do Good Well
Autodesk’s PLM solution, Fusion Manage enhances sustainability in product design and manufacturing through efficient data management, material selection, lifecycle assessments, design optimization, supply chain collaboration, change management, and end-of-life planning, aiding businesses in achieving sustainability goals and benefiting their bottom line. Autodesk is a market leader in sustainability, ranking #1 among software companies by Corporate…
Data & Process