Quality control and process repeatability are extremely important factors in modern-day machining. This is due in part to the high levels of accuracy required in the manufacture of advanced components. CNC (Computer Numerical Control) machines have made manufacturing much more accurate and repeatable with components being manufactured to incredibly tight tolerances. Despite the complexity of modern-day CNC machines, it is still important to check the dimensional accuracy of each part to ensure that it meets customer requirements as well as to prematurely pick up any manufacturing issues.
Factors that affect repeatability
There are many factors that can affect the repeatability and consistency of components that are manufactured on a CNC machine. Some of the key factors influencing repeatability are indicated below:
- Tool wear – Tool wear can have a significant effect on the quality of a component. A dull tool will result in a part that is not to specification.
- Material inconsistency – Not all materials are created equal even if they are from the same batch. Some might contain internal stresses that can cause a component to fail probing checks.
- Machine temperature – On longer-running machines it is important to monitor and account for any changes in the machine caused by temperature changes. Some machines automatically compensate for this but if it is not accounted for it will be picked up in the probing routine.
The items listed above are by no means the only factors that introduce errors, but they illustrate the need for quality control procedures to ensure that substandard components don’t accidentally find their way into the market. This is where Autodesk’s PowerInspect software can help streamline the quality control process.
PowerInspect feature breakdown
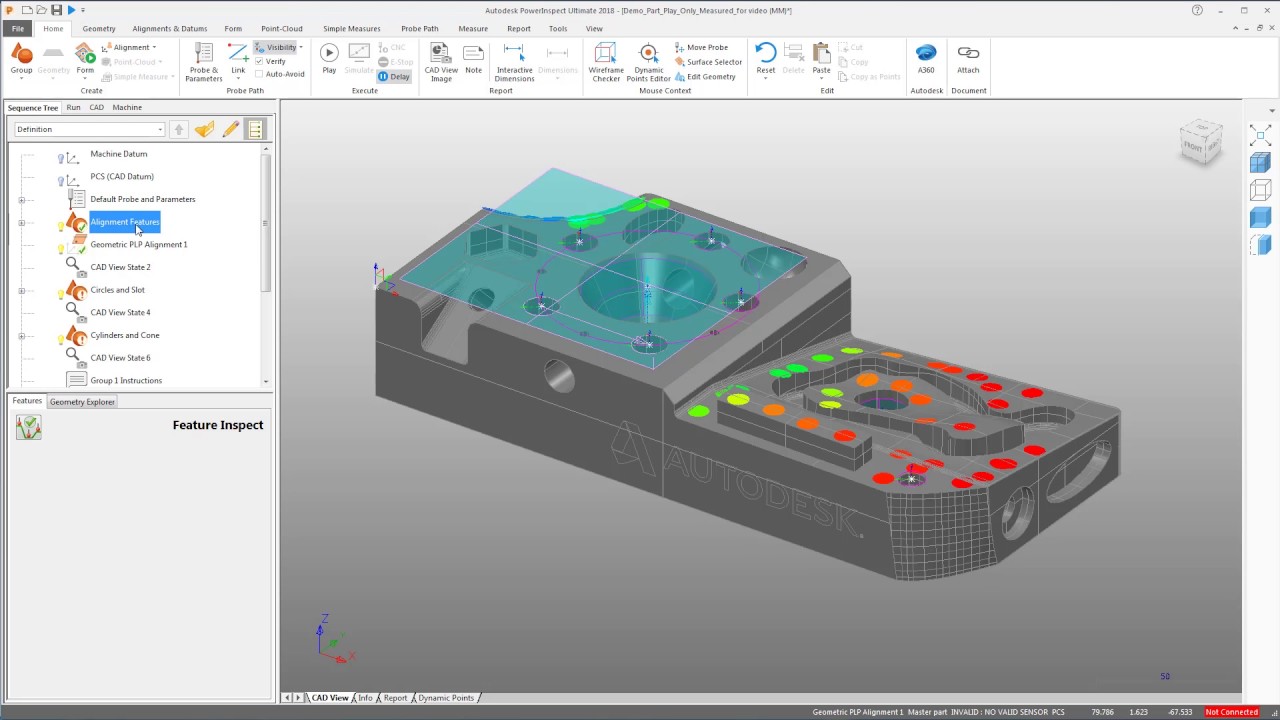
PowerInspect is Autodesk software that is used to assist in the measurement and probing of complex 3D parts. This is typically done in conjunction with a probing tool or scanner. The probing tool can be a CNC machine tool, or it can be a dedicated CNC CMM (coordinate measuring machine). Some of the key features of PowerInspect are listed below.
Hardware Connectivity
PowerInspect interfaces with a wide array of sensor and sensing devices. It can also seamlessly switch between different devices within the same session.
- Multi-device support – Hardware independent, and can make use of a wide array of probes, 3D scanners and other measurement devices.
- Automated inspection – Probing paths can be automatically generated based on your chosen probing technique. Furthermore, the software includes a simulation option that will show any potential issues that may arise during the probing of the actual part.
- Non-contact inspection – Point clouds gathered from 3D scanning devices can be easily aligned with existing CAD (Computer Aided Design) models to streamline the measurement and comparison process. Once the scanned data is in the system, geometric data can be easily extracted from the model.
Inspection Programming
The programming aspect of probing is extremely easy and understandable through the use of common user interfaces and simple to use tools.
- Ribbon Interface – The ribbon interface is used to allow for improved ease of use. This interface will be very familiar to those who have used CAD software.
- Complex Shape Inspection – Numerous tools are available that allow for the accurate measurement of freeform surfaces. Complex surfaces can also be measured by reducing the surface to a 2D profile to simplify measurements.
- Graphical Programming – Using the wireframe tool, it is easy to convert geometry into inspection features, reducing overall programming time.
Manufacturing Integration
PowerInspect interfaces seamlessly with manufacturing and helps digitize and share the results of inspections with stakeholders.
- Shared Views – Inspection data can be shared over multiple, internet-connected devices. This allows all project stakeholders to be part of the inspection process and review inspection data if required.
- On-Machine Verification – Components can be inspected while still on the machine. This saves time by eliminating the extra step of moving the part and setting it up on a dedicated CMM.
- Guiding Line – This feature is very useful as it reduces the time taken to find the next probe point when measuring in manual mode. A line is drawn from the probe tip to the next probe point in real time, which allows the user to easily locate the next probe point.
In Conclusion
Autodesk PowerInspect is an extremely powerful tool to add to your quality control procedure. It offers a long list of features that streamlines the probing process. It has an easy to understand interface that is reminiscent of Autodesk’s Fusion 360 and Inventor, making the learning curve a lot less steep. If you want to take your probing to the next level, you need look no further.


