Autodesk Forma, available in the AEC Collection or as a standalone subscription, offers powerful AI-powered tools for architects and designers in pre-design and schematic design phases.
3D modelling tools are a dime a dozen in 2024. And most of us creatives, be it furniture designers, to architects to sculptors, use several in our daily lives. Unlike ten years ago, when we were looking for that one tool to solve our every use case, today’s landscape of specialized apps feels a lot different. There is a tool for each job.
If I want to design furniture, I turn to Fusion, if I want to design goblin miniatures I doodle on my iPad in Nomad Sculpt. When I need to document buildings for construction, I use Revit for its elements. For conceptual design in a vacuum, I turn to Rhino, but for contextual modelling I start my work in Forma.
I know, a completely biased opinion, but let me tell you why and maybe you’ll agree.
Forma has a whole suite of modelling tools from parametric and generative, to fully manual adjustments, depending on your need. From FormIt we inherited a fully developed 3D modelling kernel that works excellent in-browser, which we dubbed 3D Sketch. The sketch part here is important, because everything you do in this early-phase, pre-design exploration space that Forma enables, is sketching. You sketch and explore, analyze and react. Sketching is an essential tool in exploration, and the 3D Sketch engine allows for some very valuable workflows.
If you’re a seasoned Autodesk user, and know Forma well, you’ll have noticed two things happening this summer. Our 3D modelling capabilities are built on the FormIt engine, and you’ll see the genetics of that in the tools made available, and more importantly: You’ve noticed that the 3D Sketch sub-mode stopped existing and that these capabilities now are native to our design environment. And let me tell you; as a real power-user, this feels great.
Let me take you through four workflows I enjoy doing in Forma using the 3d sketch capabilities today:
1- Upgrading models to improve my surrounding context
One of my favourite things to show other Architects when I show off Forma, is how you can set up a project anywhere in the world, and get a 3D terrain, and surrounding buildings to fill your context from whatever free databases that are available in that location.
There are some great data providers out there that give you access to fantastic data, but often at a cost. So as a starting point, I use the free stuff.
By starting out with what comes out of the box from sources such as OpenStreetMap, you quickly get a basic understanding of your site, but you’ll quickly realize that this 2.5d representation doesn’t have that glance value that a fuller 3D scene would.
So, I recommend you spend some minutes adjusting the closest surrounding buildings to be closer in style to the real world.
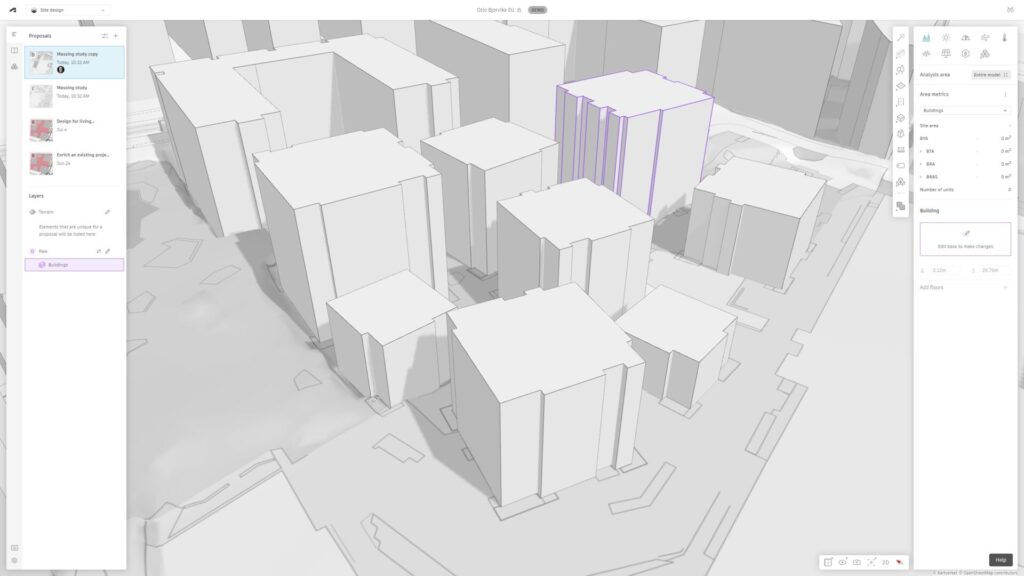
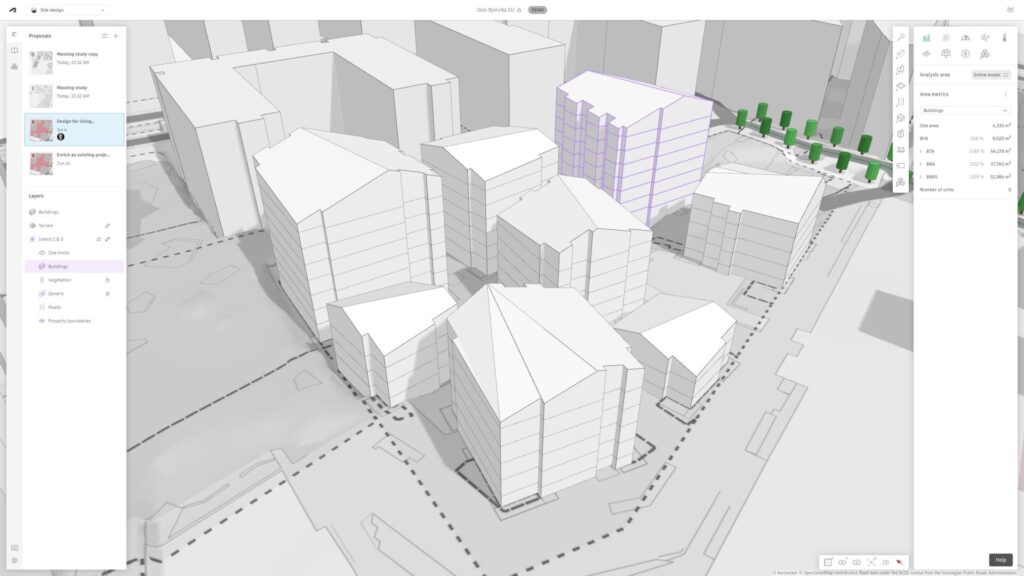
You get a lot of bang for your buck by editing some buildings to have pitched roofs, perhaps some balconies, some arcades and overhangs, just basic adjustments learned from your first initial site visits.
I dread designing outside of context, I fear the white empty screen of a newly created file. After all,
“Architecture is the thoughtful making of space” – Louis Kahn
2- Staying in the flow zone of design while exploring volumetric studies
Now nothing breaks a good flow state than having to switch context. As creatives, having to switch modes can completely break your flow, and so when you’re exploring your volumetric studies, whether they come from Forma natively, or Rhino, or are imported, you’ll want to make constant design adjustments based on the insights you’re learning while using Forma.
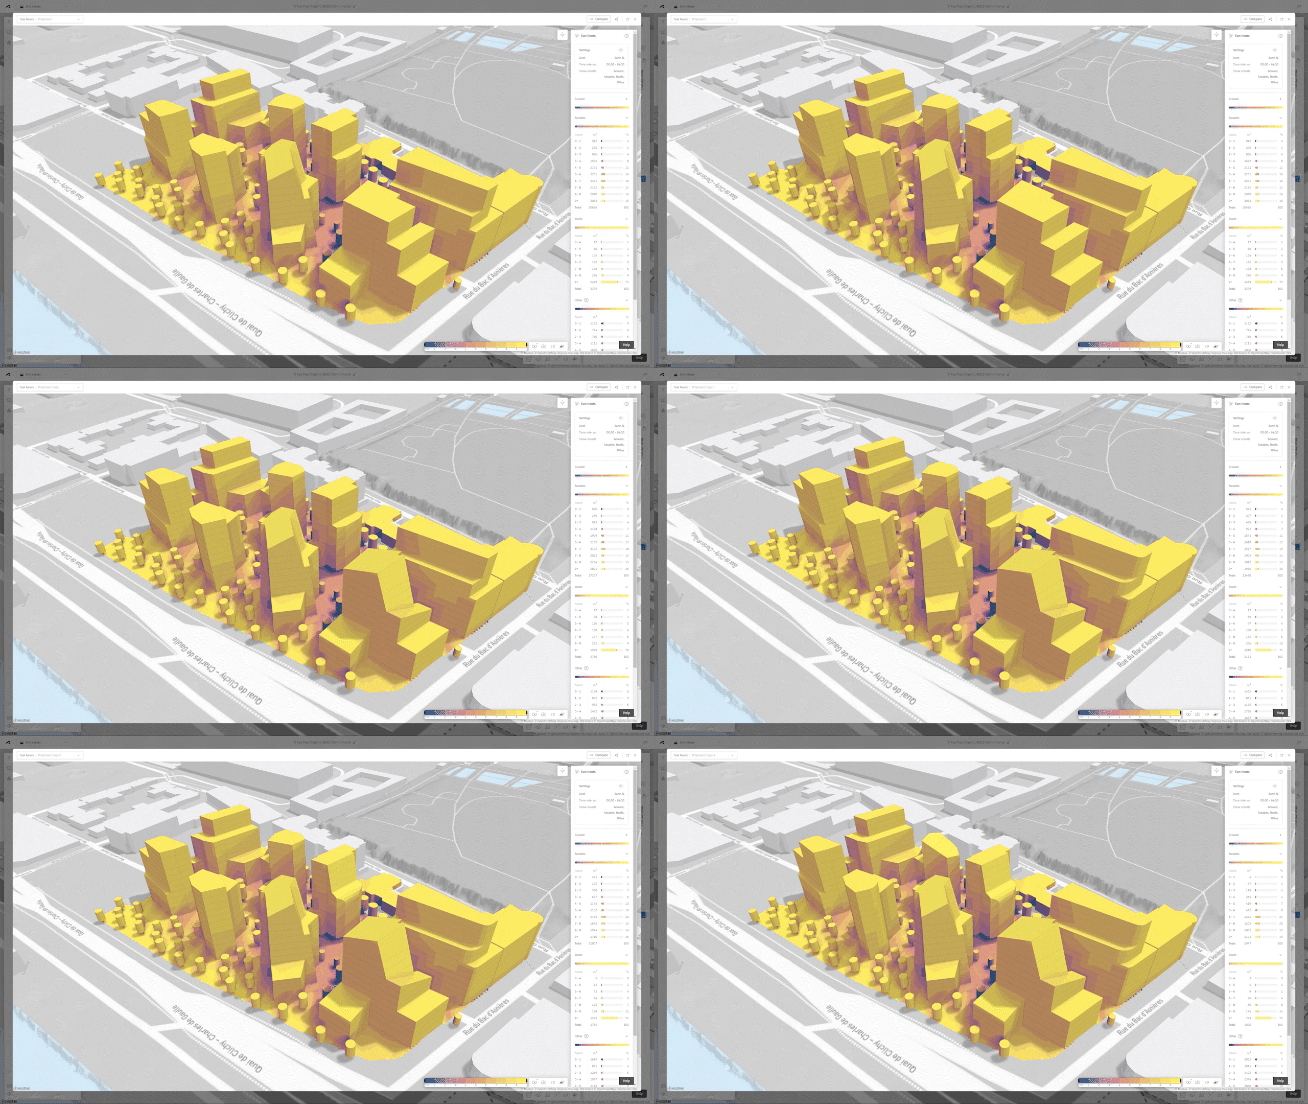
Turns out that building roof slope doesn’t quite ‘capture the sun correctly’, or ‘these two facades are creating a daylight challenge between themselves’. Having the option to simply, and quickly, adjust the volumes, and reassess, is a flow state saver.
You can right-click and convert all buildings in Forma into 3D sketchable buildings, and make on the spot adjustments then and there, and order up a new analysis to see if these tweaks improve your design.
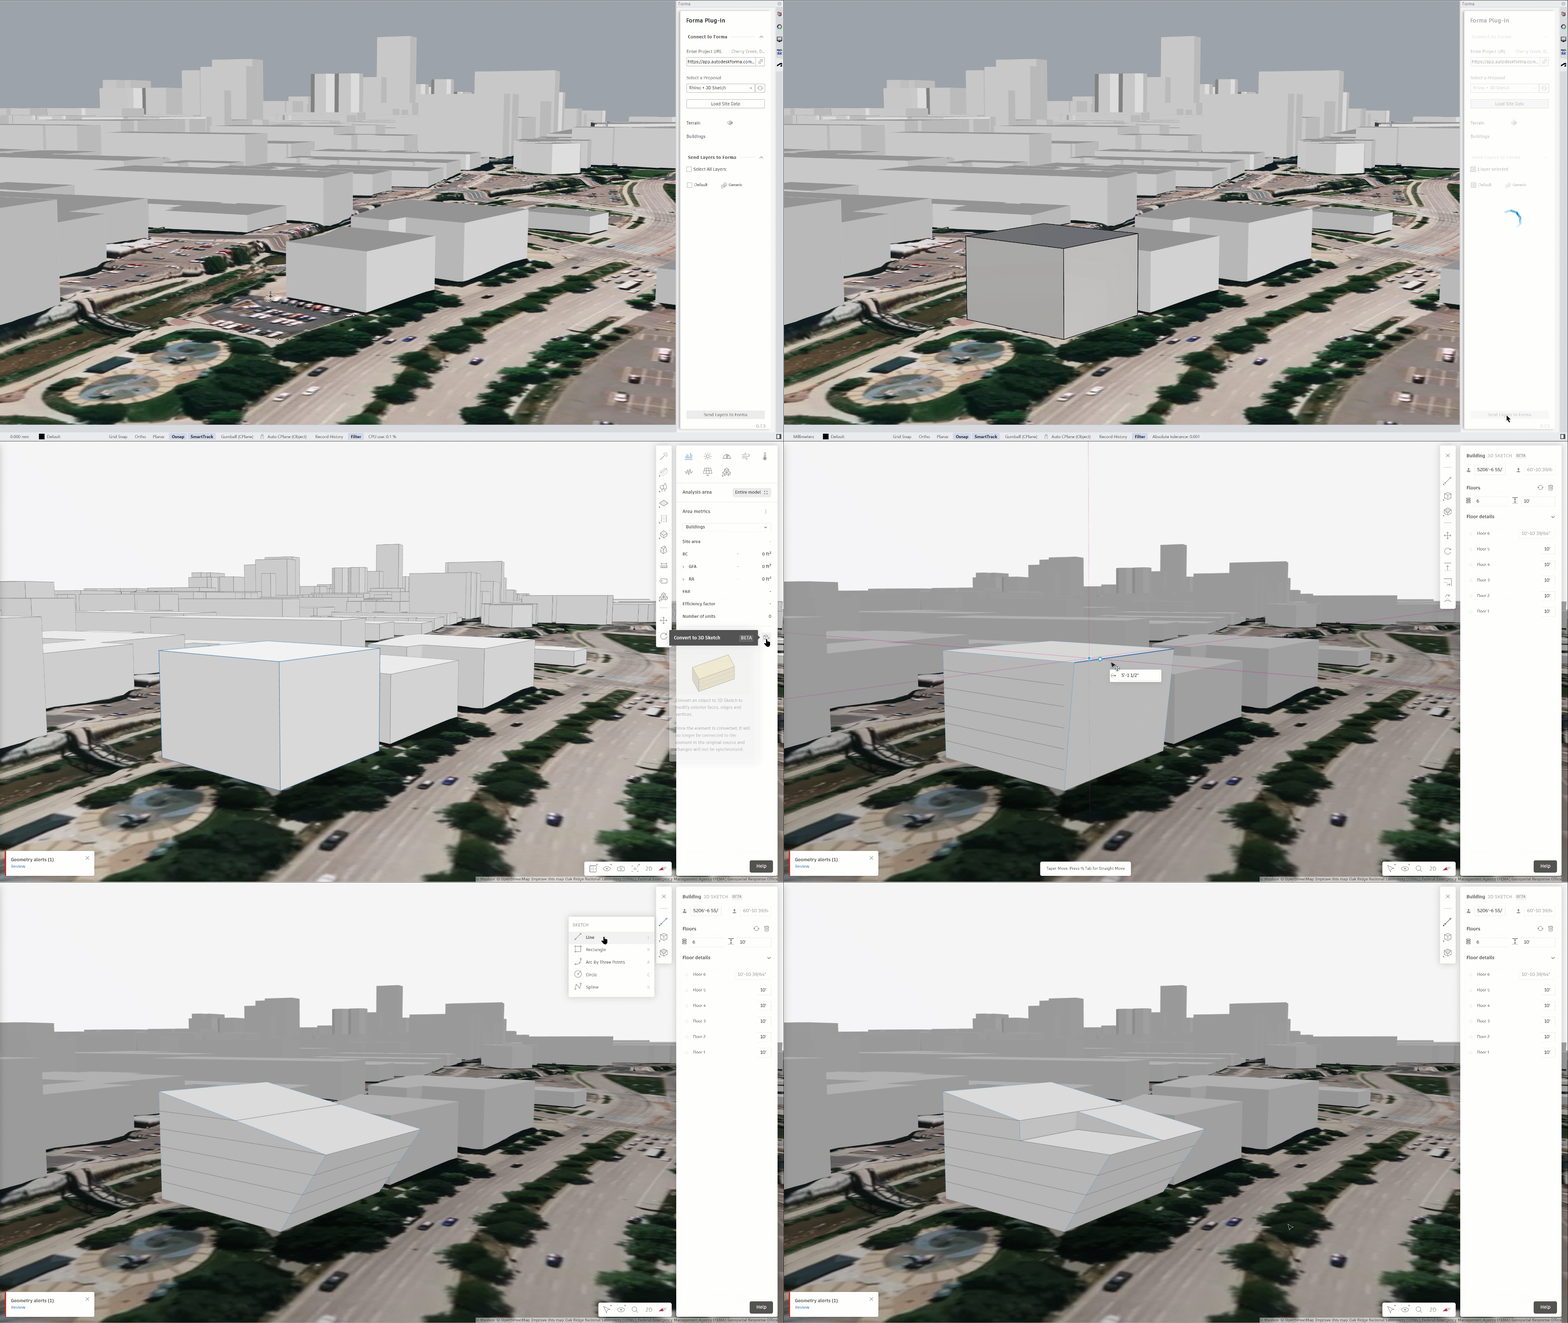
We call this outcome-based design, it’s as simple as “Form follows function”, and a “no thank you” to doing yet another import.
3- Fixing poorly modelled 3D imports
When you’re looking to analyze models for environmental qualities or just pure area statistics and things like gross floor area, you need to be mindful of the geometries you create.
The necessary quality of your mesh entirely depends on your use-case, if you’re making some quick and dirty visualizations that you’ll use for a collage in photoshop, then you don’t need to respect any rules, but if you’re looking to 3D print something it needs to be manifold and water-tight. When you want to analyze how wind simulations would pattern around your building, you also have a level of quality with manifold models, as you can imagine.
A lot of import issues our developers encounter when they support customers are around poorly built 3D models, where for example faces are not normal to the geometry, creating “back faces”.
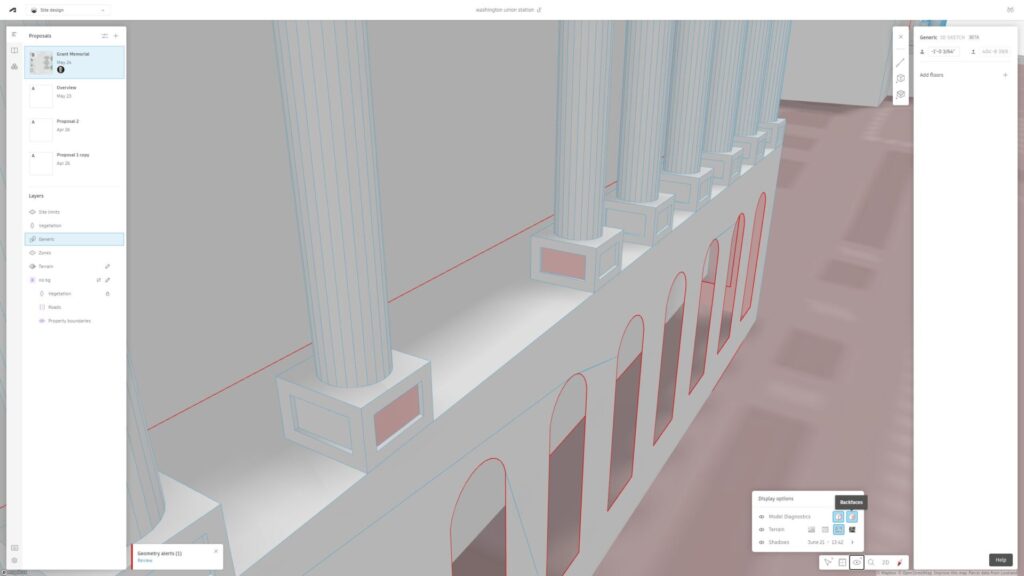
Now the best practice is of course to fix that wherever you made the geometry before import, but you can also opt to fix this efficiently using 3D sketch. You can flip the faces back to point the right way there by selecting them all and finding the Reverse Faces command in the context menu (or shortcut FF – used to be known as Flip Faces).
In fact, you can use the Selection Filter tool to select only faces, then use the area selection window to grab everything and hit FF. So, fixing it should take just a few seconds. Again harking back to my previous point, just fix it where you’re at, and keep your flow state for a while longer.
4- Adding details that tell a story
Over-detailing is a huge problem in the early design phases. We are all guilty of falling for the temptation of adding soffits in our conceptual models for that extra visual expression, and then having to do it all over again in the design documentation phase later on.
I’ll say this: BIM managers hate over-detailing of mass models, but there is something to the freedom to play with the expression of a building beyond the rational.
I’ll use a sketched 3D element in front of my “rational building design” to play with how light hits the building, with some arcades and columns, perhaps different shapes of brise-soleils. It adds a certain something to the texture of a concept that communicates intent beyond what is thought through. It’s good to be sketching a little on top of your designs.
Just, to keep your project timeline, remember to stop in time and don’t get lost in the details of mesh-modelling.
Oh, and by effectively working with Groups, and Hide Geometry (H), you’ll be able to edit duplicates and skin large facades in a fraction of the time!
Now, 3D sketching in Forma is still evolving, as are all our design tools. We recognize that 3D modelling is not just a means to an end; it’s not merely about placing something on the canvas to analyze. For architects, the expression of form is an analysis in itself.
Give Forma’s 3D modelling tools a try and let us know what you think. Our developers are eager to unlock workflows valuable to you. So if you see a need, perhaps a feature from FormIt that you wish Forma had, please share your thoughts on our forum here. Autodesk Forma should be the best place for you to start your new site-planning and design projects.