Have you seen the 3D posts we added to the Inventor Facebook page recently? Here is an example if you haven’t seen it yet. Some of you may have asked, “How did they get a 3D model in there?” Visitors have speculated whether it was the Autodesk Viewer or something new in Inventor. Well, it is somewhat new. It’s a Facebook feature that was released about a year ago. So why are we not seeing tons of 3D models posted? The process is easy, but it’s not just a click of a button either. There are several optional paths to create the file you are going to place in Facebook. I’m going to attempt to make it as easy as possible.

Step 1 – Your Inventor Design
The process begins in Inventor. The first thing you should consider is the size of the assembly and the complexity of the model geometry. You might need to suppress unnecessary components or complex geometry from your design before exporting. Later I’ll discuss the exact file size limits for Facebook.
Step 2 – Export
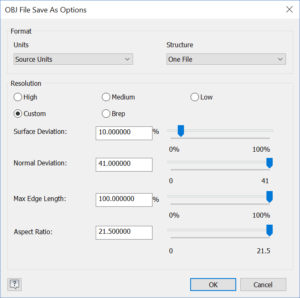
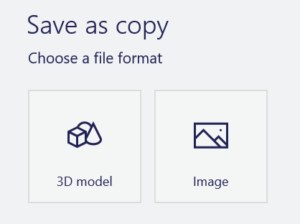
Once your model is ready, it’s time to export it as an OBJ file type. This is a 3D file format that can be opened in various 3D image editing programs. It also carries with it the 3D coordinates, texture maps, and other object information. Before exporting the file, be sure to pick on the options button. You should make the file as small as possible by clicking on low resolution or custom. If you use custom, drag the normal deviation all the way to the right. This will turn circular edges into polygons. You might not like how it looks at first, but most Facebook users won’t notice the low resolution.

Step 3 – Open in 3D Paint
To use your design in Facebook, you need a GLB file. There are several options for creating this file extension. The one I’m using is 3D Paint. It’s included in Windows 10. If you are using a different Windows version or different operating system, then you may need to search the web for an alternate application. I have even seen web pages that will create a GLB simply by dragging in your OBJ file.
When opening your OBJ file it will prompt you for the colors and textures. I believe you can select the root folder for the file and it will find the texture folder automatically.
Step 4 – Save the GLB
Finally, save the 3D model as a GLB file.

The size of the file will determine if it can be used as a 3D post. It must be less than 3.14 MB. I’ll speak to this further in the next step.
Step 5 – Post the GLB to Facebook
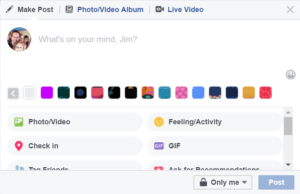
This is the easiest part. Login to your Facebook page. Select “What’s on your mind” just like you normally would when posting a message, photo, or video. Then drag and drop the GLB file right to the edit box where you type your message. If the file size is too large, you will receive the following message.

Click on the “Learn more” link and it will provide an upload button to validate your file and let you know why it can’t be used. Most of the time it’s either because of the file size or the textures used for the components. This helps to diagnose the issue so it can be resolved quickly.

If the GLB is valid then you will see your 3D model! Unless you have a message to go along with it, it’s ready to send for all your friends or customers to see!
Additional options and resources
There are several editing tools that are available in 3DS Max for material, appearance, and file size. I still have more to learn which may turn into another article later. I have found that basic material types work well. Feel free to change the material color, specular level, and glossiness for a nice reflective look on your model. Don’t get too fancy with advanced materials as it may produce an error when importing the file to Facebook.
I have also used the ProOptimizer in 3DS Max to reduce the size of the model. This worked well when I included flow traces from Autodesk CFD. Originally, they came in very heavy during import. I would suggest looking this up online for additional usage information.
We also have video instructions available live on YouTube for you to view or share with friends.
Social post suggestions
Finally, share your 3D post with us! We want to see your great work. Use the hashtag #Inventor3Dpost in your message. Happy posting!

Jim Byrne joined Autodesk in 2013 on the design and manufacturing marketing team. Prior to joining Autodesk, Jim worked at a local reseller for 14 years selling and supporting CAD, Simulation, and data management solutions. He also has three years of experience in the industry as a machine designer.


