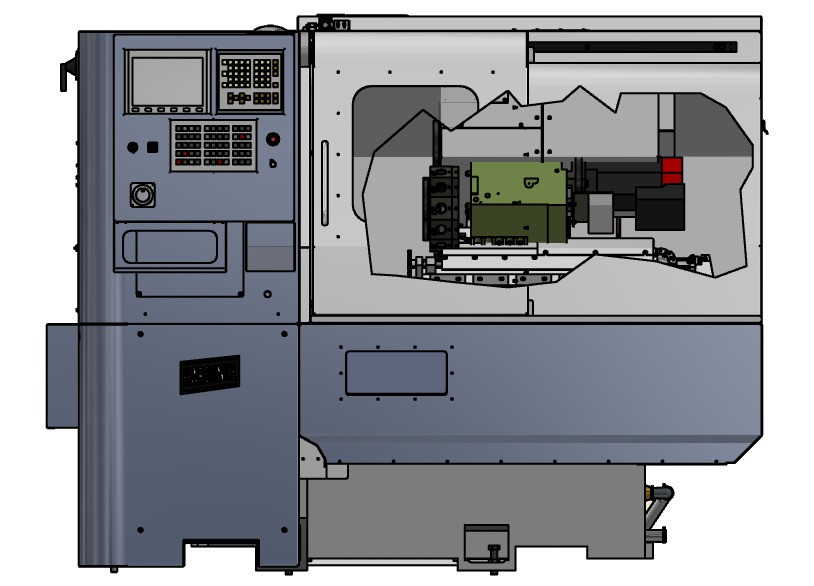
Breakout view might be one of the least used but coolest drawing view in Autodesk Inventor. Breakout views allow you to see into a drawing view through a defined area you specify.

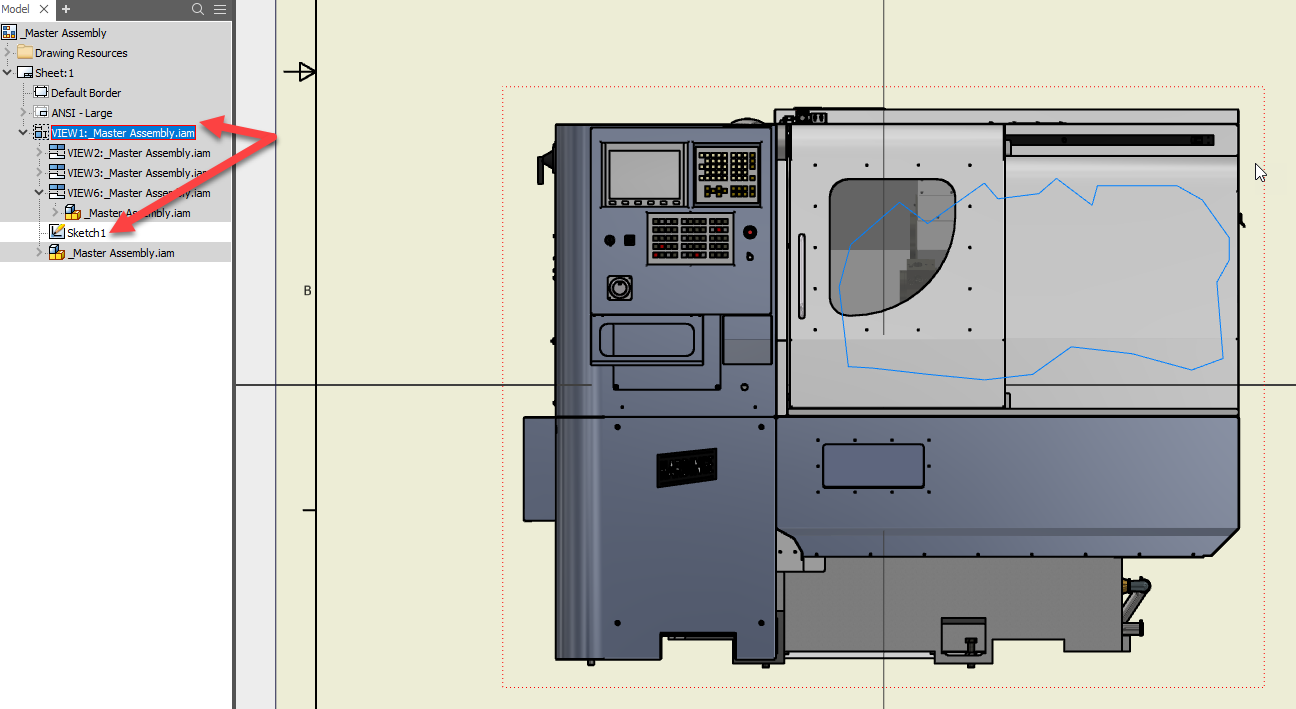
After you have created your base view the first thing you want to do is create a sketch inside of that base you. Make sure that you activate the base view by clicking inside of it then you go to sketch a new sketch. It’s important that the sketch be in the base view at self and not at the sheet level of the drawing.

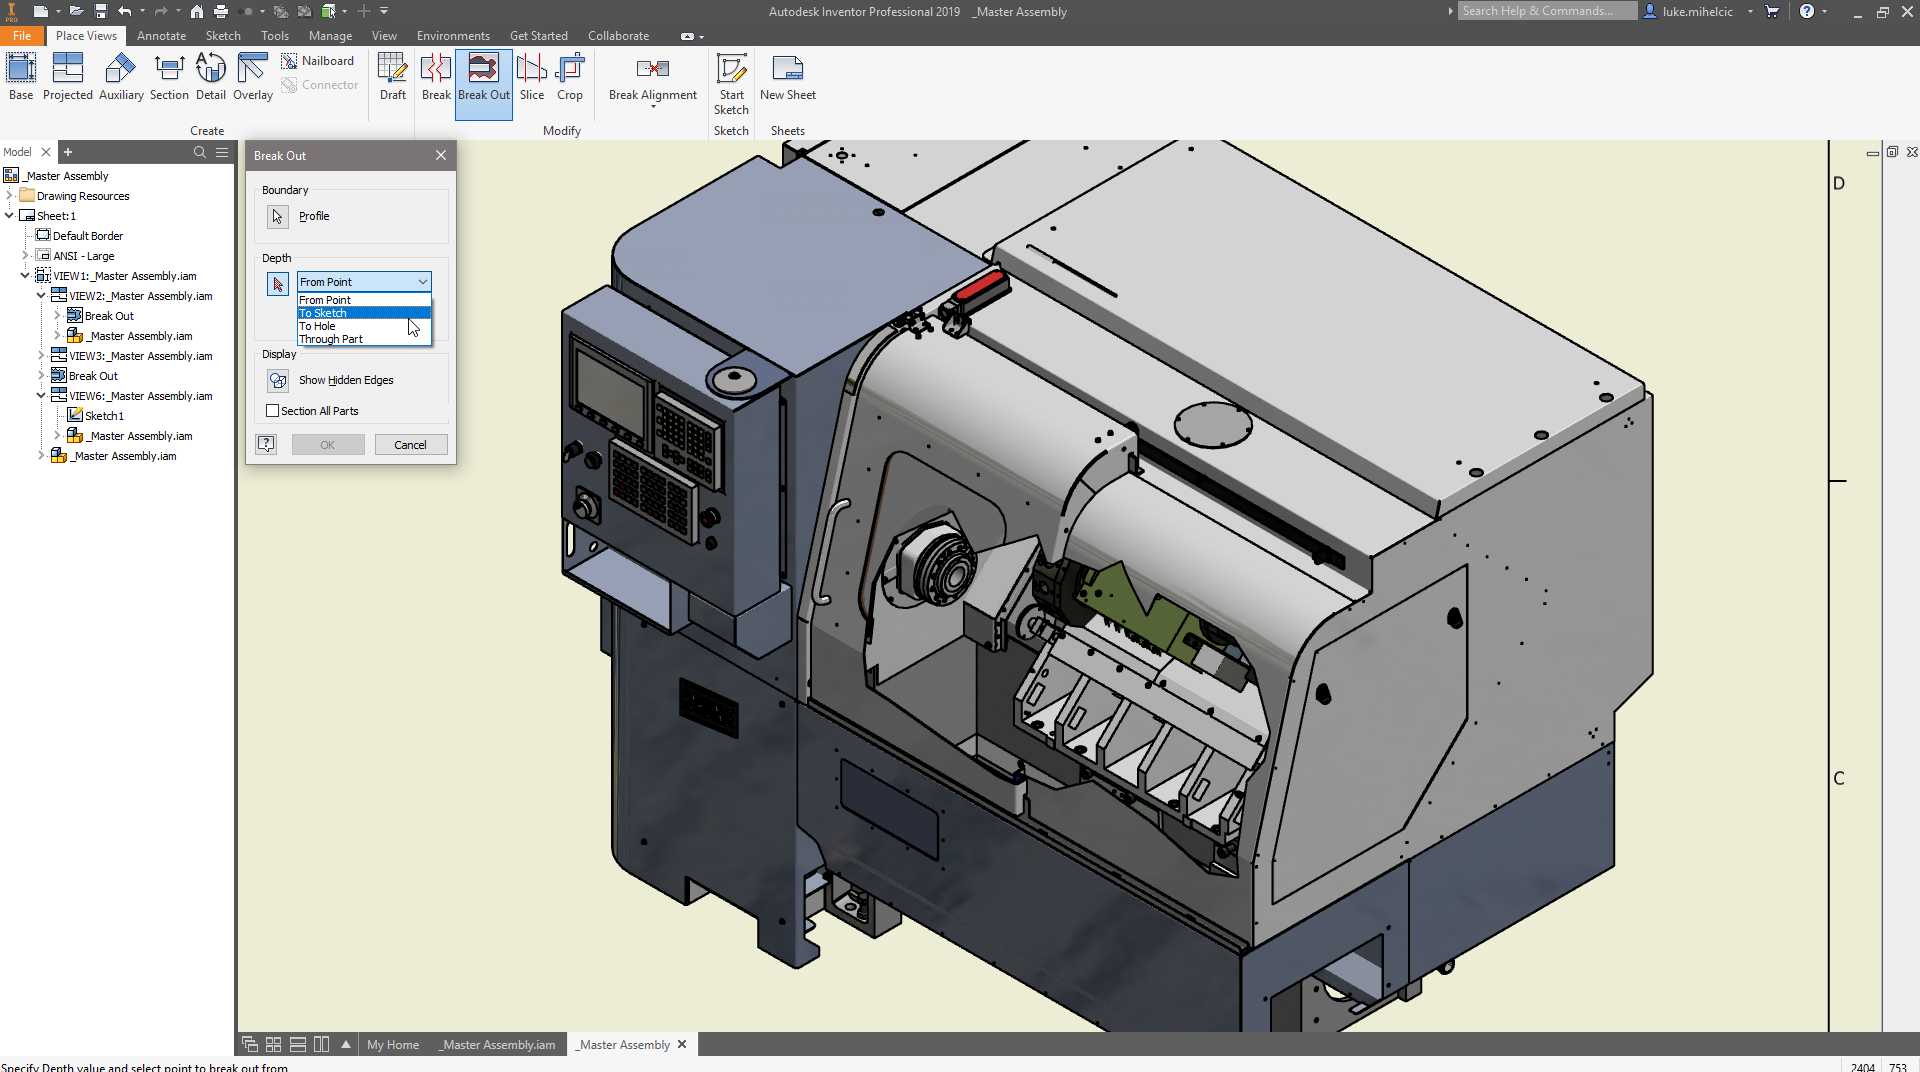
The breakout of you can have any shape and size just make sure it’s closed profile. When you’re done with your sketch finish the sketch and issue the breakout view command. If you did your sketch correctly, it should automatically identify the sketch inside of the view and prompt you to specify the depth. The depth can be specified from a point, a sketch, to a hole and through the part. Through part is the easiest to set up, simply pick the components that you want to breakout view to go through. When setting up the depth from the point, you can use the projected views as your selections.

Breakout views are a great way to show internal detail of parts and assemblies. To learn more about breakout views, take a look at this quick video that will walk you through the steps to create what you see above.
If you’re looking for more help with Autodesk Inventor, please make sure to check out the Autodesk Inventor YouTube channel. If you have more specific questions about Autodesk Inventor, please feel free to reach out to our experts on the Autodesk Inventor forums.
Luke


