Today we will talk about Key components during Vault Server Installation.
First of all:
Pre-checks (Supporting Components)
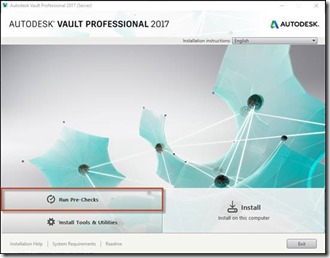
There are a couple of Pre-Checks ongoing before you can install Vault Server. (full list –as mentioned in the previous post – can be found in the help)
Those Pre-Checks can be executed at the very beginning of the Vault installation, so you can check right away if everything is good BEFORE you configure everything. This was a feature we introduced some releases back. In earlier releases, you would have needed to configure each time freshly after you failed the pre-checks.

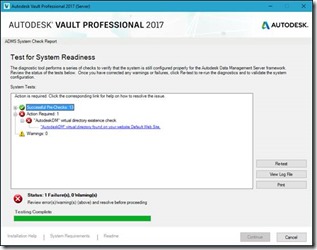
Vault is then verifying your system against the needed pre-requisites for a successful installation.
If something is wrong with the pre-checks, you will be provided a link to the help with the most likely path to resolve the issue.

On the right-hand side, you see the possibilities to print this result, to view the log file or to re-test. Most probably after fixing the issue, so you can directly go forward from here.
It will also check if certain things already exist (like IIS, SQL) and will skip those steps during the installation, as already existing.
Then we continue with the License Agreement
![clip_image002[5] clip_image002[5]](https://blogs.autodesk.com/vault/wp-content/uploads/sites/105/2017/05/6a012877799c1c970c01bb0987045d970d-1.jpg)
On the left-hand bottom, you find in every Installation the links to the Installation Help, System Requirements, and Readme.
Next Step is licensing, where you need to fill in Serial number, Product Key, and your License server.
Product Keys for all Autodesk Products can be found on the Autodesk Homepage (here for 2017 and here for 2018)
![clip_image004[5] clip_image004[5]](https://blogs.autodesk.com/vault/wp-content/uploads/sites/105/2017/05/6a012877799c1c970c01b7c8e3d0ee970b-1.jpg)
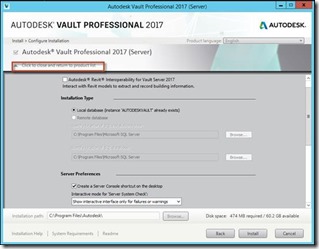
After that, you get the screen for adjusting your installation.
You can expand the selection with the little arrows and select more details.
E.g. if you are using Revit with Vault, you would like to enable Revit Indexing later on for Family Types for Vault, you need to install the Revit Interoperability. If you do not select this you can re-install this also later on.
In the first screen, it is also checking if the database instance is there or needs to be created. In my screenshot, it is already there. As there is already a local instance it will not suggest you the Remote Database option. If you want to do that, but you have a local instance you will need to remove the SQL Server instance first.
Additionally, you see the Server Preferences for the “Server System Check”.

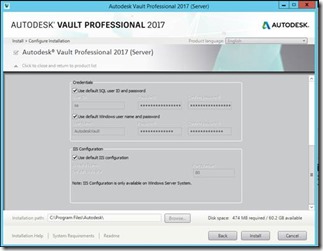
If you scroll further down, you can already change the database user and the windows user for running the Autodesk Vault Application Services. And of course, you can modify the location where you want to install Vault too.

Please find further information in the help.
After hitting the Install button our installer is doing the magic and within some minutes you are all done.
I hope you enjoy Autodesk Vault!
Johannes Bauer
Product Support Specialist
Customer Success Services
