This month, we’ve released some highly requested features that improve usability and standardization efforts when working with issues in BIM 360.
- Issue Templates – helping to standardize how issues are documented across the project, and speeding the issue creation process in the field
- Pin Issues to Location – saving users time by automatically associating a dropped issue pin to a specific location
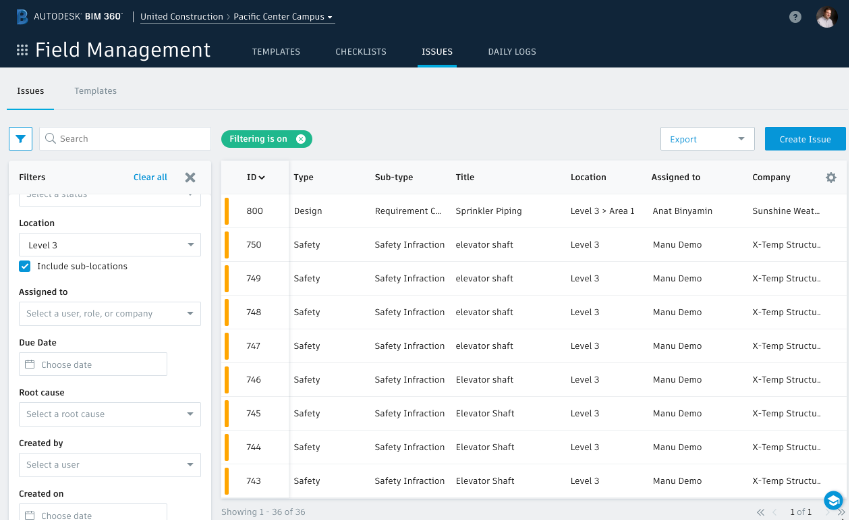
- Sub-Locations on Issue Filtering – adding the option to show locations and sub-locations when viewing a filtered issue list
Each of these enhanced capabilities helps workers in the field and office execute issue workflows more efficiently – speeding issue creation, making it easier to locate issues during site walkthroughs, and ensuring all information is captured to help resolve issues quickly.
Issue Templates
With the introduction of Issue Templates, team members creating issues can choose from a template with pre-populated information — such as who it should be assigned to or when it has to be completed — in seconds and specific fields to fill out.
This brings added value in terms of both productivity on the jobsite through digitization initiatives, plus added ability to use issue data for analytics and continuous improvement — giving teams reporting they can rely on.
Creating & Managing Templates
Creating and managing issue templates can be executed by Project Administrators from either the Field Management or Document Management module in BIM 360. A new templates tab allows you to create or edit issue templates – which are then available for the project.
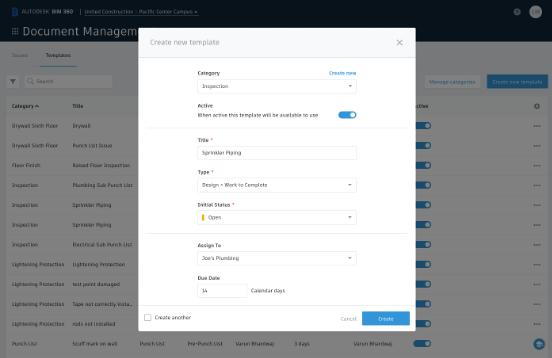
During template creation, administrators can specify fields – including type of work, assignee, time to complete and root cause – that will be automatically filled in when the template is selected during issue creation.
Template creation and management is available to administrators using the Web UI.
Creating issues using templates
Using templates to create issues can be performed by any team member on either a mobile device or the web. Now, with templates available, a user simply selects “Start from a template” when creating an issue and the pre-defined information is pre-filled.
All other issue detail information specified by issue type – including the ability to add photos, attachments, comments and custom fields – remains available in the issue creation dialog.
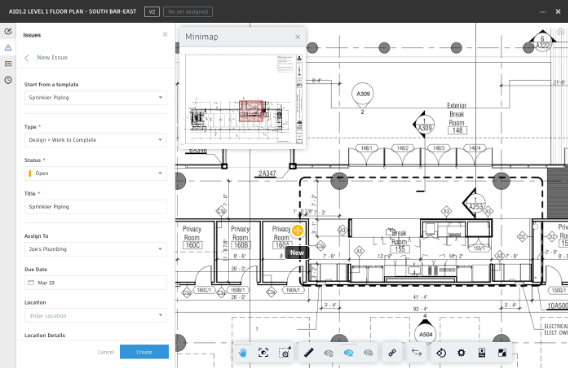
By creating and using templates for trades, punch list walkthroughs, inspections and other repeatable workflows, the way that issues are documented gets standardized across the project team and users benefit from reduced manual entry.
Pin Issues to Locations
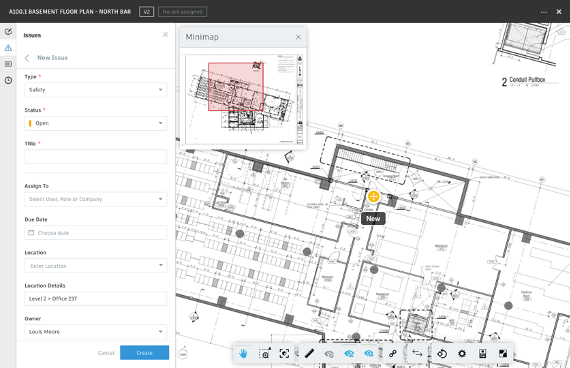
Pin Issues to Locations builds upon the idea of automatically filling in issue details automatically. Based on the location breakdown structure set configured in Project Administration, BIM 360 can now automatically fill in the location detail for an issue when a pin is dropped on a drawing or model.
This saves users time during issue creation, while leading to more accurately reported data since there is less risk of human error.
Defining Location Areas
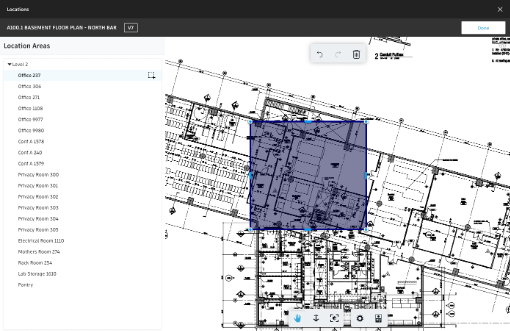
Project admins can define areas on drawings or models by linking files from the Plans folders to locations, and to define specific locations by drawing an area.
Creating Issues
With these locations and areas defined, when an issue is created and a pin dropped on a drawing or model, the location details of that issue is automatically populated.
Filter Issue Locations, including Sub-Locations
We released this feature a few weeks ago in order to improve the way that project teams can view issues that need attention in a certain area of a project. On the web, issues can be filtered by a number of attributes, including location.
Previously, you could only filter by choosing a specific location – whether that was a top-level location (like Level 3) or specific sub-location (like Level 3 > Area 1). With this new enhancement, a checkbox can be selected in the filter tool to show sub-locations when a location filter is selected. With this checkbox selected, both the Location and Sub-Location are shown in the issue list. This makes it much easier to identify the location of issues.
