3D PDF export out of Inventor was one of the most popular IdeaStation requests. This new functionality allows you to not only export a 3D PDF but also customize the format, choose what properties to show and even attach relevant files such as spec sheets or neutral files. The following will walk you through the steps to create your very own 3D PDF.
Check out 3D PDF in action:
Step #1
Open an awesome model that you want to export.
Step #2
Setup or leverage the representation you want to use in your 3D PDF.
Step #3
Choose the properties, design view representations, visualization quality and what entities you want to export.
Step #4
Select the template you want to use and where you want to save your 3D PDF. (we will cover creating custom templates in another tutorial blog post)
Step #5
If you choose, you can generate and attach a STEP file automatically during the 3D PDF creation process.
Step #6
And last but not least you can attach any file to your 3D PDF. These could be DWG files, spec sheets, images whatever you need to help communicate your design.
Now that you’re in the 3D PDF, let’s take a look around…
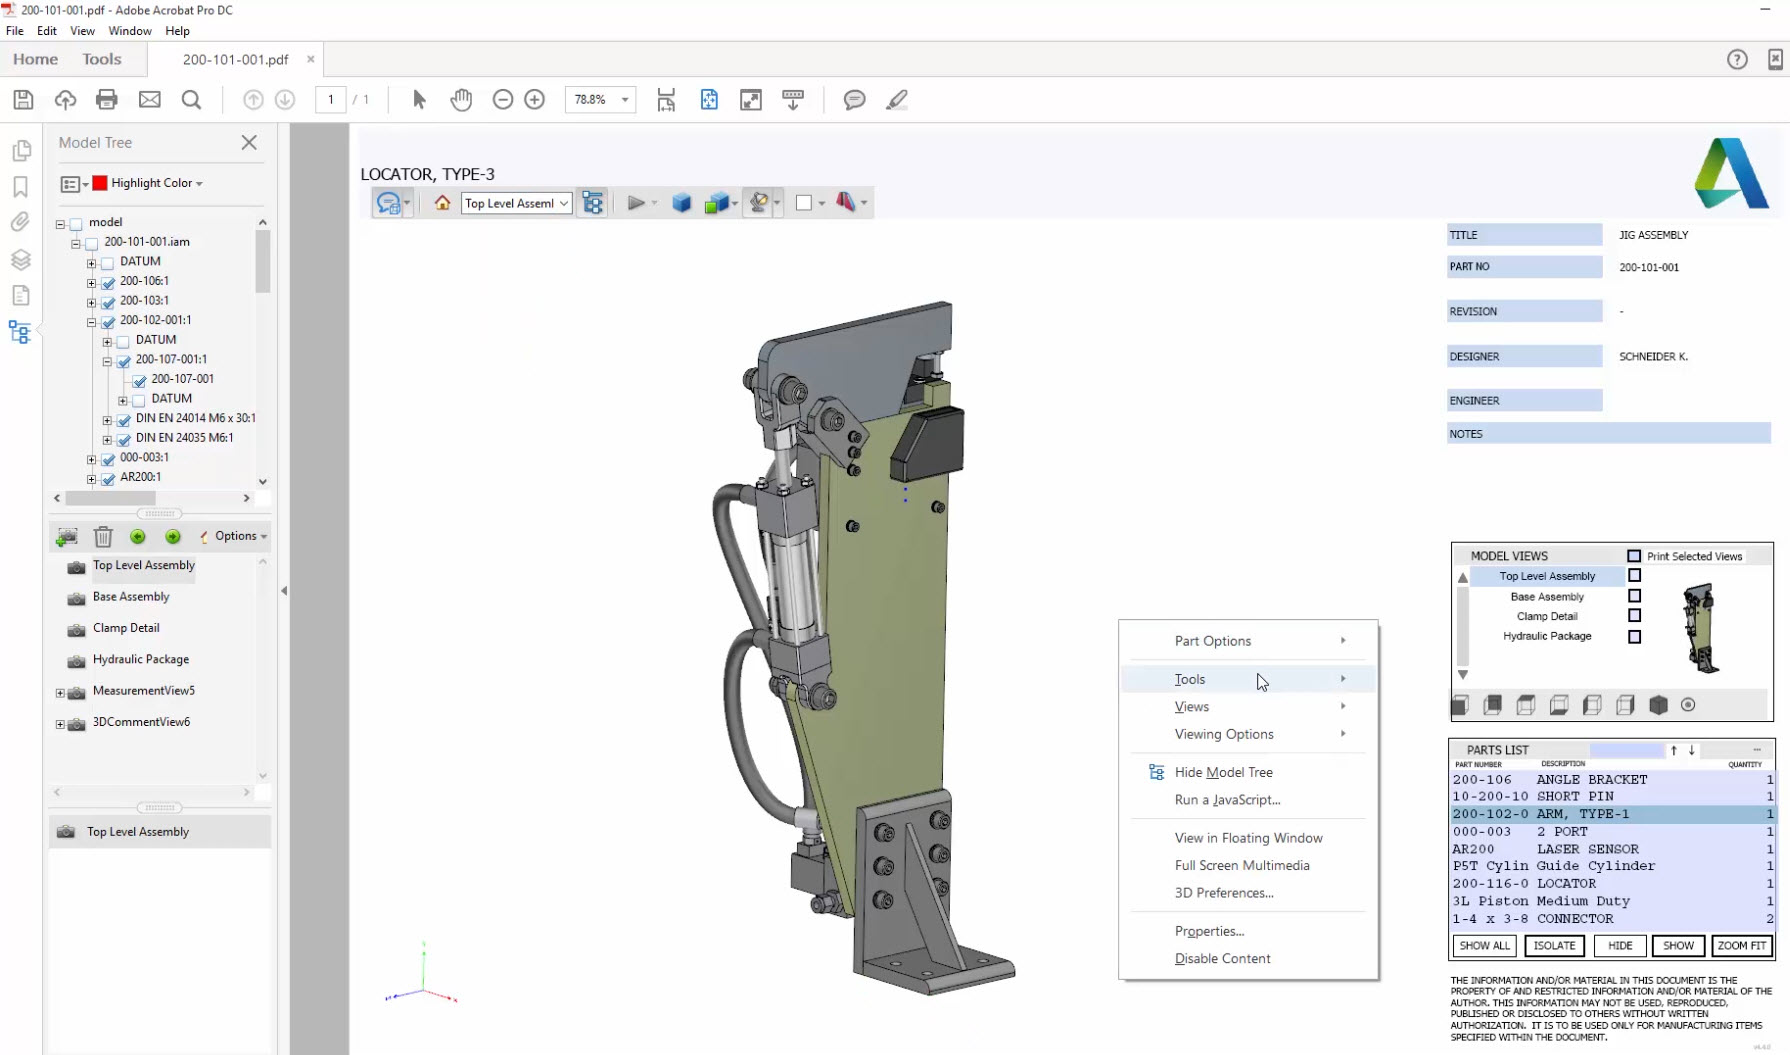
In the upper right hand corner you can access all of the representations you setup in your model. Since this is a 3D PDF you can zoom, pan and rotate similar to how you would in Inventor. As a matter of fact your 3D motion controller should work for an even better experience. In the lower right hand corner you can access the full parts list and isolate, hide and zoom to any selected component. You can also view the full model tree to access parts and assemblies. Right click in the graphics window to access measure and annotation tools. You can also select components and view the properties. 3D PDFs provide a powerful way to collaborate in an industry standard format inside and outside your organization.
For more information about all new features in Inventor 2017 check out the what’s new page: http://www.autodesk.com/campaigns/inventor


