The Secrets of Lofting | Get Smart with Inventor Part Modelling 03

Tutorials
Secrets of Lofting | Get Smart with Inventor Part Modeling 03

Click her to read post 02 of this series, we found out when we should create a swept shape, and when we need to move on to the Loft command.

In this post, we’ll learn the Secrets of Lofting and how to get the best out of the loft command in Autodesk Inventor.
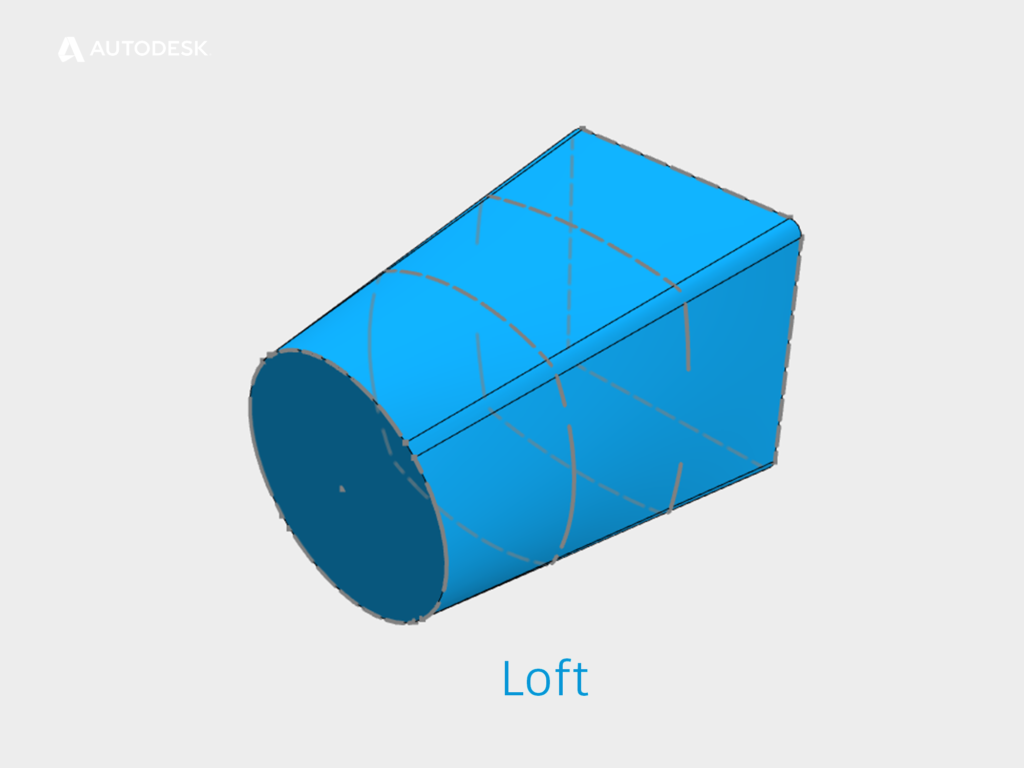
An example of a lofted shape in Autodesk Inventor

A Lofted shape

What does the Loft command do?

The Loft command creates a shape that is a smooth transition between two or more profiles.

Because the loft command can ‘warp’ the surface that it creates, we can set boundary conditions to maintain curvature continuity (Click here to read Part 01 for a definition of curvature continuity).

What is the difference between a Guide Rail and a Centreline?

A guide rail is doing the same job as a profile. The shape that we create is being ‘pulled’ toward the guide rails. We can have as many guide rails as we need.

A centreline behaves in a very similar way to a Sweep path. ASM will create intermediate profiles which will be perpendicular to the centreline. The profiles will follow the path, instead of being ‘pulled’ toward it.

Examples lofting with guide rail and lofting with centerline in Autodesk Inventor

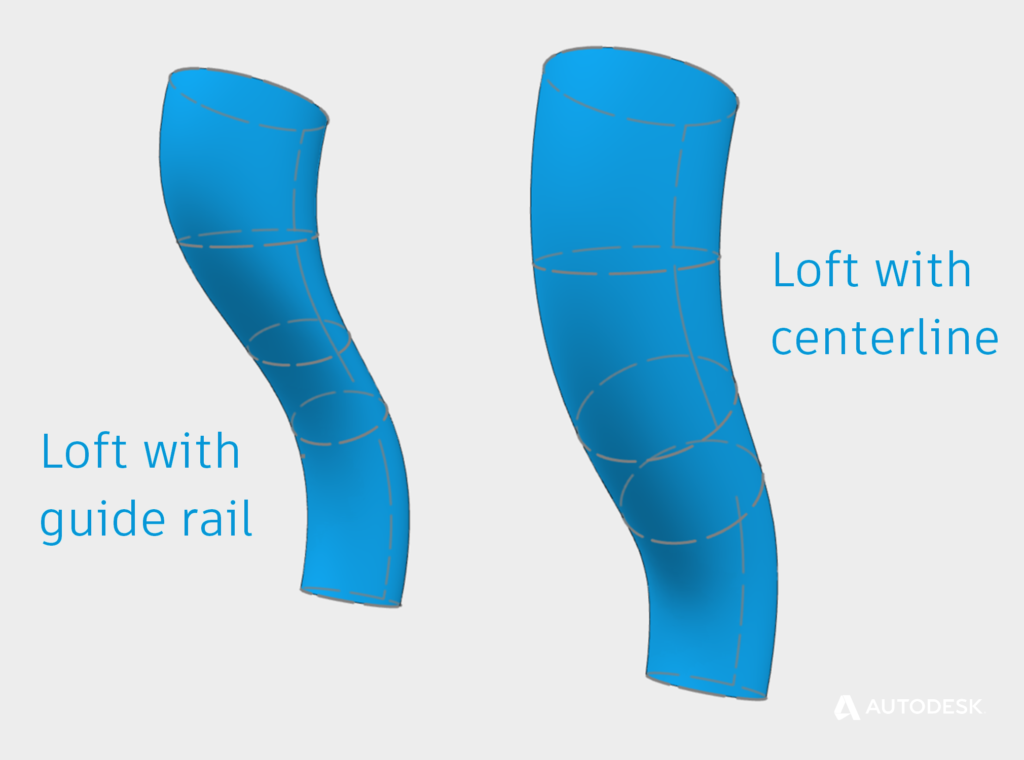
Lofting with Guide Rail Vs Lofting with Centerline

When would I use a Centreline loft, instead of Guide rails?

A centreline loft with a pair of profiles will give you a naturally smooth transition. If you are struggling to get what you need from a rail loft, try centreline instead.

When SHOULDN’T I use a Loft?

Lofts can be created from sketches, faces, and points as inputs, but they are limited to a minimum of two profiles.

What if we want to create a surface using only one input? Maybe it’s time to learn about Patch?

What’s the difference between a Loft and a Patch? | Get Smart with Inventor Part Modelling 04

Click this link for part four of ‘Get Smart with Inventor Part Modelling,’ in which we will take a closer look at how Autodesk Inventor’s 3D modeling tools work under the hood, and you’ll learn when to use the Loft command and when to use the Patch command.

This blog post is based on an Autodesk University class, originally by Jake Fowler and later updated by Inderjeet Wilkhu and Paul Munford. You can watch a recording of the class, and download a handout that goes with this presentation from the Autodesk University website here:
Autodesk University Online: The Inventor 7 Deadly Sins of 3D Part Modeling

Paul Munford Author of 'Get smart with Inventor Part modelling'


Paul Munford

Paul Munford is a laugher, dreamer, raconteur, CAD geek and Industry Marketing Manager for Autodesk in the UK. Paul's background in manufacturing items for the construction industry gives him a foot in digital prototyping and a foot in Building Information Modeling (BIM). Paul was a speaker at Autodesk University for the first time in 2012, and he says it's the most fun anyone can have with 250 other people in the room.

Related Articles

______
icon-svg-close-thick

Cookie preferences

Your privacy is important to us and so is an optimal experience. To help us customize information and build applications, we collect data about your use of this site.

May we collect and use your data?

Learn more about the Third Party Services we use and our Privacy Statement.

Strictly necessary – required for our site to work and to provide services to you

These cookies allow us to record your preferences or login information, respond to your requests or fulfill items in your shopping cart.

Improve your experience – allows us to show you what is relevant to you

These cookies enable us to provide enhanced functionality and personalization. They may be set by us or by third party providers whose services we use to deliver information and experiences tailored to you. If you do not allow these cookies, some or all of these services may not be available for you.

Customize your advertising – permits us to offer targeted advertising to you

These cookies collect data about you based on your activities and interests in order to show you relevant ads and to track effectiveness. By collecting this data, the ads you see will be more tailored to your interests. If you do not allow these cookies, you will experience less targeted advertising.

icon-svg-close-thick

THIRD PARTY SERVICES

Learn more about the Third-Party Services we use in each category, and how we use the data we collect from you online.

icon-svg-hide-thick

icon-svg-show-thick

Strictly necessary – required for our site to work and to provide services to you

Qualtrics
W
Akamai mPulse
W
Digital River
W
Dynatrace
W
Khoros
W
Launch Darkly
W
New Relic
W
Salesforce Live Agent
W
Wistia
W
Tealium
W
Upsellit
W
CJ Affiliates
W
Commission Factory
W
Google Analytics (Strictly Necessary)
W
Typepad Stats
W
Geo Targetly
W
SpeedCurve
W
Qualified
#

icon-svg-hide-thick

icon-svg-show-thick

Improve your experience – allows us to show you what is relevant to you

Google Optimize
W
ClickTale
W
OneSignal
W
Optimizely
W
Amplitude
W
Snowplow
W
UserVoice
W
Clearbit
#
YouTube
#

icon-svg-hide-thick

icon-svg-show-thick

Customize your advertising – permits us to offer targeted advertising to you

Adobe Analytics
W
Google Analytics (Web Analytics)
W
AdWords
W
Marketo
W
Doubleclick
W
HubSpot
W
Twitter
W
Facebook
W
LinkedIn
W
Yahoo! Japan
W
Naver
W
Quantcast
W
Call Tracking
W
Wunderkind
W
ADC Media
W
AgrantSEM
W
Bidtellect
W
Bing
W
G2Crowd
W
NMPI Display
W
VK
W
Adobe Target
W
Google Analytics (Advertising)
W
Trendkite
W
Hotjar
W
6 Sense
W
Terminus
W
StackAdapt
W
The Trade Desk
W
RollWorks
W

Are you sure you want a less customized experience?

We can access your data only if you select "yes" for the categories on the previous screen. This lets us tailor our marketing so that it's more relevant for you. You can change your settings at any time by visiting our privacy statement

Your experience. Your choice.

We care about your privacy. The data we collect helps us understand how you use our products, what information you might be interested in, and what we can improve to make your engagement with Autodesk more rewarding.

May we collect and use your data to tailor your experience?

Explore the benefits of a customized experience by managing your privacy settings for this site or visit our Privacy Statement to learn more about your options.