Five Autodesk Inventor iLogic productivity hacks for non-programmers
‘Yeah—that can probably be done with iLogic.’
Did you ever hear this and wonder—HOW?
iLogic in Autodesk Inventor is a rule engine that utilizes the intelligence already built into your design to create a configurable model or automate your processes.
iLogic is designed for individuals unfamiliar with computer programming, but getting started can still be daunting.
In this series of posts, I will give you five iLogic productivity hacks—easy examples that will help you get started with iLogic.
This content was originally presented as a hands-on Lab at AU 2023. You can download a handout, presentation, dataset, and videos of the demonstrations from the AU class page:
IM602043-L Five Autodesk Inventor iLogic productivity hacks for non-programmers! [Lab][PM2]
Why you should add an input form, using Inventor iLogic.
Have you ever opened a part file for editing and thought, “Errrguh! Where do I even start?”
It may have been modeled by a colleague. It might be a part YOU modeled months ago, and you’ve forgotten what you were thinking (we’ve all been there).
No wonder we resort to direct editing or give up and remodel parts from scratch.
Building a part with clear design intent can save us hours fighting with—or even rebuilding—a model. But communicating design intent can be even more important. How can we leave instructions in a part file to say:
“How have I designed this model to change? Let me show you!”
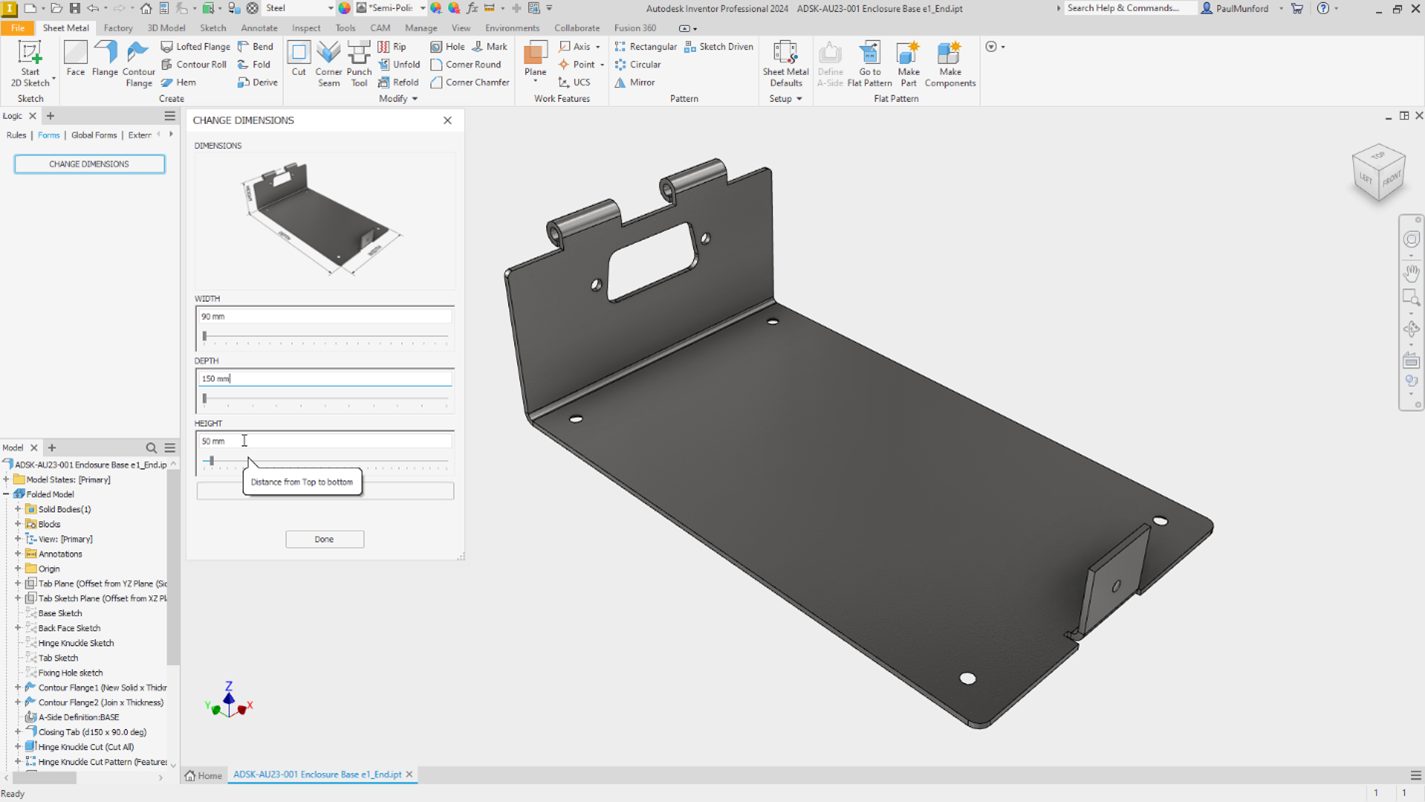
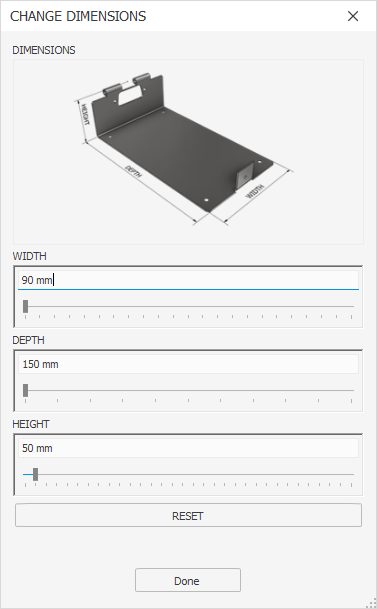
By adding an iLogic form to a parametric part model, we can easily communicate design intent. We can make it clear exactly which parameters should be changed and by how much, and indicate what the effect on the design will be.
How to add an input form, using Inventor iLogic.
If you want to follow along, click here to download the example dataset and demo video.
- In the iLogic browser, LMB click on the ‘Forms’ tab.
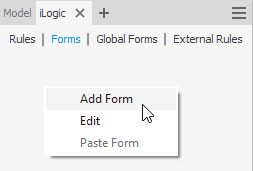
- RMB click anywhere in the iLogic browser, and choose ‘Add Form’.
- The iLogic form editor will open, along with a preview of the new form.
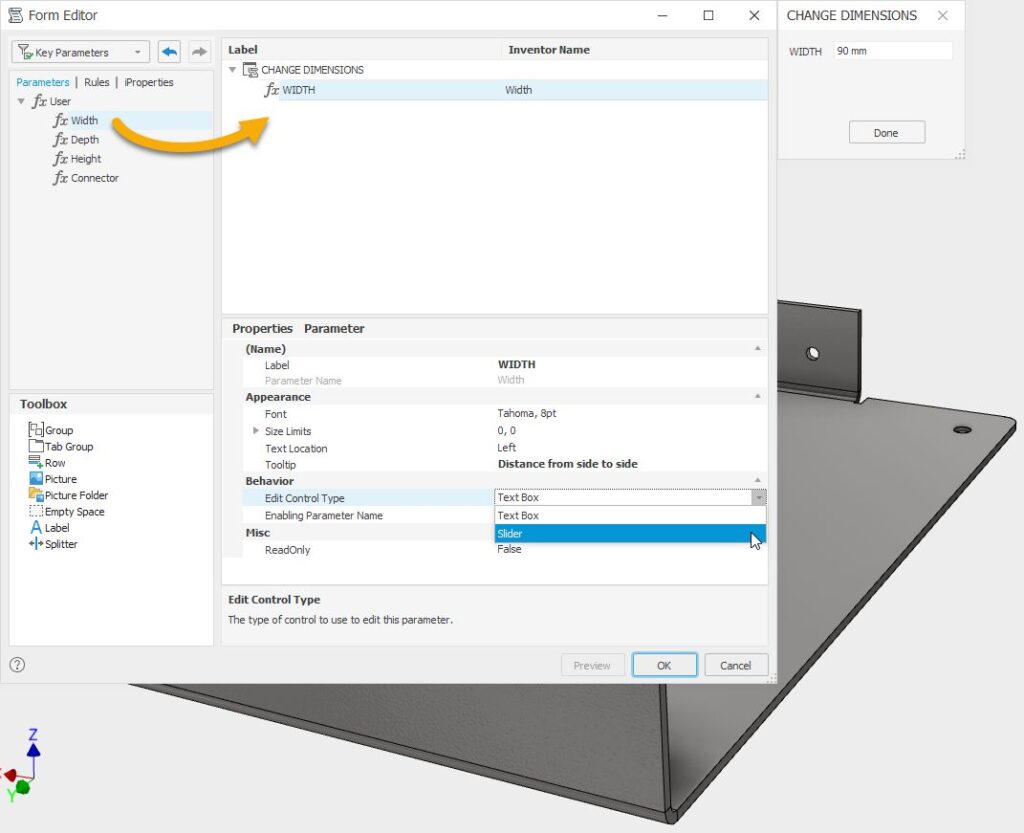
To add controls to the form, drag and drop from the Parameters section on the left, to the form building area on the right. You’ll see the form preview update as you work.
You can change the form control type from a simple input box to other types such as a radio control or slider, or limit the inputs to help control the design intent.
You can even add an image to the form to better communicate how your model is designed to change and anticipate how the controls on the form will change the model.
Tip: iLogic forms and rules are typically saved in the file you are working in, meaning the changes you’ve made aren’t saved until you save the open file. When working on your own iLogic projects, save your files regularly to save the changes to your iLogic Rules and Forms—or explore external Rules.
That was fun! What can I learn about iLogic next?
There are five block posts in this series. Read them all!
- Use an iLogic form to communicate design intent.
- Create a simple iLogic rule to check data compliance.
- Use iLogic for Top-down design
- Use iLogic for Assembly configurations
- Use an iLogic form to standardize drawing title blocks.
Click here to download step-by-step instructions, dataset, and demo videos.
How can I find out more about Inventor iLogic?
AU (Autodesk University) is Autodesk’s flagship customer event, but the learning doesn’t stop when the in-person event is over. On AU Online, you can find on-demand class videos, handouts, and data sets, so you can enjoy learning from industry experts, partners, and your peers the whole year round—it’s all free, no log-in required.
To help you find the product design and engineering content you need, we’ve created a landing page that curates design and engineering content from AU specifically for you.

