While translating a 2D style into a 3D world for the 2024 role-playing game ‘Granblue Fantasy: Relink,’ video game development studio Cygames used unique modeling tools and techniques within a larger suite of animation solutions, perfecting a highly-stylized and immersive look.
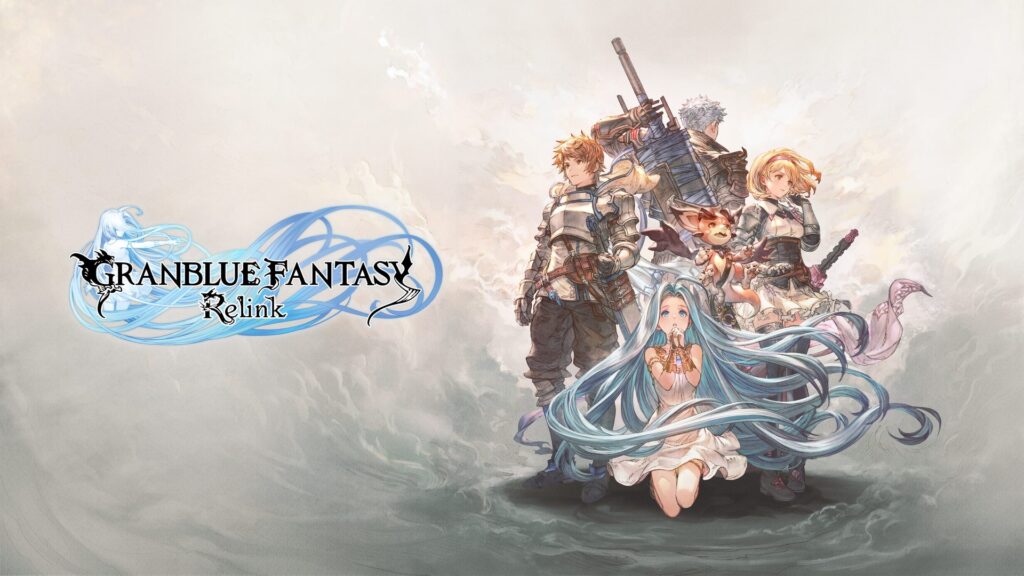
Translated from Japanese. Read the original story in Japanese here.
‘Granblue Fantasy: Relink’ set sail for PlayStation®5, PlayStation®4, and PC on February 1, 2024—the ambitious action RPG sought to transform the fantasy world of the hit mobile RPG ‘Granblue Fantasy,’ which boasts over 37 million registered users, into a fully-realized 3D environment from its 2D origins.
The game is a dream come true for fans of the franchise, whose characters have come to life, employing a variety of weapons and magic to face off against fearsome monsters.
Widely praised for its dynamic combat and stunning cutscenes, Relink was born out of Cygames’ aim to recreate the original 2D style in a 3D project with as little compromise as possible. We took a behind-the-scenes look at Cygames’ development process, which leverages Autodesk solutions such as Maya and MotionBuilder to captivate the hearts of Granblue fans and elevate the game’s storytelling to the next level.
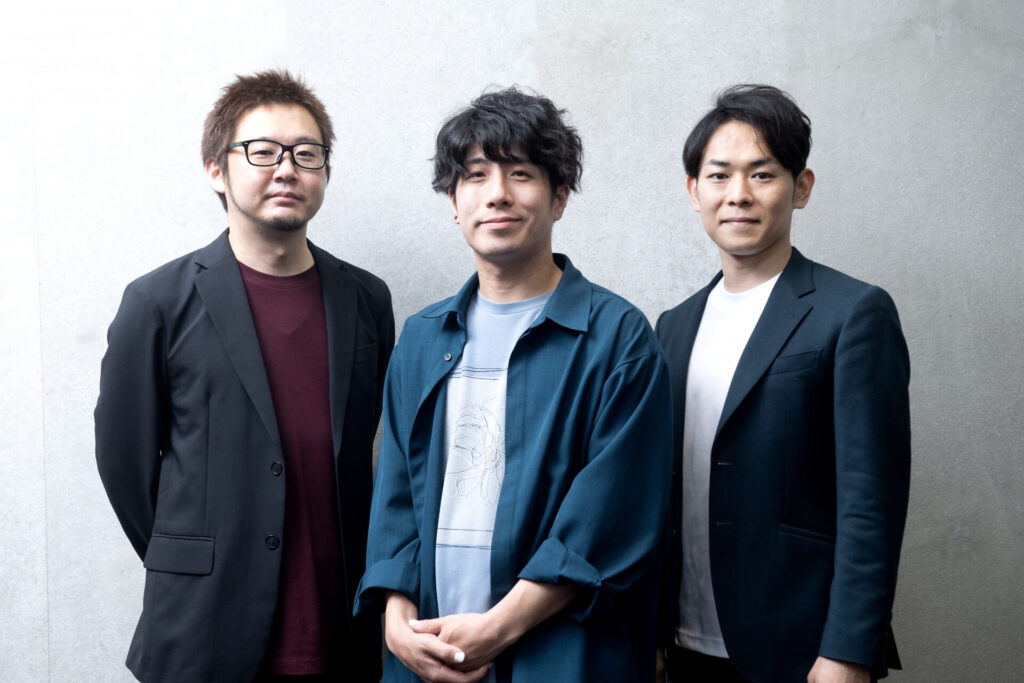
We sat down for an interview with the following members of the development staff at Cygames:
Senior Character Model Artist: Mr. Tanaka
Lead Character Animator: Mr. Yasui
Lead Rigging & Simulation Artist: Mr. Kanda
Lead Facial Animation Artist: Mr. Shiba (not pictured)
A creative approach to rendering 2D ideas on 3D models
The world of ‘Granblue Fantasy’ has evolved since its debut in 2014, presenting its iconic characters in a variety of media—including anime, fighting games, and 3D/live cross-reality concerts.
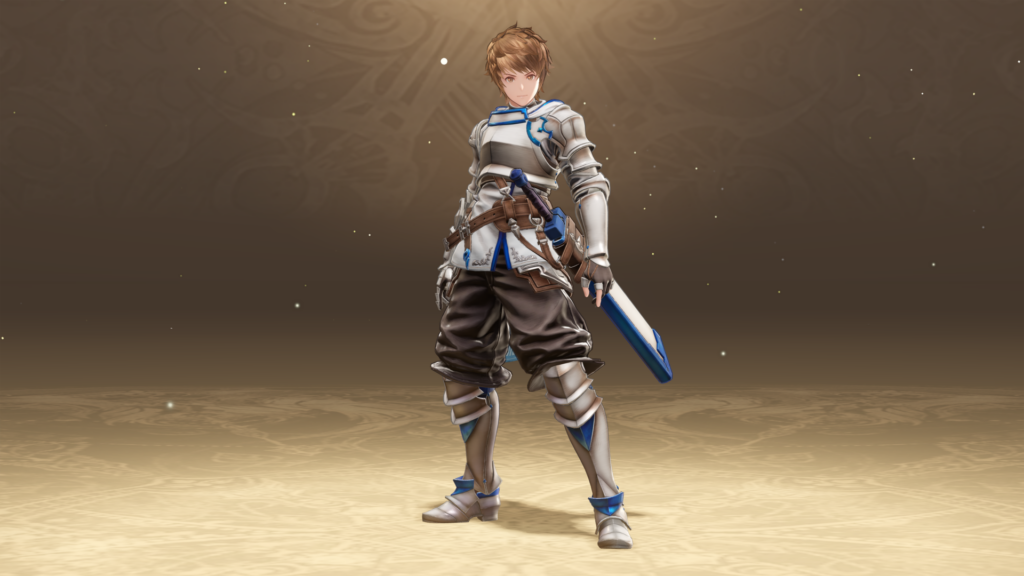
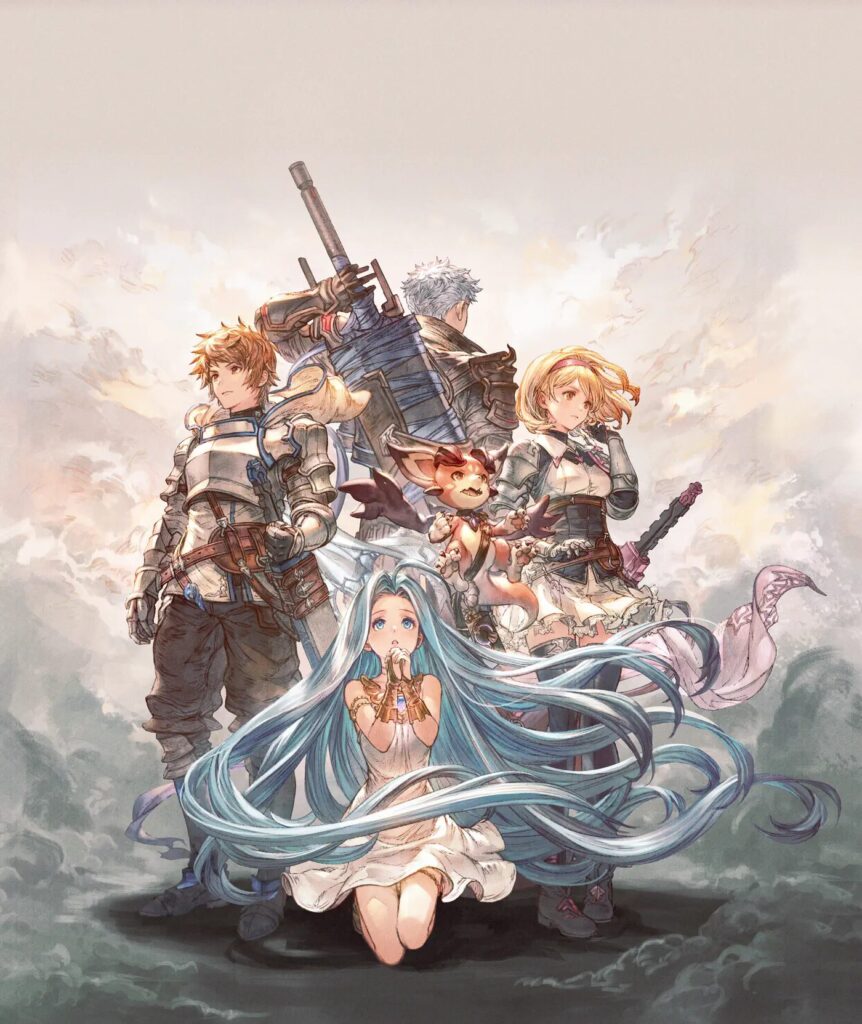
Long-time fans of the franchise will feel a sense of familiarity with the original character visuals thanks to the unique, recognizable character art style featured throughout the new installment.
_立ち絵_231101最新-1-852x1024.png)
_立ち絵_231101最新-1-852x1024.png)
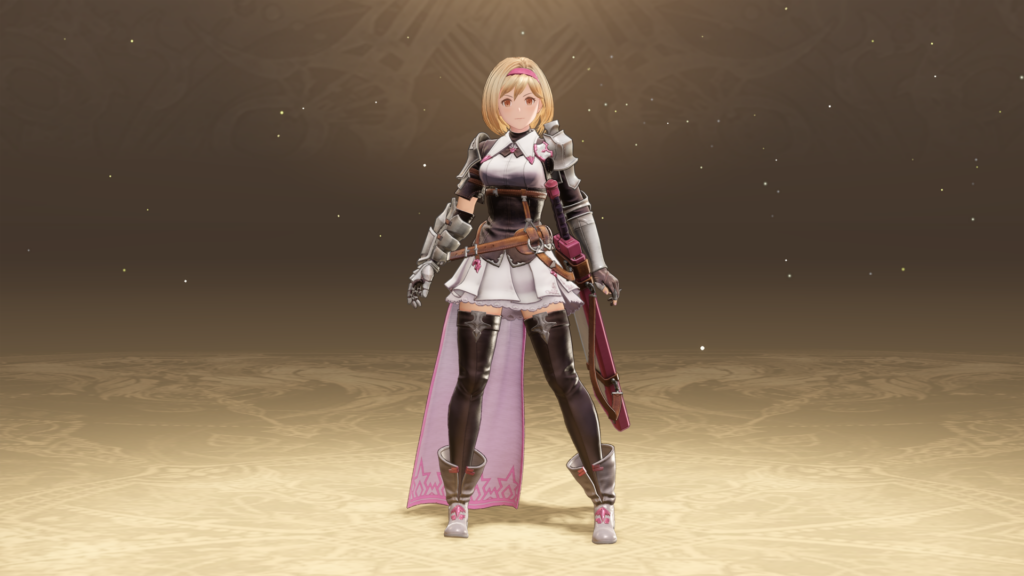
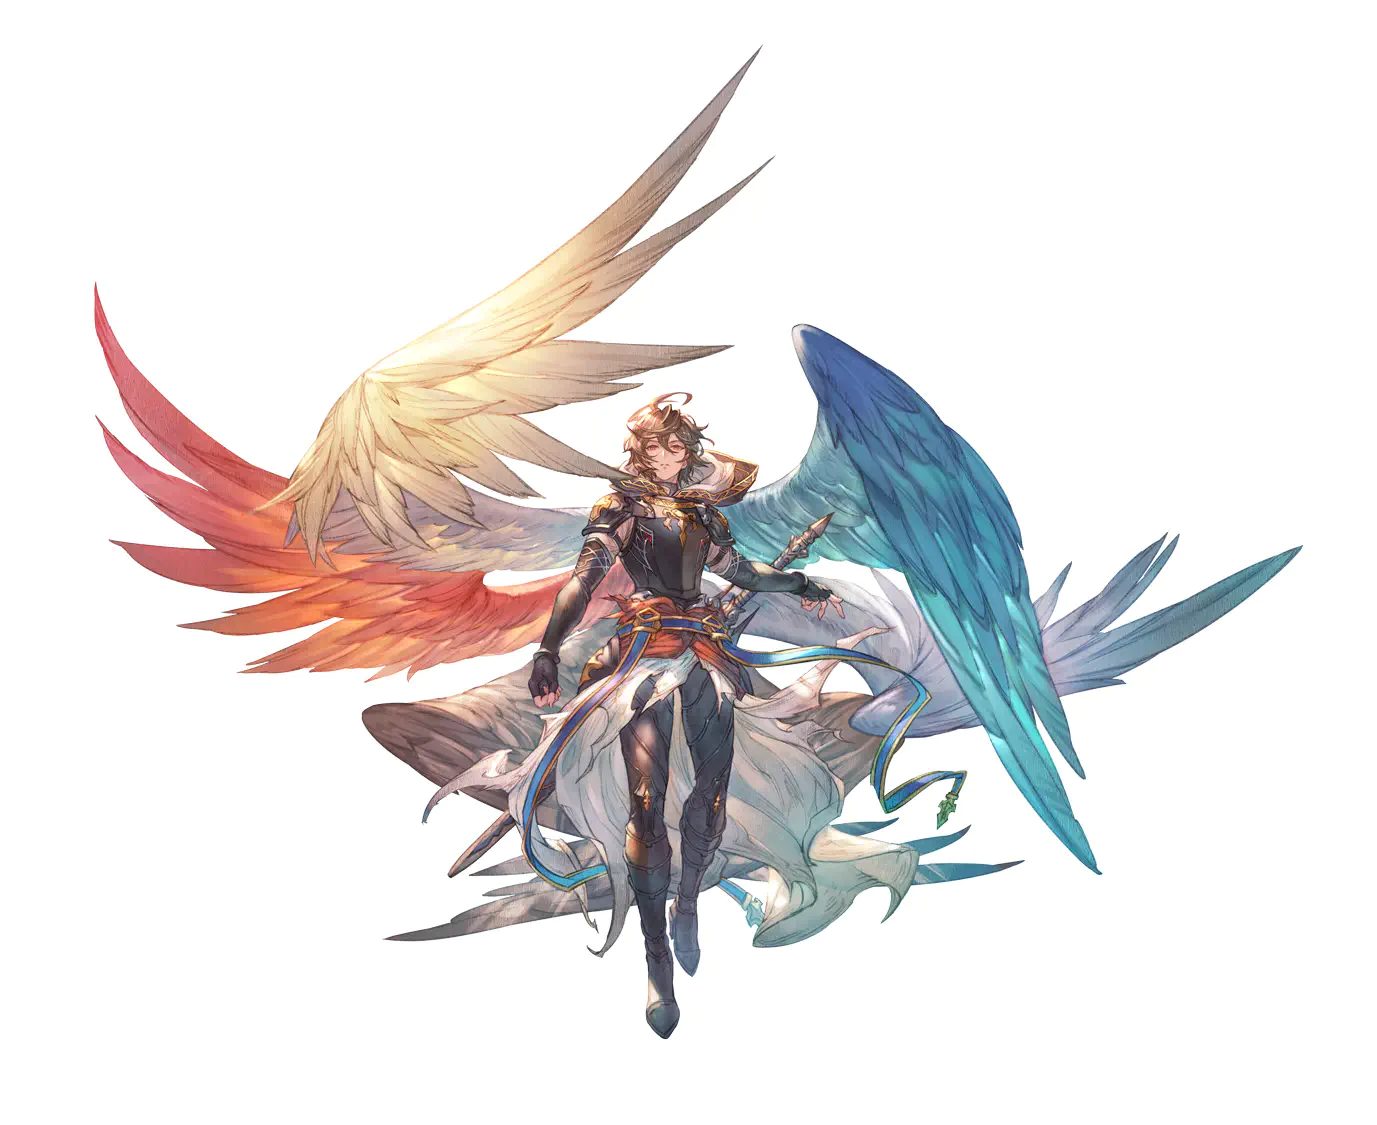
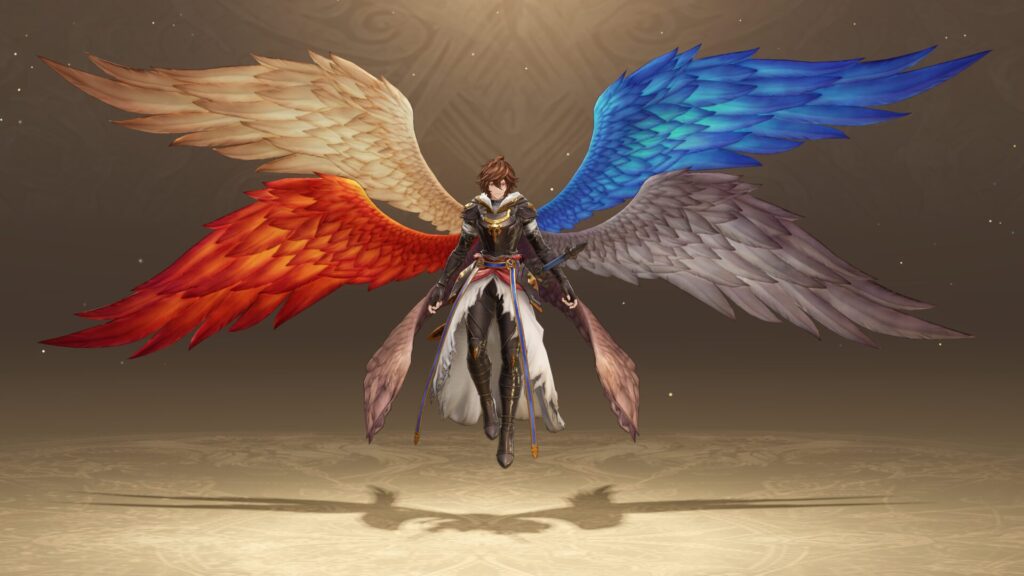
In Relink, players traverse through an adventure in a 3D world that keeps true to Granblue Fantasy’s iconic art style.
“We meticulously studied the source material to ensure that the characters retained their defining traits from every angle in a realistically proportioned 3D form. This involved collaboration between directors, planners, and engineers,” said Lead Character Animator Yasui.

Lead Facial Animation Artist Shiba emphasized the importance of always keeping the 2D-to-3D reproduction goal in mind when talking about crafting facial expressions.
“But our approach didn’t stop there—we were mindful of illustrating elements unique to the hand-drawn art, such as the lines around the corners of the mouth and subtle facial muscles, in a 3D environment—qualities that aren’t easily conveyed through simple lines.”
In this process, creating a 3D character with realistic proportions often involves emphasizing or incorporating certain elements of the original 2D visuals, such as color balance and spatial volume, in 3DCG.
“We opted for a toon-like finish, enhancing details to enrich their representation in 3D,” explained Senior Character Model Artist Tanaka.
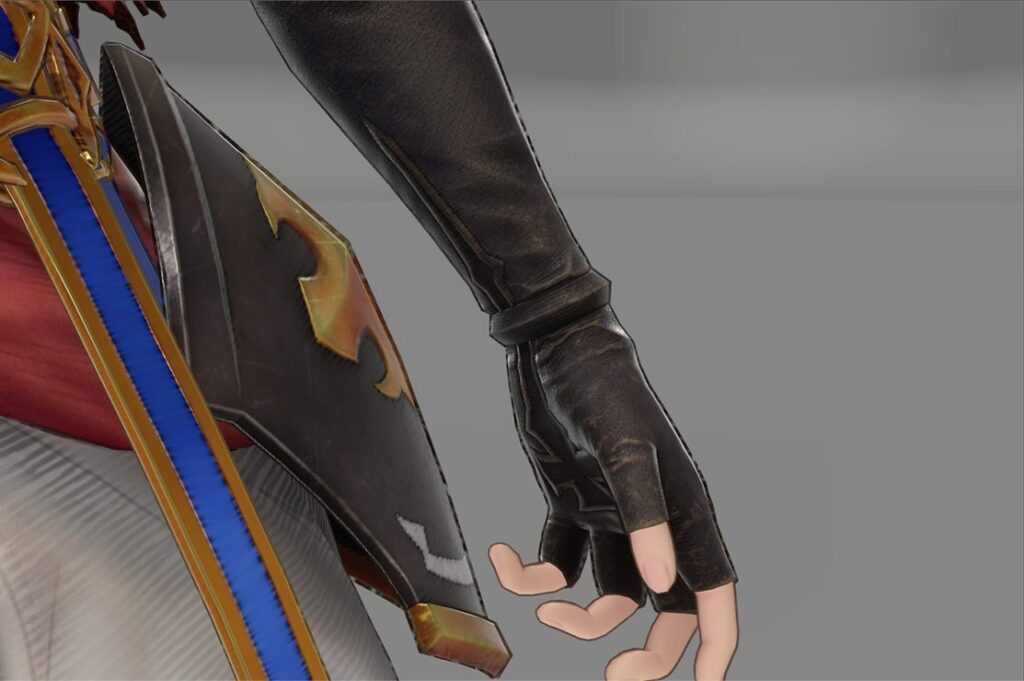
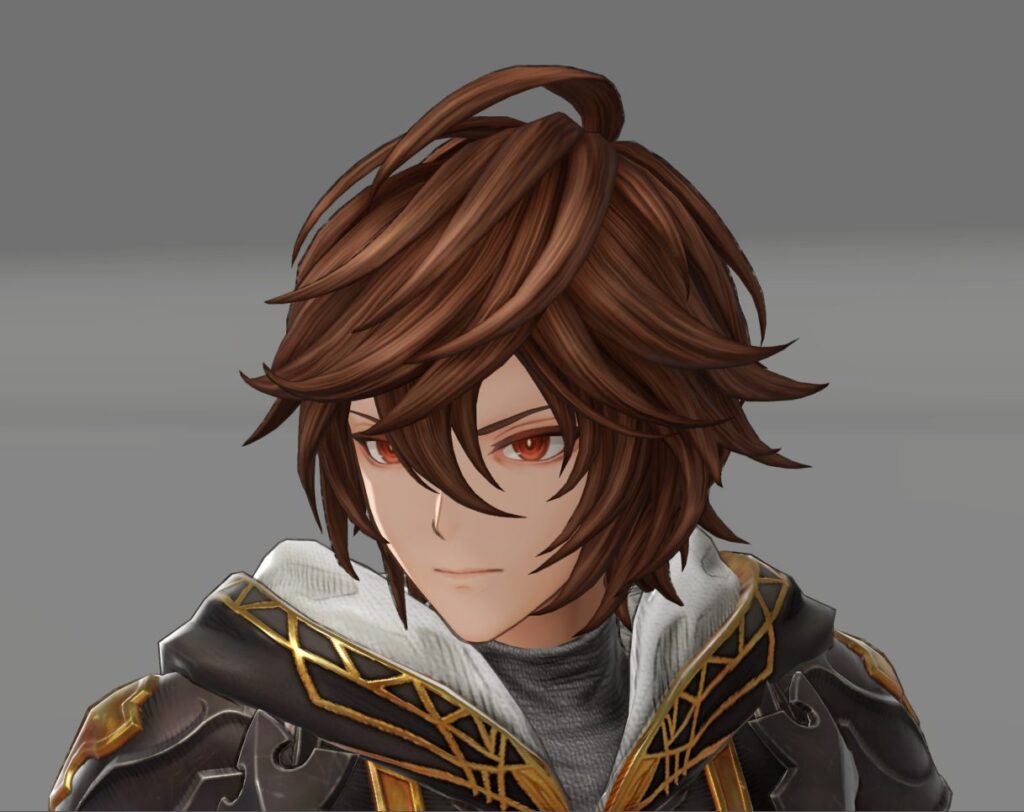
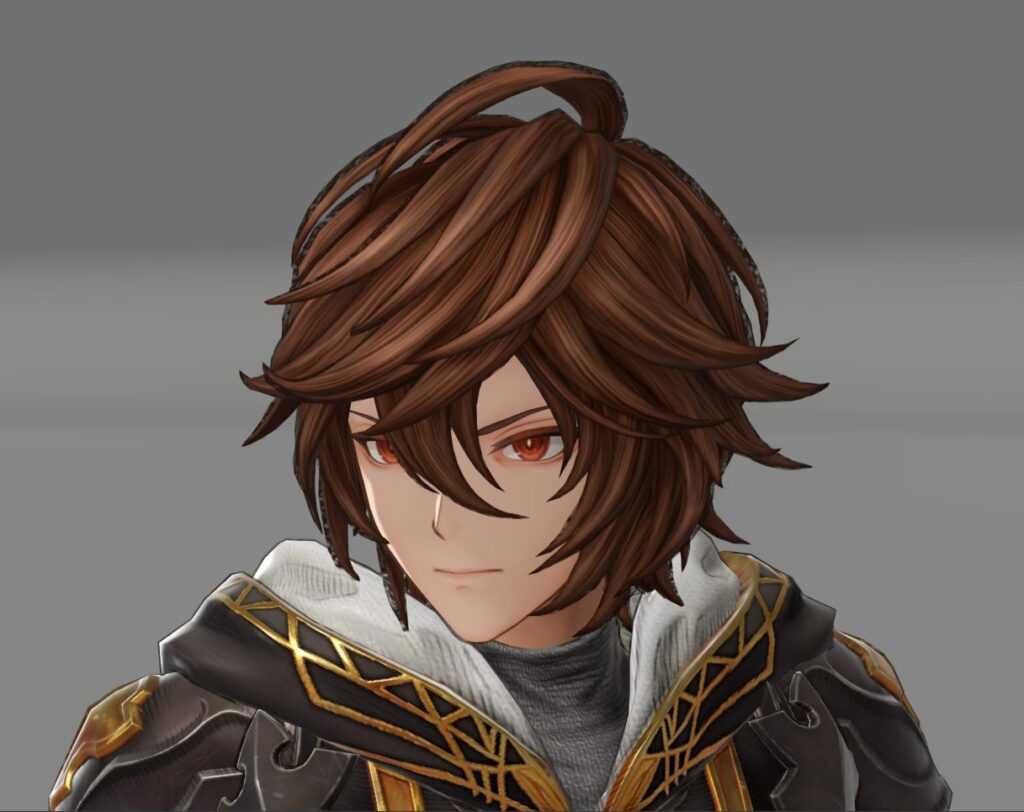
As an example of creating this intersection between the 2D and 3D styles, the distinctive character outlines from ‘Granblue Fantasy’ are rendered using mask maps, defining the strength of the lines from a range of 0 to 1.
“The thickness of the outlines is carefully adjusted for each part of a character’s design to represent their artwork from the original game,” said Tanaka.
Example of adding dynamic outlines in a DCC tool:
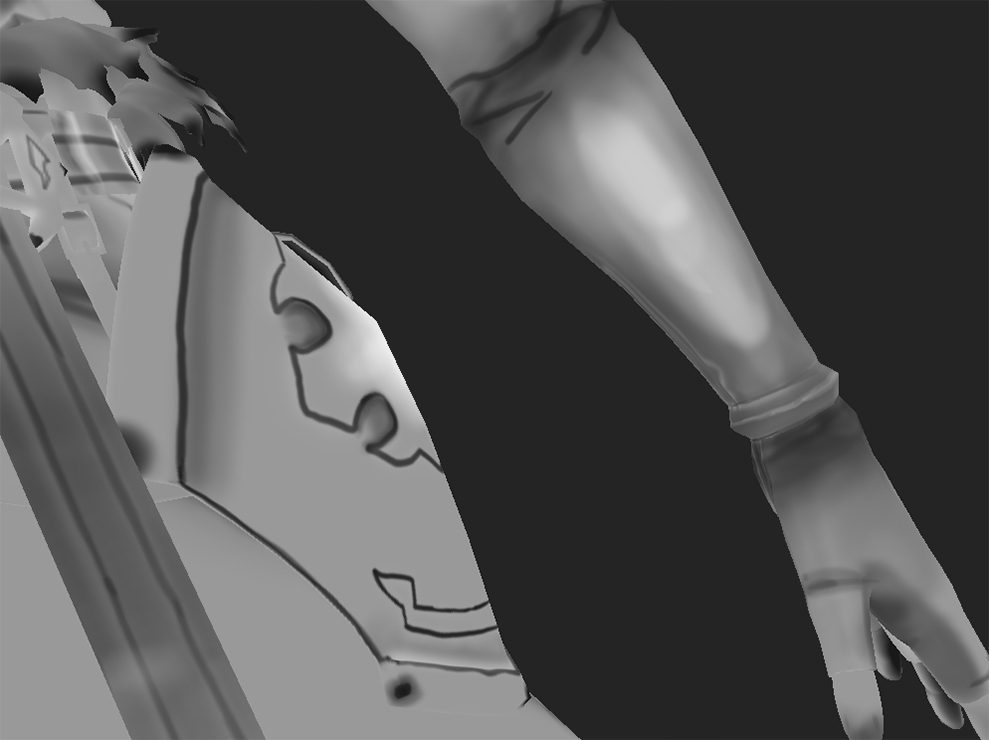
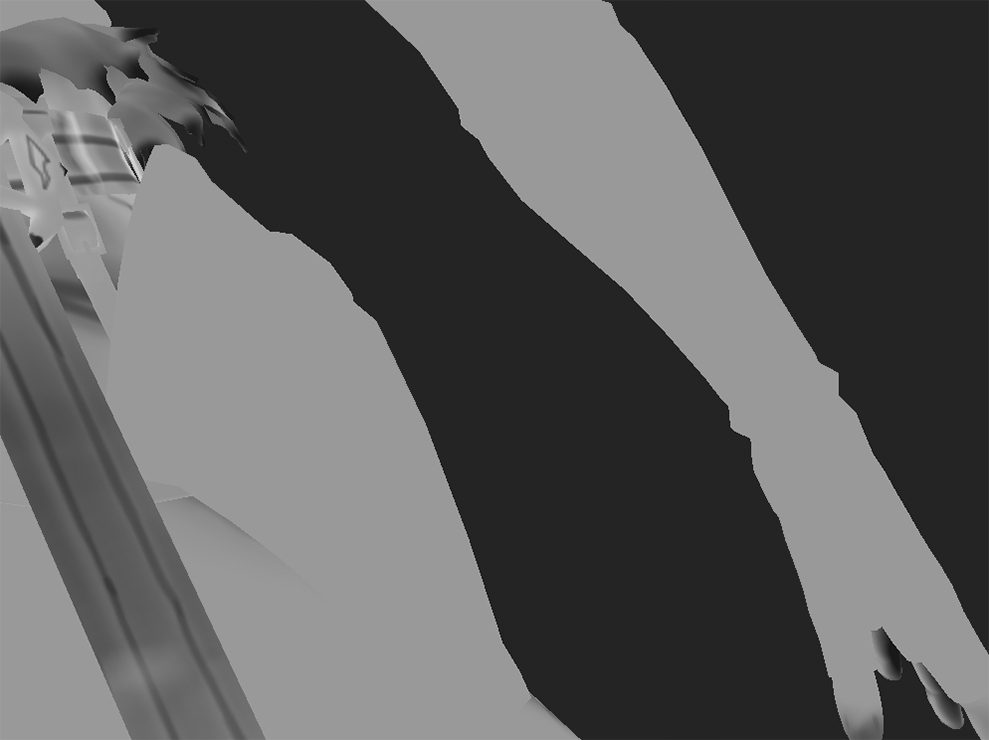
Actual in-game model data utilizes the dynamic outlines. The darker the color, the thinner the outline will be; the lighter the color, the thicker it will be.
Example of adding dynamic outlines in a DCC tool. Actual in-game model data utilizes the dynamic outlines.


Capturing characters’ expressions and movements
When asked what he considered important in expressing the essence of Granblue’s characters, Shiba explained, “We focused on clearly defining characters as either ‘cool’ or ‘cute,’ avoiding any ambiguity.”
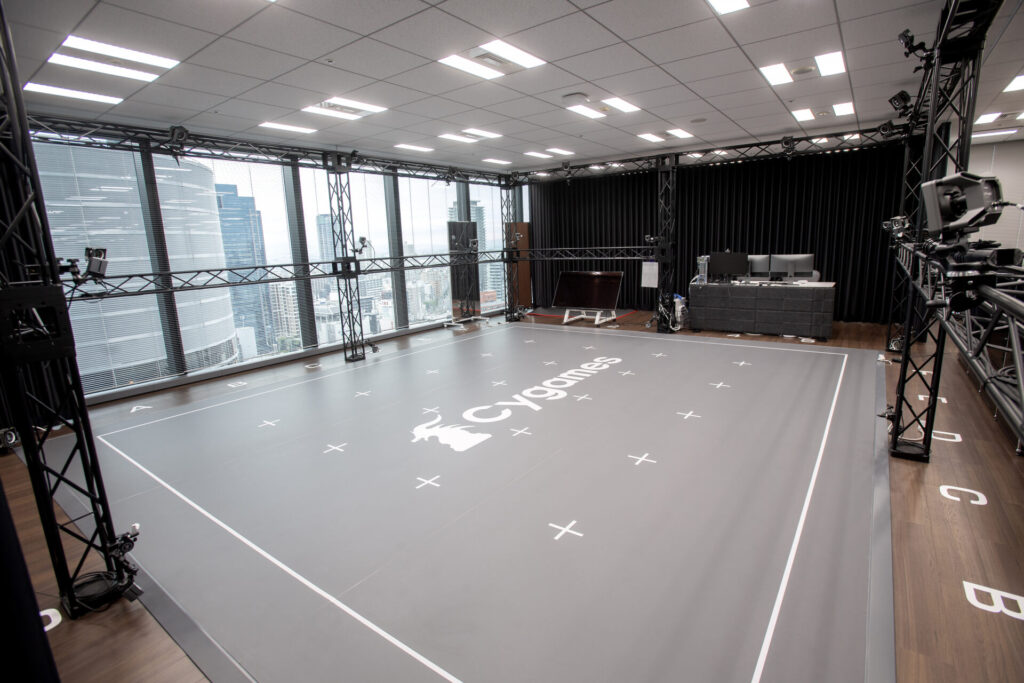
During cutscenes, the team used facial capture (iOS app MocapX) for nuanced expressions, ensuring synchronization with motion-captured body movements. This not only helped to process a large amount of animation information, but also to match the tone with the motion-captured body.
After that, Shiba and the team used Maya to adjust finer details, like tweaking the eyebrows and facial expressions to match the acting.
These finer adjustments were crucial given the game’s 30 frames-per-second format, demanding a balance that maintained realism and wouldn’t feel out of place in full-frame animation.
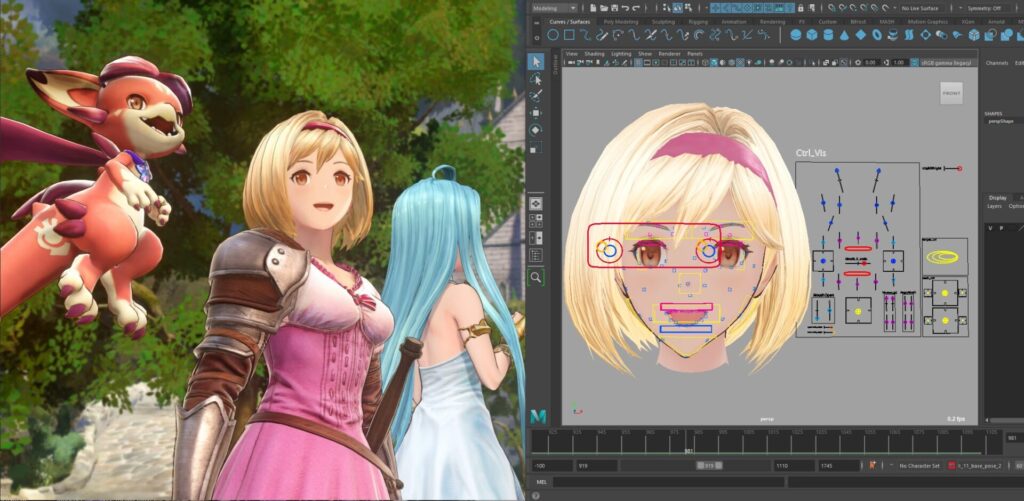
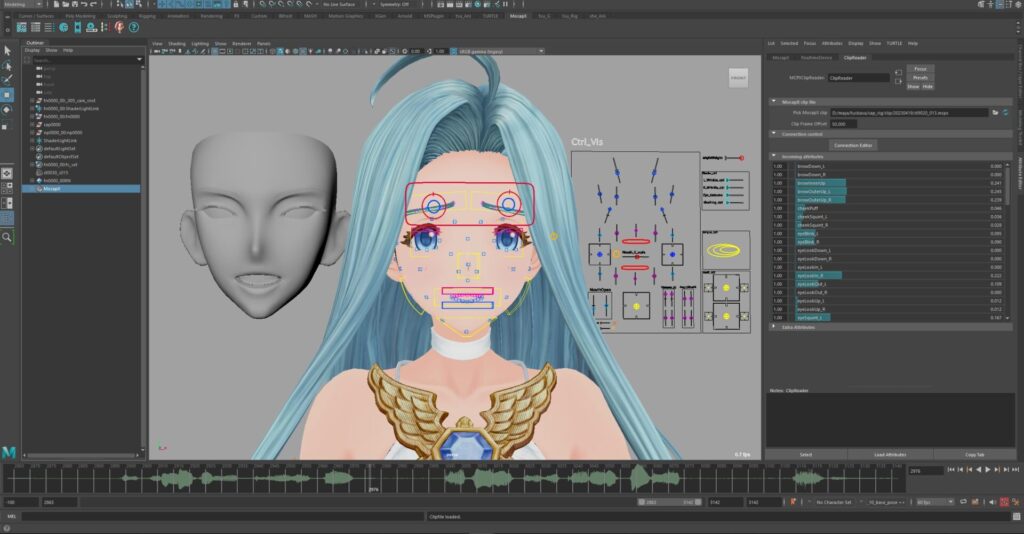
“If both the upper and lower teeth are visible when closing the mouth, it looks strange, so we skipped some frames, like in Limited*,” Shiba explained as an example.
*”Limited” facial animation—common in 2D and 3D projects—repeats three frames of mouth animation: fully open, partially open, and closed.
“But if we made the entire lip-sync in Limited, it would not match the body motion, so we adjusted it to maintain the taste of each character while taking consistency into account,” Shiba said.
He added that the basic approach was that “even if we had to manually modify the transformations, we should do it with the minimum amount of work.”
This policy was thoroughly implemented throughout the team when touching up cutscenes.
“It’s best if the model can be made to work as is without modifying it,” Shiba said. “On top of that, when recreating the illustrations from ‘Granblue Fantasy,’ our job is to fill in any parts that we feel are lacking and make them better.” In the end, almost every cutscene in the game ended up receiving some amount of manual editing.
Minimizing workloads while maintaining high standards
Shiba and other team members simplified the rendering and touch-up processes between hand-offs.
“I was conscious of maintaining the silhouette as beautifully as possible, even in scenes where the mesh was deforming during movement, so I think it was quite a difficult undertaking,” Shiba said. “But the most important thing is for players to be able to immerse themselves in the story and enjoy it without feeling out of place. If I can achieve that, then I will have done my best as a creator of the game.”
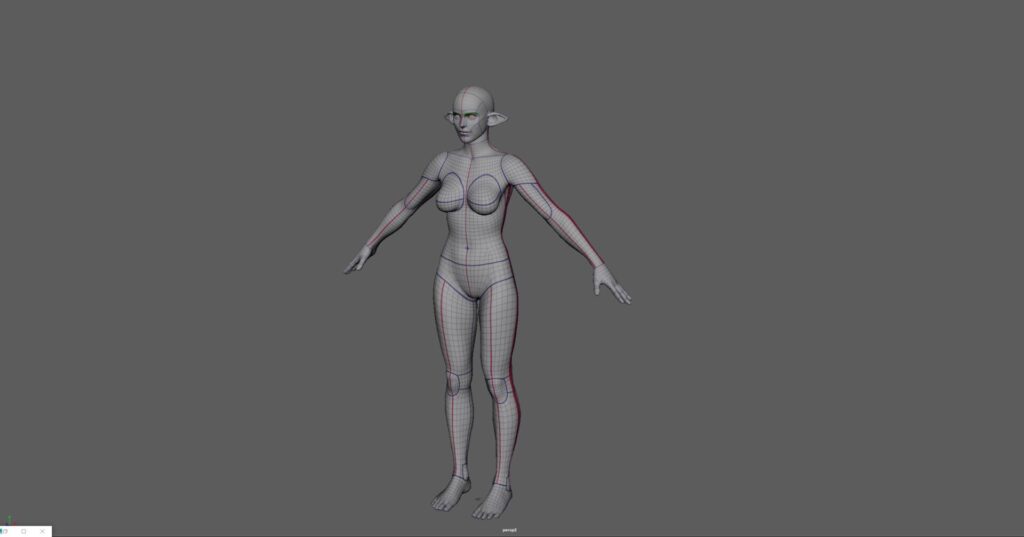
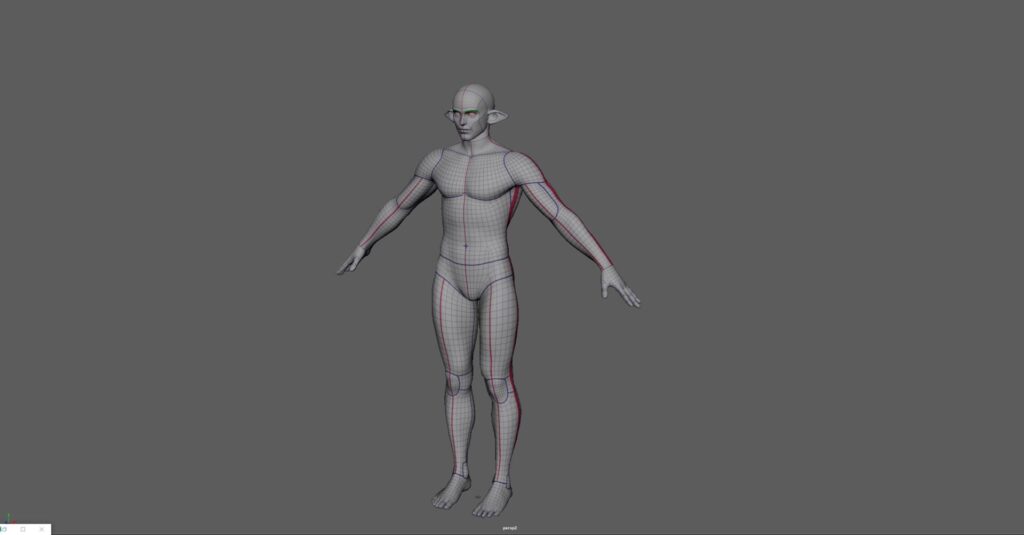
The playable characters that appear in Relink mainly consist of four races:
- Humans, including the main characters Gran and Djeeta
- Erunes, with long ears and tails
- Harvins, a small race less than one meter tall
- Draphs, a race with males who can tower over two meters tall
All of these races are made from one universal mesh (common base body) for men and one for women to efficiently create the 20-plus primary characters that appear. Considering the effort it takes for artists to model each character individually, building each character from a single standard mesh allows for more consistent quality.
Making use of tools for easier collaboration and faster work
The team leaned on the digital content creation tool Maya for character modeling, making the most of the flexible rendering and animation capabilities, plus the capacity for easy collaboration with engineers for various processes.
“Using the Tweak Mode and Quad Draw tools together allows you to work quickly,” said Tanaka. “Maya works very well with a pen tablet and is easy to use because it feels very intuitive. Also, even in more nuanced work such as using the component editor, it has the ability to complement design work by making decimal-point levels of adjustments.”
Organic design work and fine adjustments can happen at the same time, making it a tool that artists can use like their own fingertips.
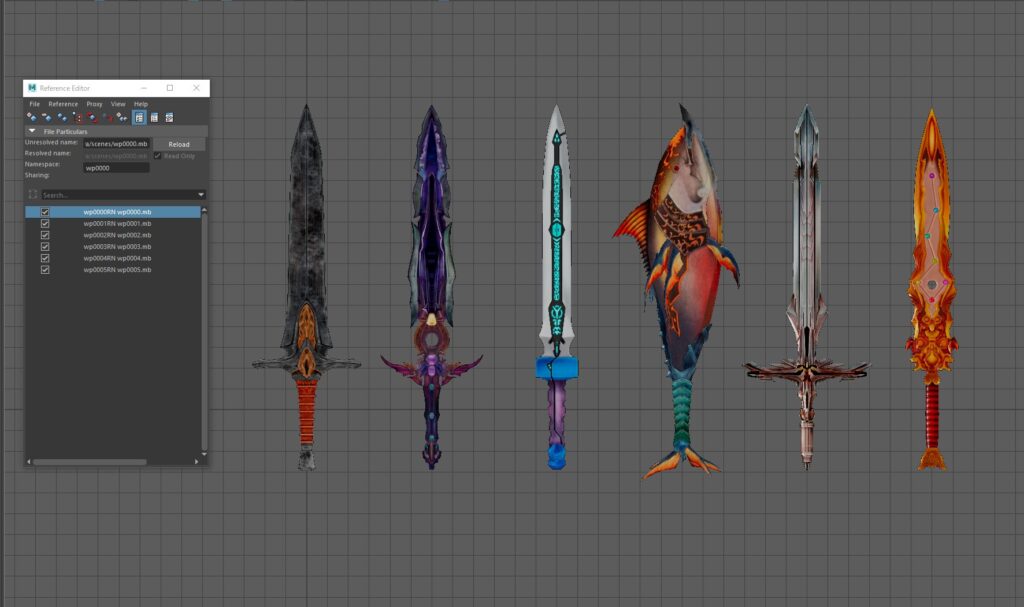
Tanaka, who often supervised the look of weapons and NPCs, said he most frequently used the reference function.
“The ability to seamlessly load and edit multiple weapons at the same time streamlined the process when checking whether they met the specifications,” he said. “I thought it was very good because I could instantly edit and save the mesh data that I had loaded as a reference on the spot.”
More efficiency by automating repetitive tasks
The modeling team used scripting to automate repetitive tasks and improve efficiency.
“When I wanted to efficiently process repetitive tasks that involved following menus and executing functions, I was able to complete them myself without consulting a technical artist,” Tanaka said.
“The script editor’s query function avoided the need for coding from scratch. You can register the tasks you’ve performed on the shelf by copying and pasting them. By taking a little time to register the script you worked on, next time, you can process it with just one click, which is convenient for saving time.”
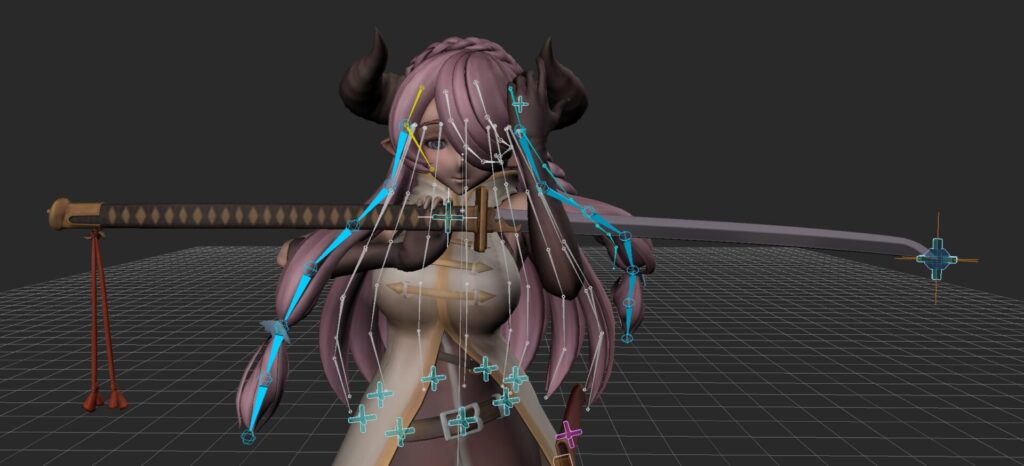
Formulating custom object swaying with wind simulation models
To further add to the fantasy-like stylization of the game, Lead Rigging and Simulation Artist Kanda worked with the company’s engineers to develop the system for setting up swaying objects. He used the parameter controls of Maya’s nCloth and nHair solutions as a reference.
“Our ultimate goal was adding the look of a ‘Granblue Fantasy’ piece while still having the persuasiveness of a physical simulation. ” Kanda said. “Sometimes we would emphasize the swaying of hair or clothing, or at high speeds we would incorporate parameter controls to make the swaying objects behave as if they were in zero gravity.”

Kanda collaborated with internal engineers to recreate the scene and time scaling features from Nucleus in the game, and they were able to build a stable shaking system with few breakdowns that could withstand large, flapping movements.
Furthermore, using the Wind Shadow parameters from the nCloth fabric simulation solution as a base, engineers created a function that weakens the wind’s strength when the character’s body direction is parallel to the wind direction, ensuring swaying objects don’t break down as much regardless of the wind’s direction.
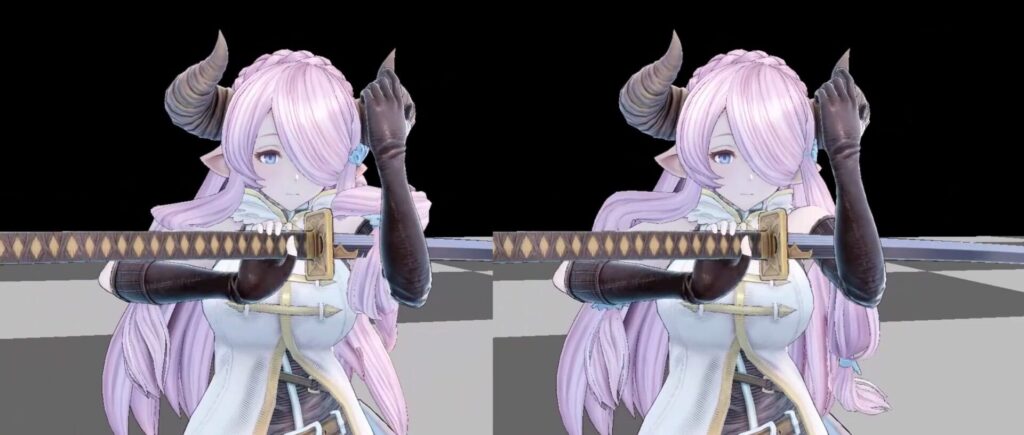
This function helps to reduce distortion when characters with long hair, such as Lyria, turn their backs to the wind.
Effects of wind on swaying objects according to body orientation / Before adjustment
Effects of wind on swaying objects according to body orientation / After adjustment
A scene in front of Furycane’s altar served as a guide for scenes with swaying objects.
“This is the scene with the strongest winds in the game, so we worked out how much movement we could achieve with the wind and decided on the implementation together with the director,” Kanda said.
During development, the team created a virtual “room” to test wind behavior. They checked whether the swaying objects for each character remained stable in relation to the wind effects produced in the game, and whether they matched the effects.
In total, including an option for no wind, the testing room was capable of simulating six wind conditions ranging from calm breezes to strong mountain gusts.
Even though there are many different character motions in the game, they were all tested and checked in this wind test room, repeatedly refining the movement settings to ensure all swaying objects animated properly.
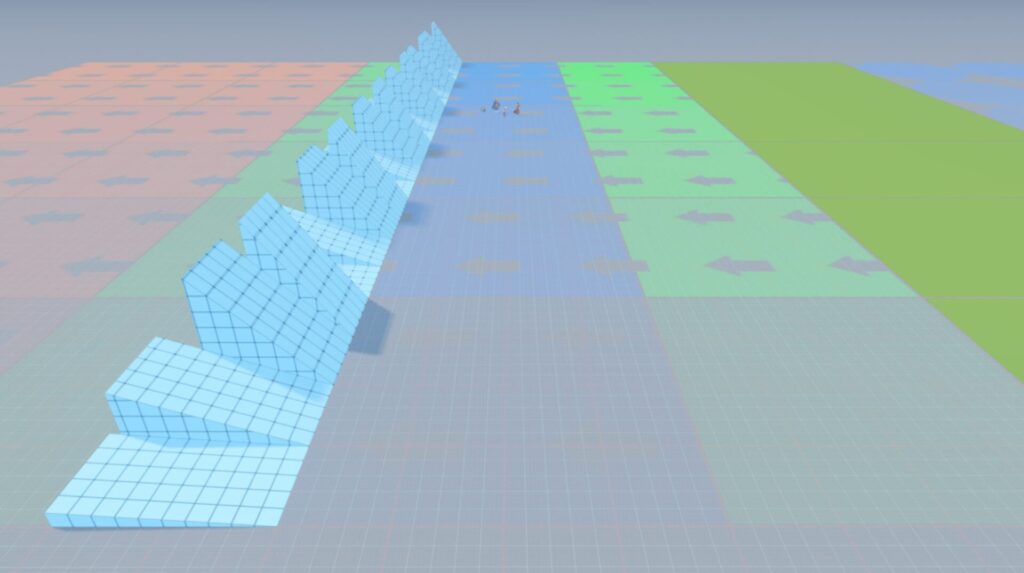
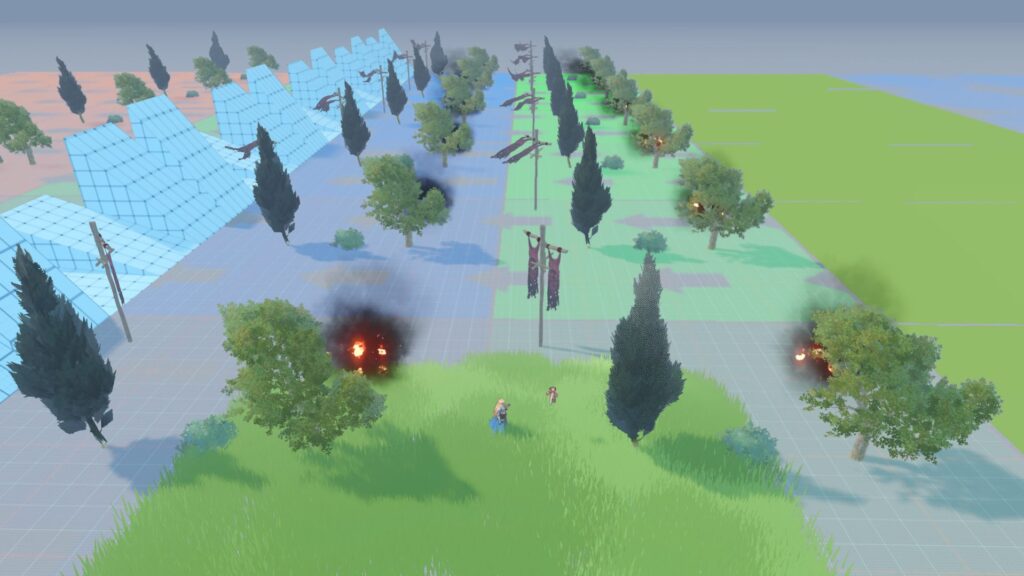
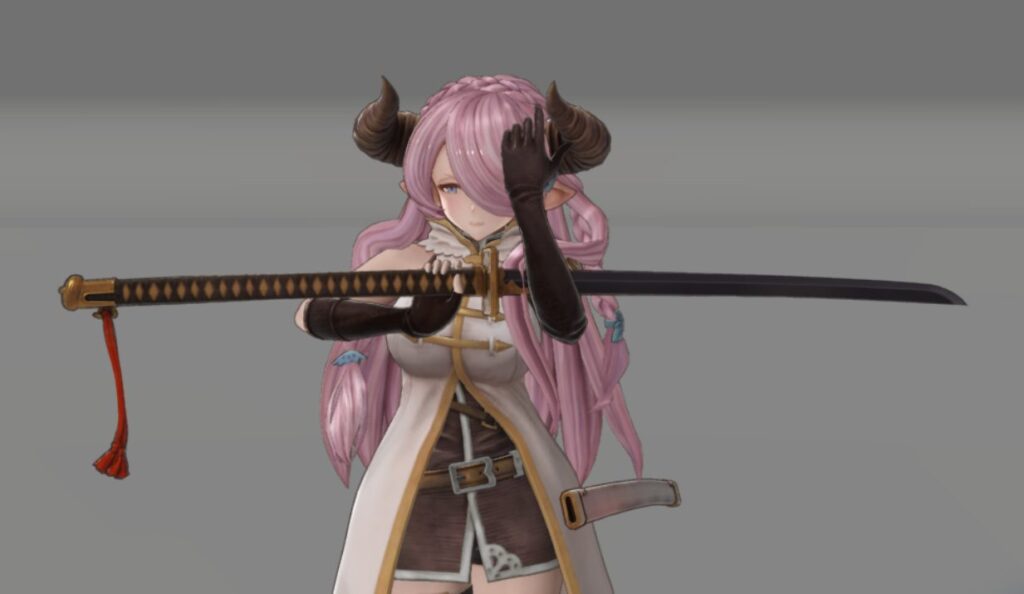
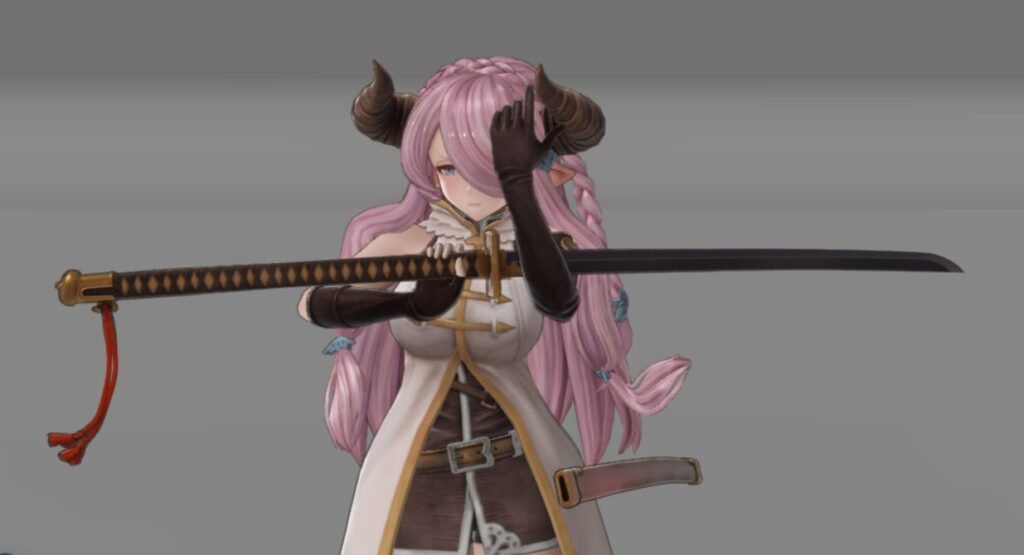
The team used a process called guide motion to deal with any issues that couldn’t be solved simply by changing parameters. They applied animations directly to the skeleton of the moving parts; then the team would adjust the blend to tackle each issue individually.
“We paid close attention to the details of the moving parts, including making adjustments to ensure that characters like Vane and Percival, who wear long layers of clothing, don’t look distorted, as well as having each part carefully processed to ensure the immersiveness of emotes [special actions such as striking a pose or sitting cross-legged],” said Kanda.
In short, the team considered all types of animations when preparing these meshes, simulations, and models for the final product.
Integrating Maya and MotionBuilder

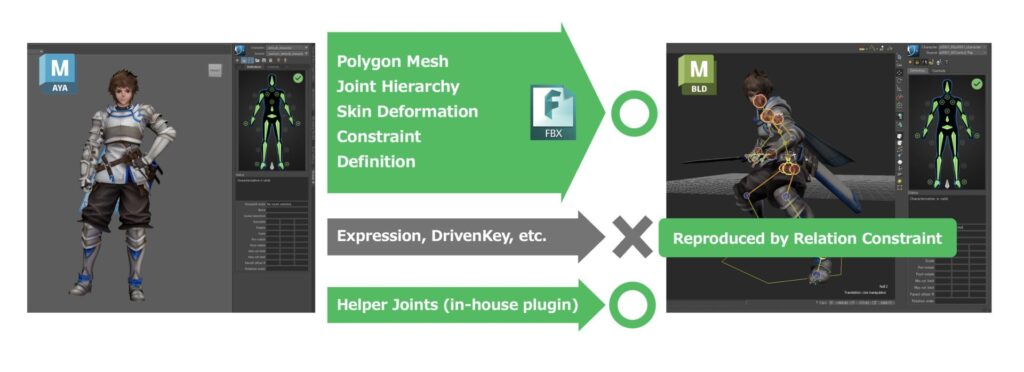
The link between Maya and MotionBuilder plays an essential role in Cygames’ rigging process. Apart from the facial animations of humanoid characters, rigging work was mostly done in MotionBuilder. First, skeletons were created and skinned in Maya, helper joints were added, and Character Definition settings were prepared, all of which were then imported into MotionBuilder in FBX format. Then, using a tool developed in Python that runs on MotionBuilder, the team was able to characterize, create controllers, and organize data, creating a workflow that automates most of the setup work, readying the models for processing.
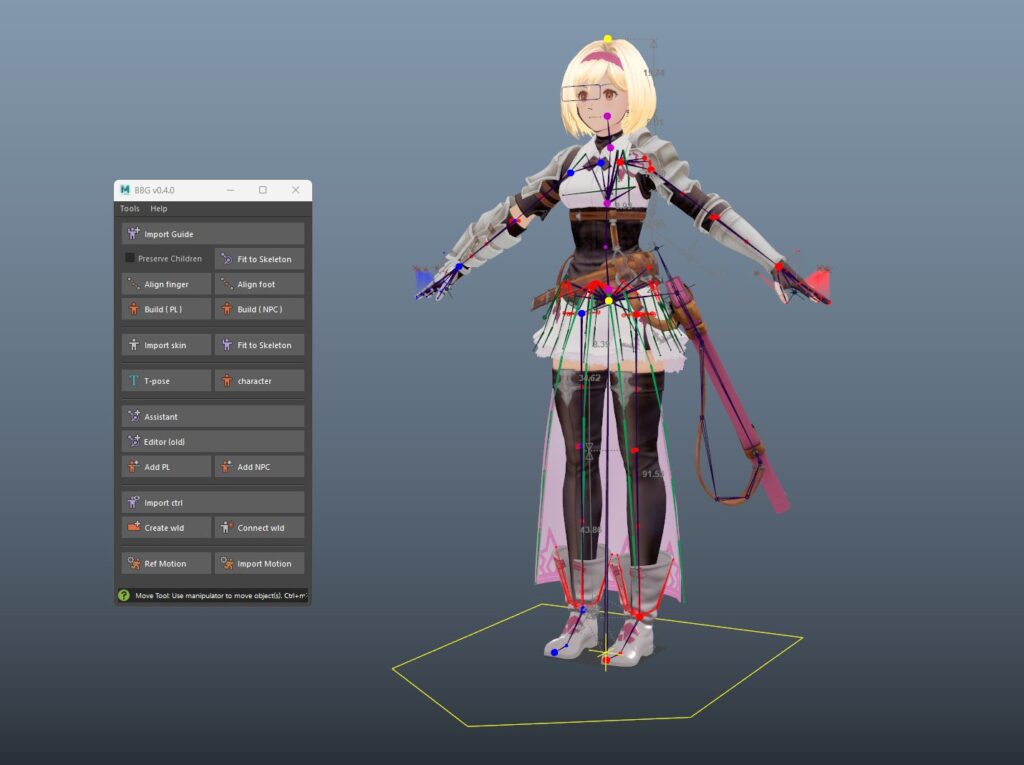
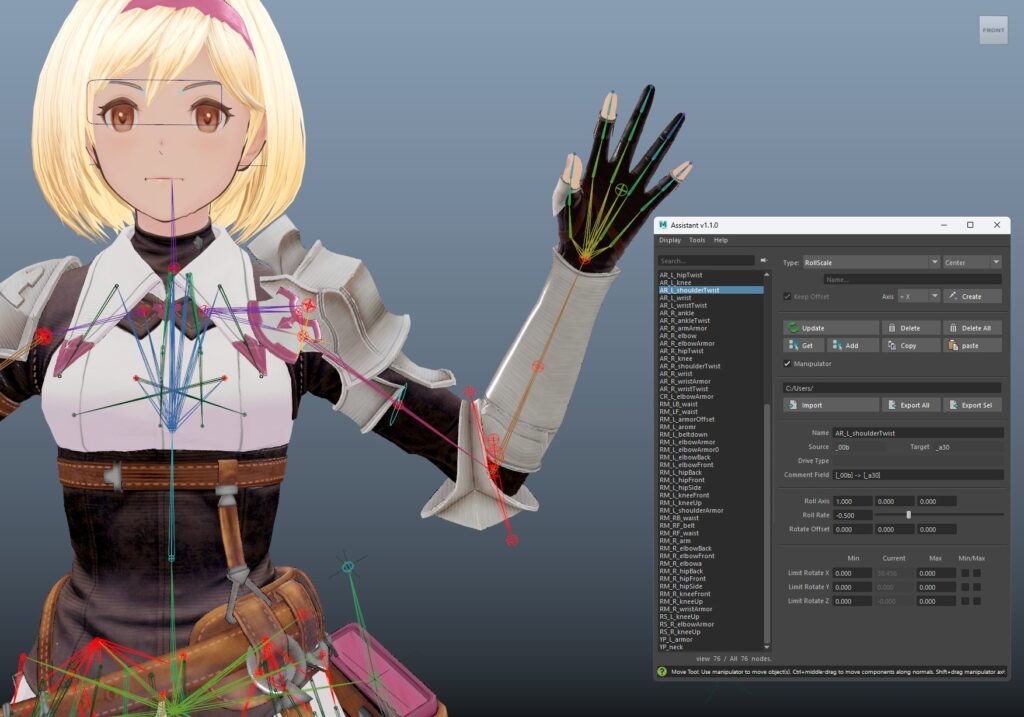
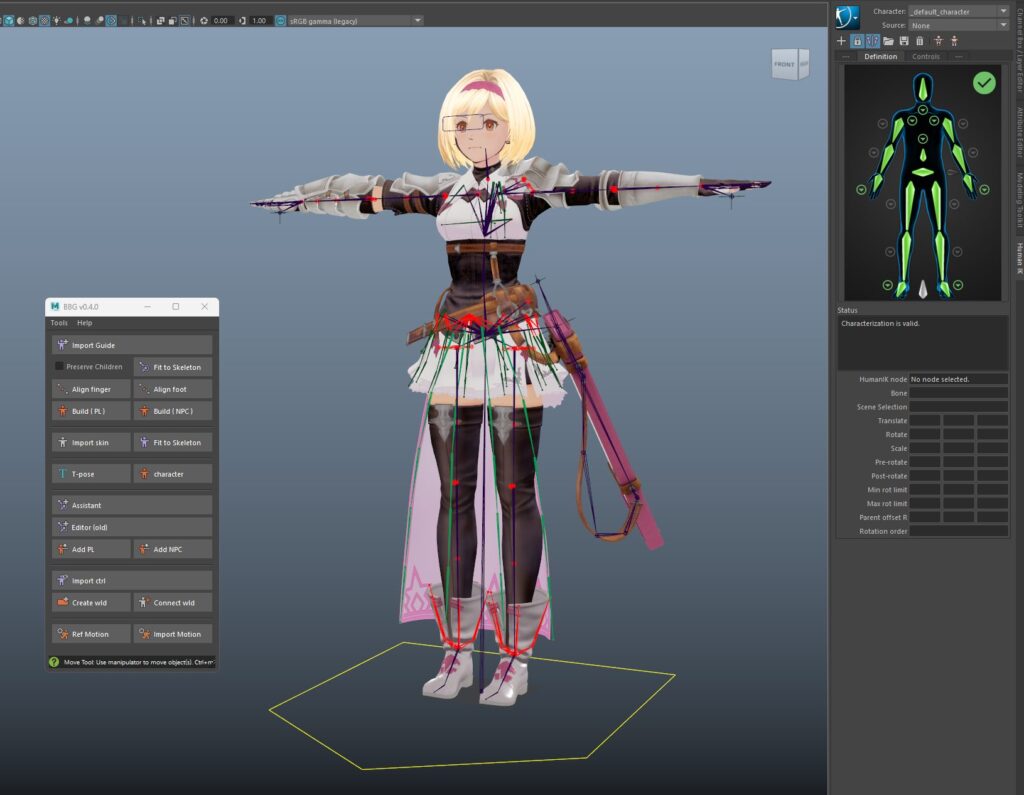
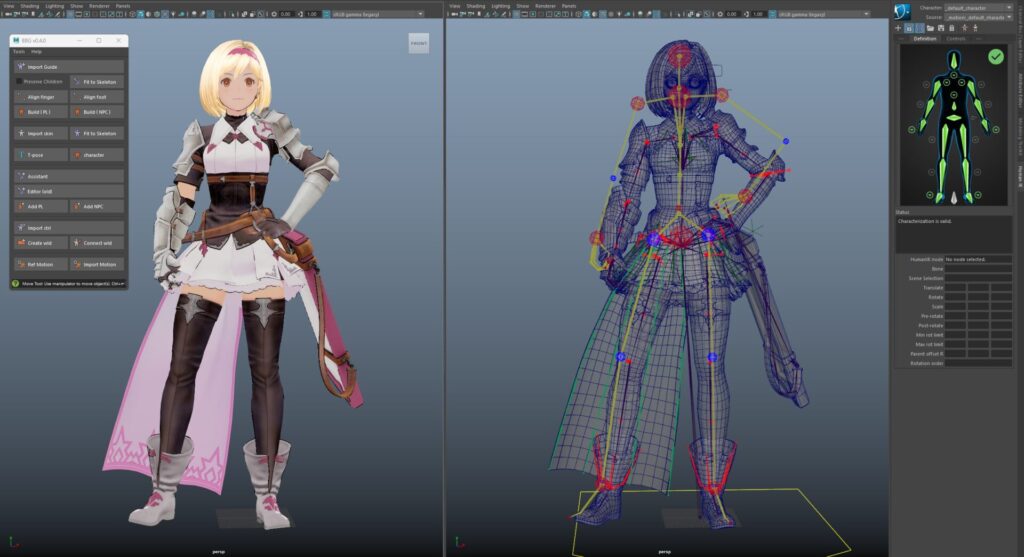
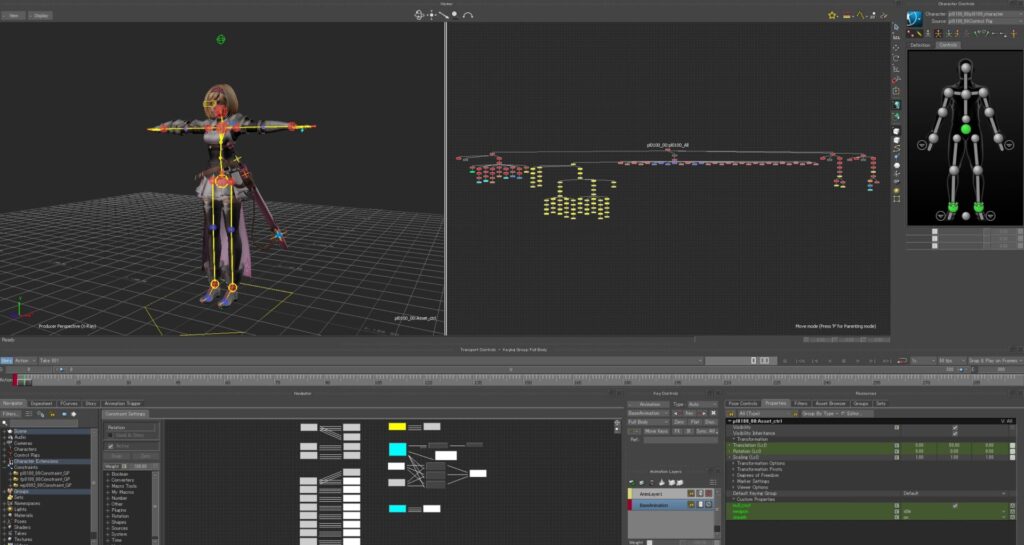
At this time, elements that could not be linked between the two, such as Expression and DrivenKey, were reproduced using the Relation constraint in MotionBuilder. However, since most elements could be linked between Maya and MotionBuilder through FBX, the integration of building rigs in MotionBuilder based on data prepared in Maya allowed artists to concentrate on improving quality even with a small rigging team.
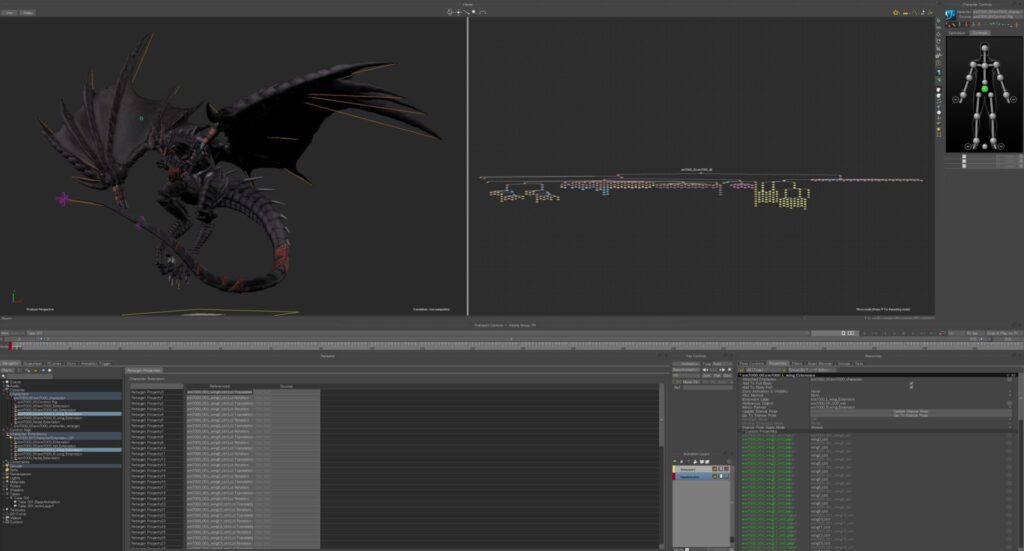
When Lead Character Animator Yasui was asked, “Why use MotionBuilder instead of Maya?” he pointed out its efficiency and ease of use.
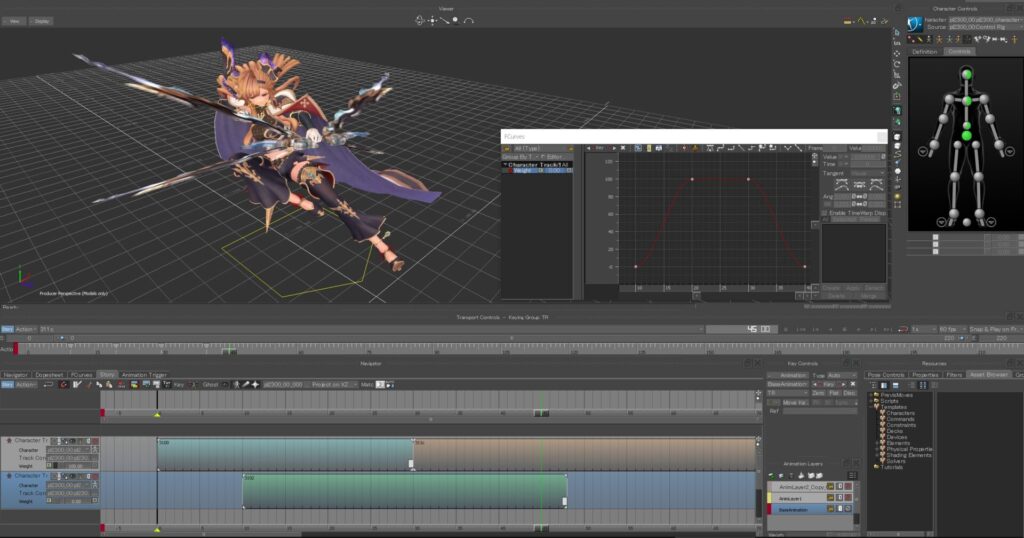
“Especially when creating in-game battle action motions, we sometimes need to correct data while playtesting and respond quickly to additional requests. MotionBuilder allows for quick keyframe plotting—even when loading characters with many accessories or a large number of characters, it moves smoothly and without stress, so I think it’s very suitable for a production environment that often requires rapid iterations.”
Shiba added, “When creating cutscenes, even if a large number of characters are introduced, there are no frame drops, and they can be moved in real time.”
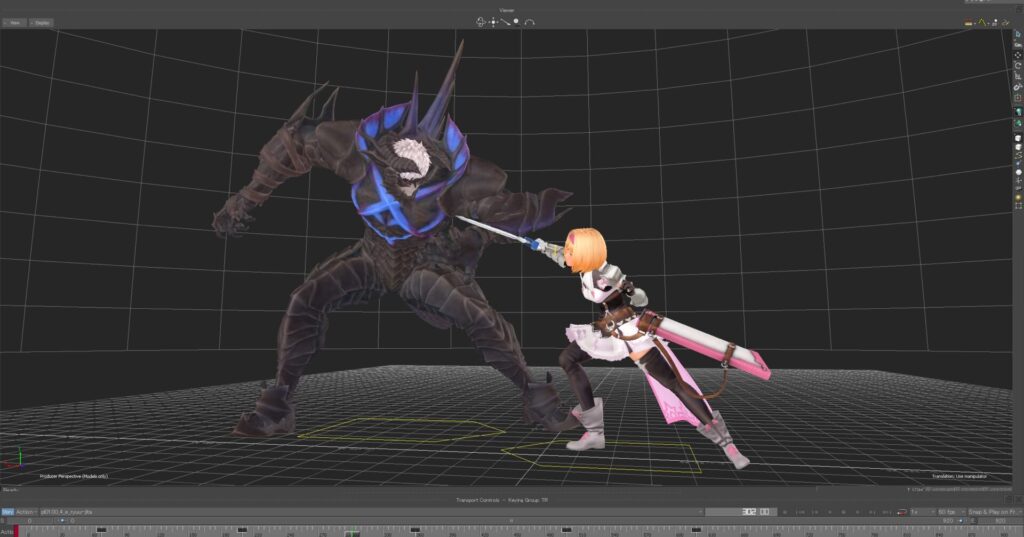
In the battle with the gigantic boss character Vulkan Bolla, the background collapses as the battle progresses, creating a dramatic effect. According to Yasui, when they were creating this with MotionBuilder, they were able to load all the tunnel assets into one scene and have Vulkan Bolla crawl through it without issues. “I think one of MotionBuilder’s strengths is that it can run smoothly even when a large number of assets are loaded at the same time in such a large-scale scene,” explains Yasui.
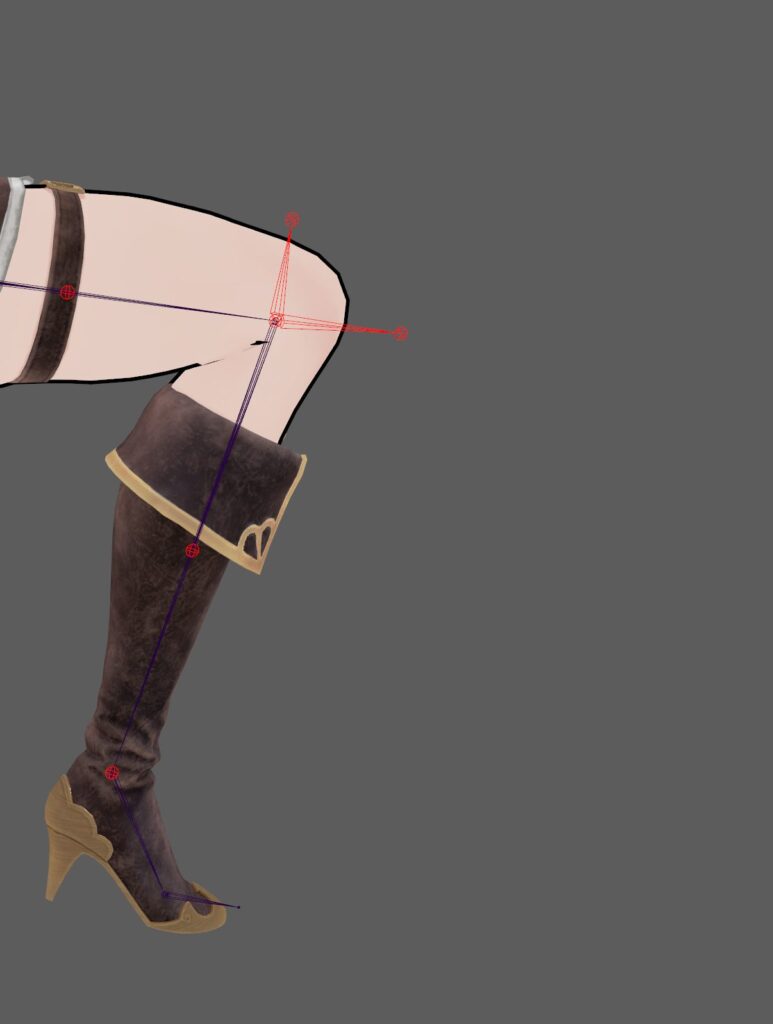
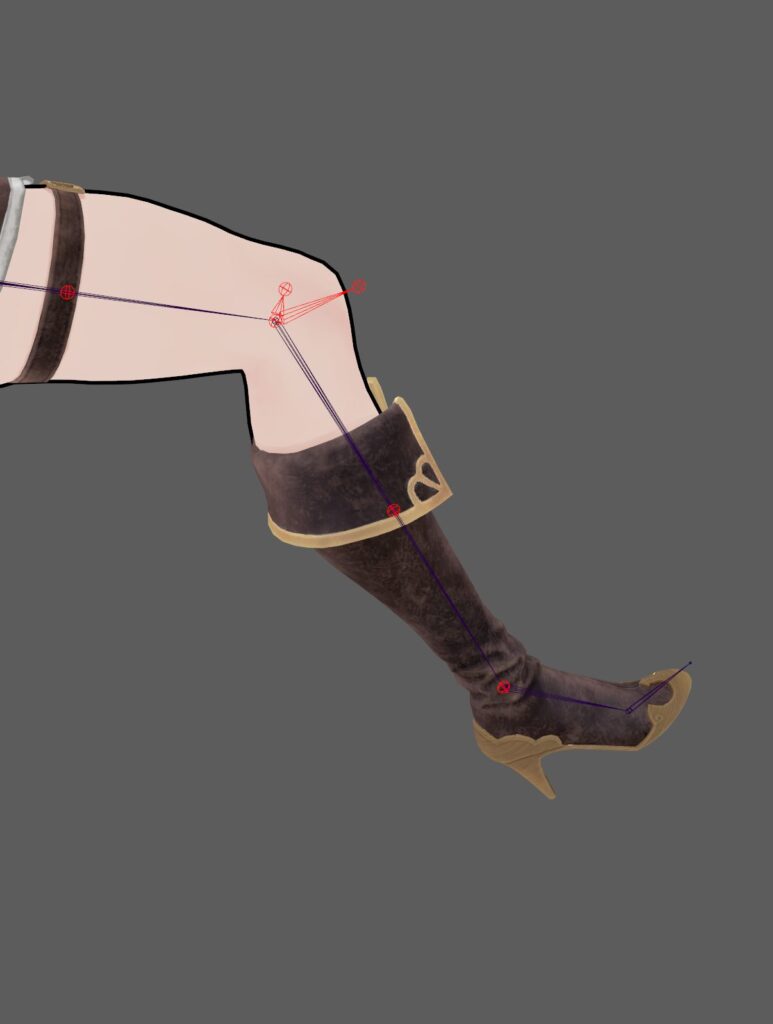
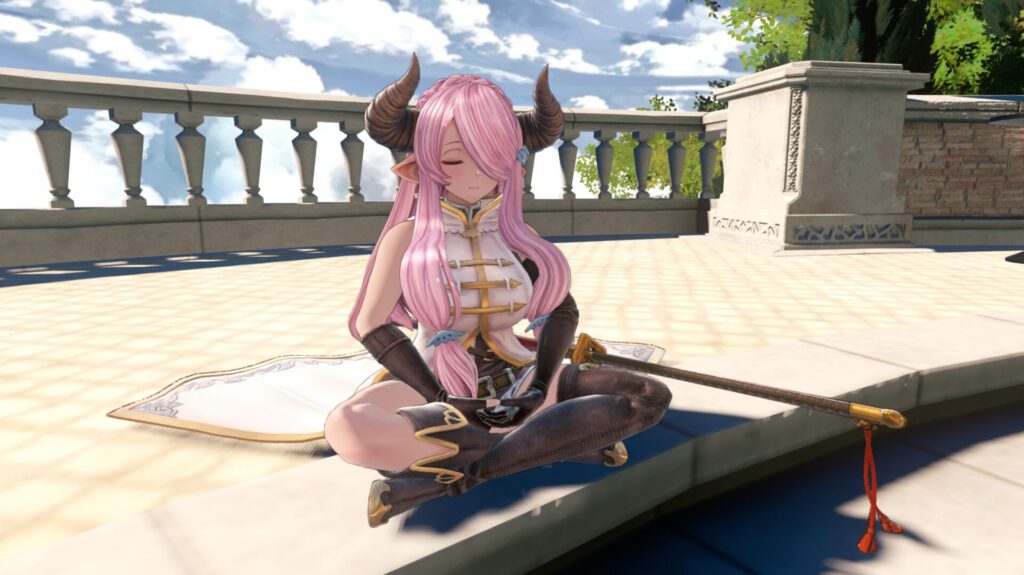
If any clipping occurred during the motion creation, they worked together with the rigging department to address the issue. Solutions included blending hand-animated jiggle with the simulation or adding helper joints. As a result, seven types of helper joints were added in Maya, which were used not only for joints but also to prevent decorations such as armor from clipping into the model. “Furthermore, to prevent any additional potential clipping problems, we used a two-stage system of inserting joints in a layer below the helper joints and skin-binding them so that the motion team could adjust the clipping,” explains Kanda.
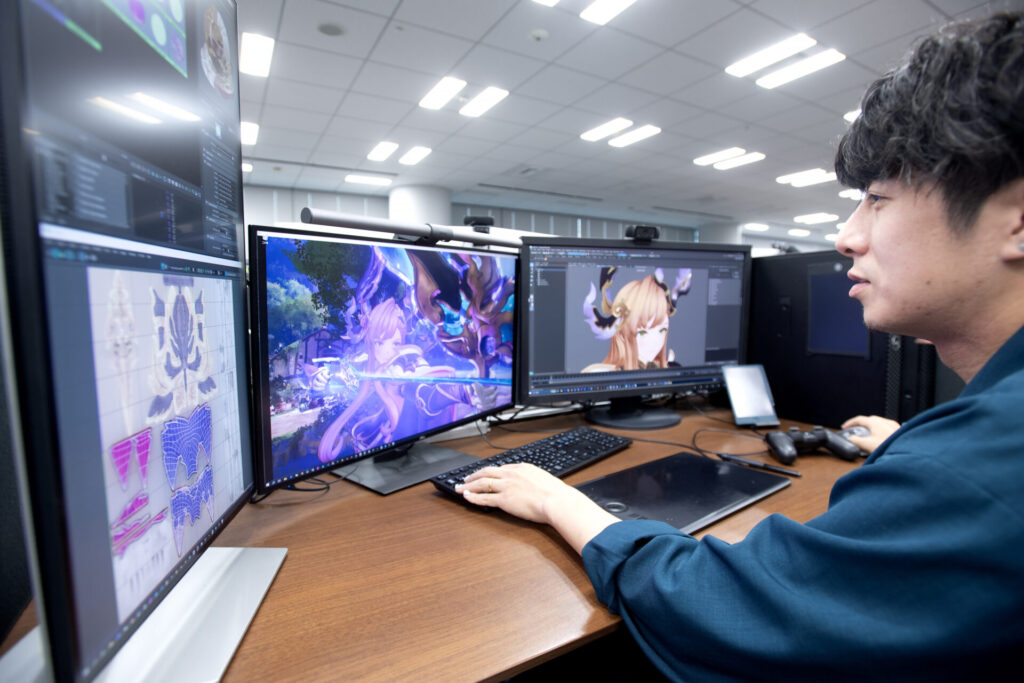
The motion team consulted with the director, planners, and engineers to decide on the movements and poses for the attack motions. At this stage, it was essential to create a game that not only felt good as an action game, but also captured the characterization traits that fans would expect. “We shared our opinions thoroughly on the key points for both the feel of the action and the character’s likeness, so we were able to create the game with everyone having a common understanding,” explains Yasui.
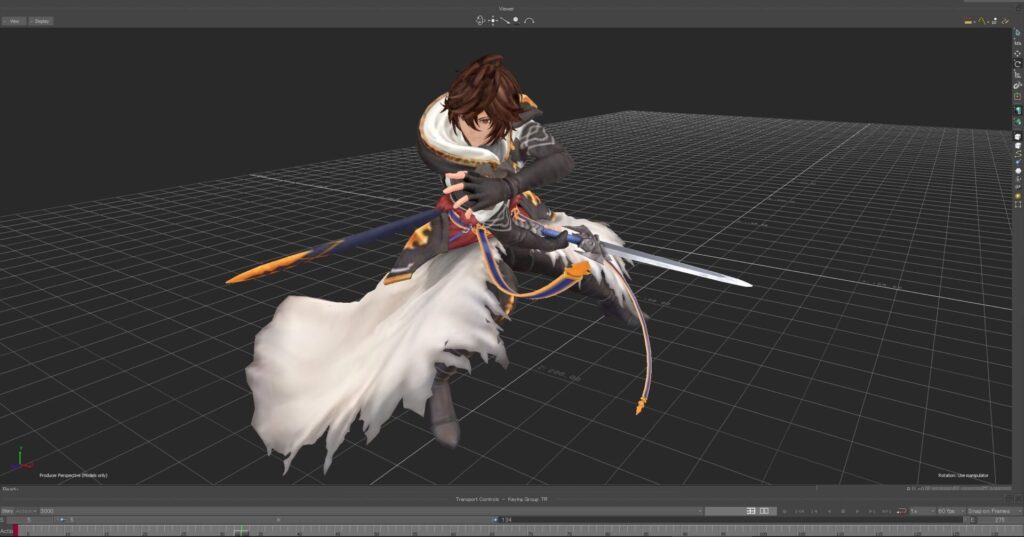
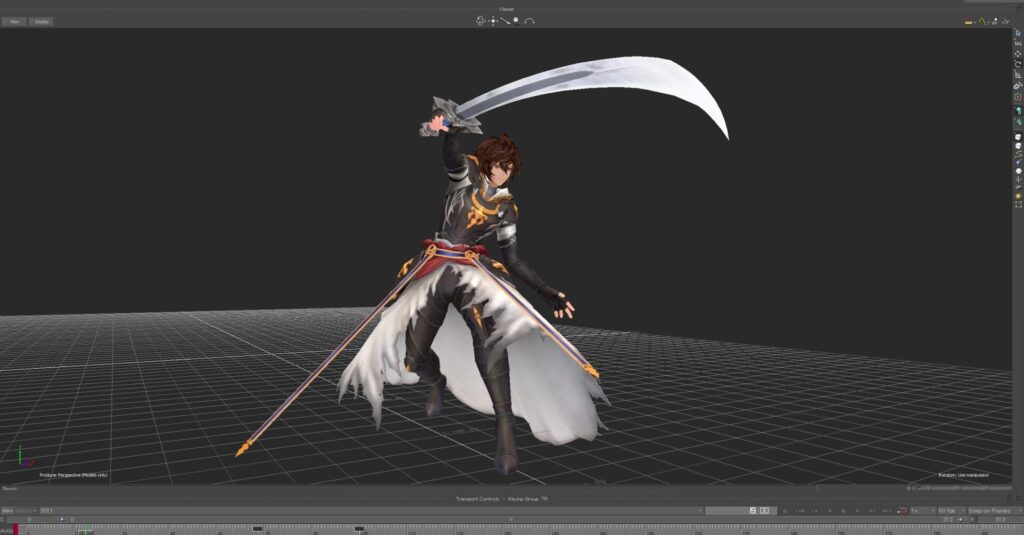
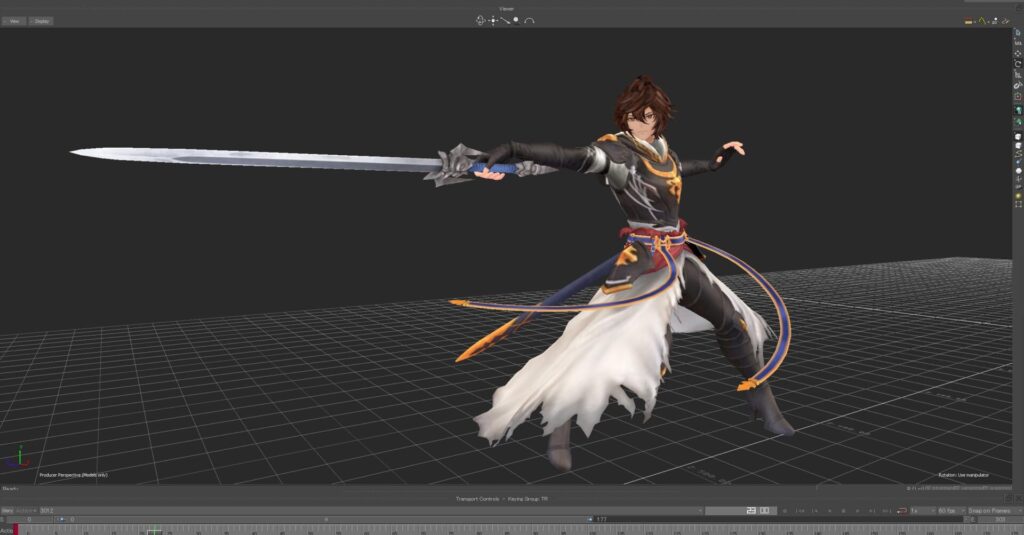
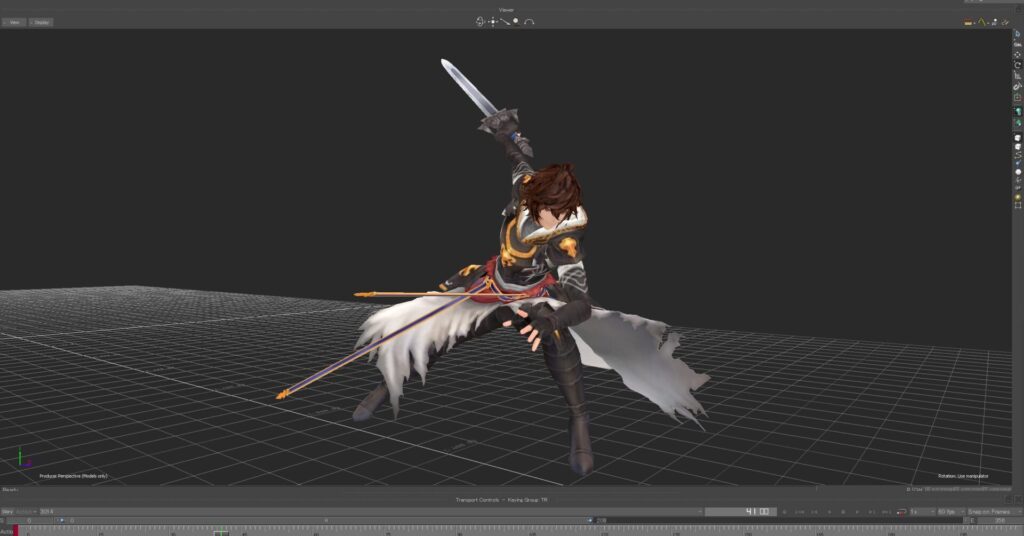
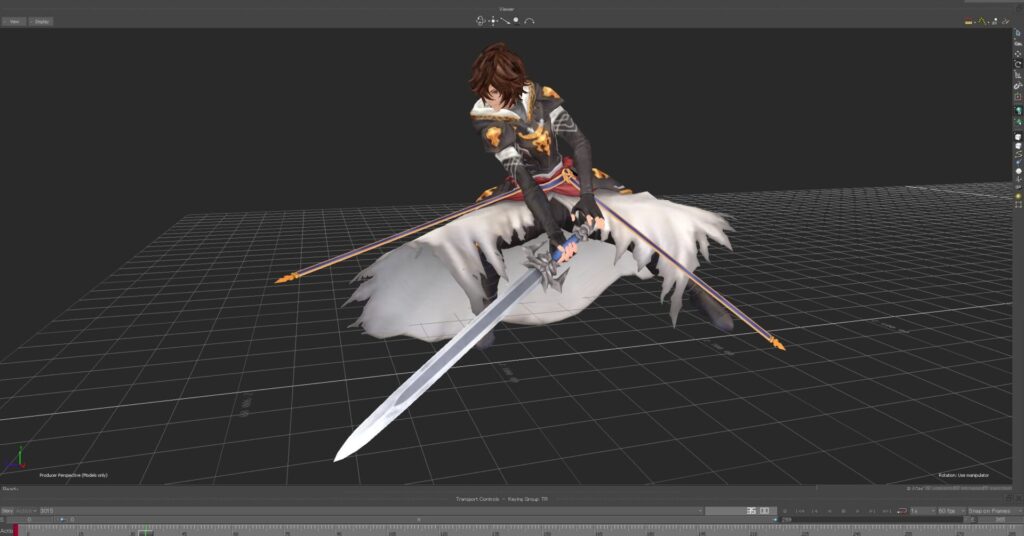
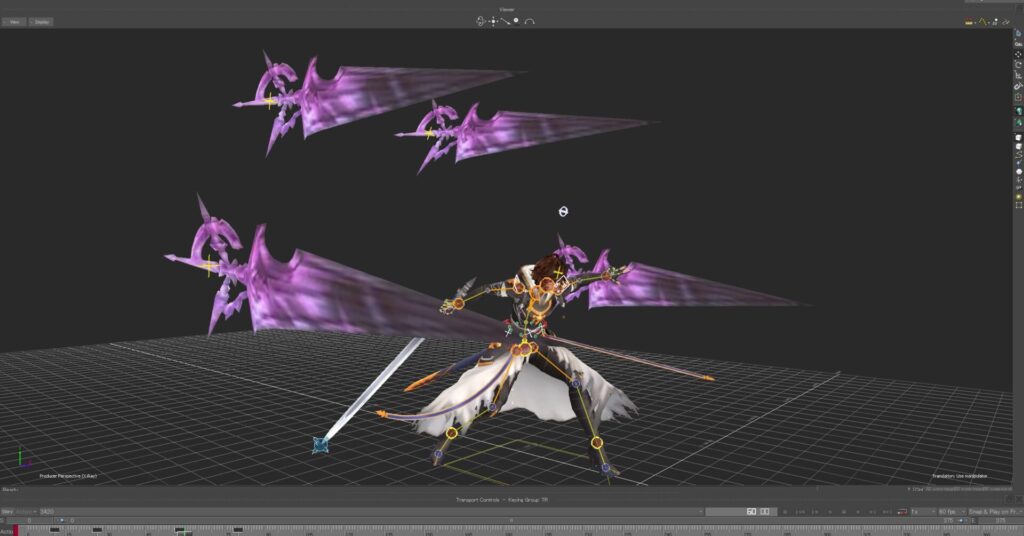
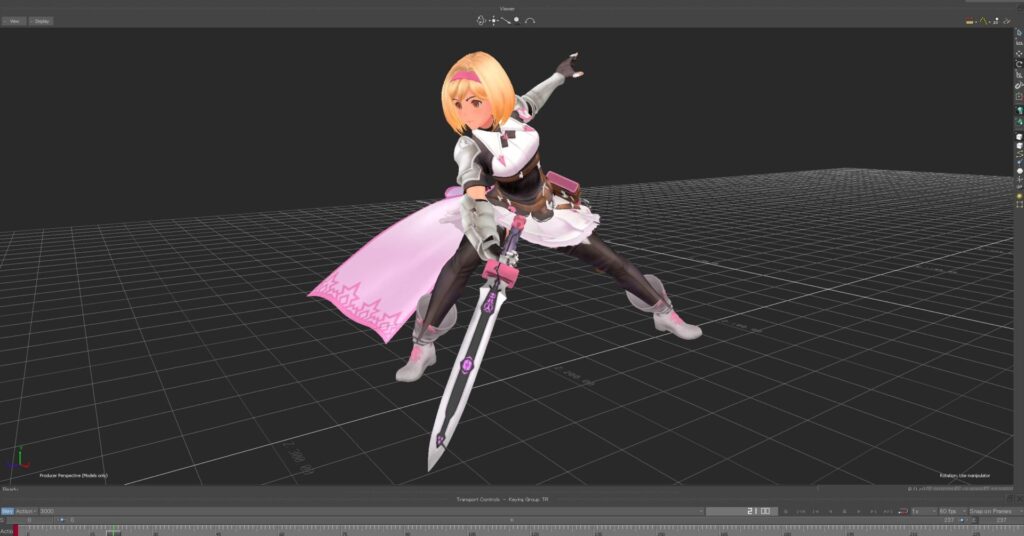
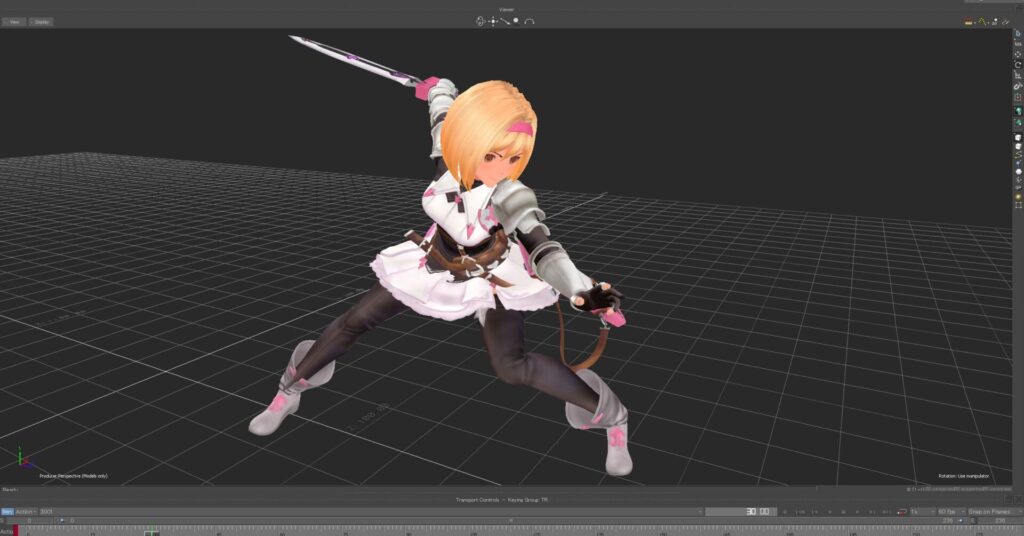
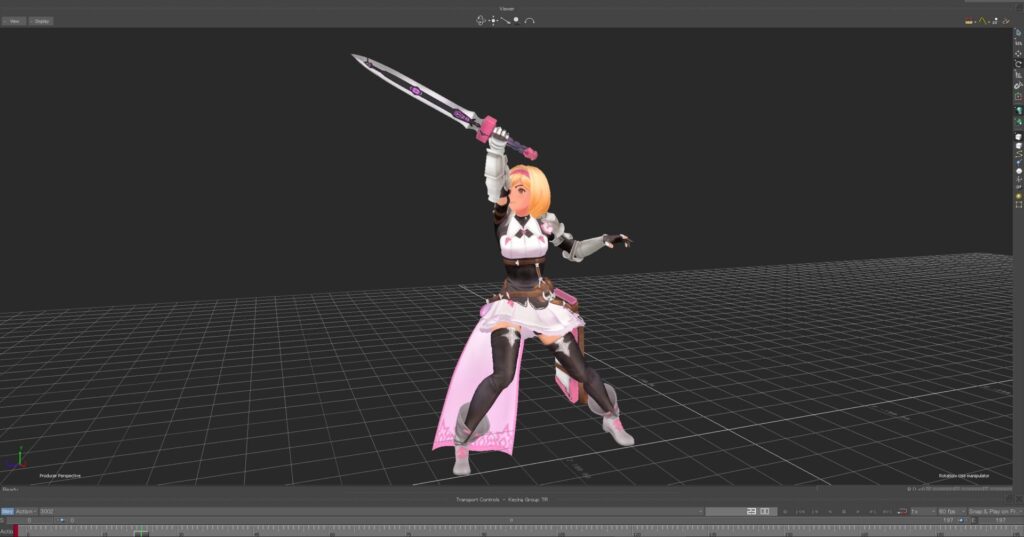
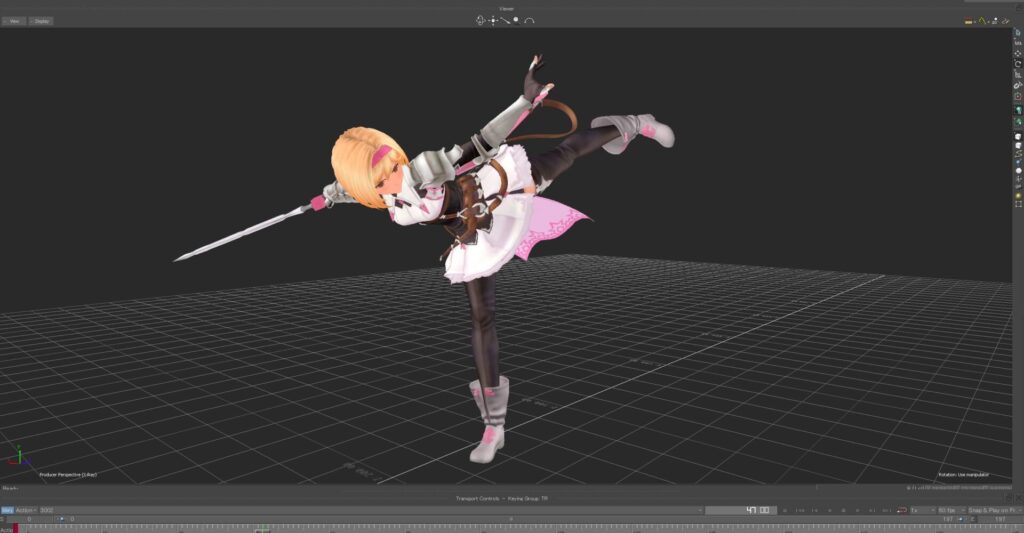
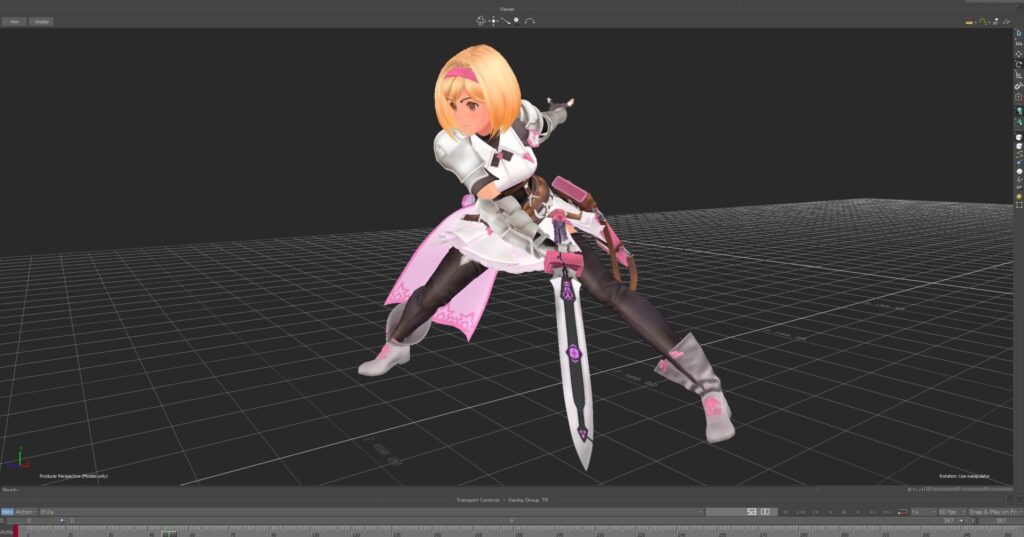
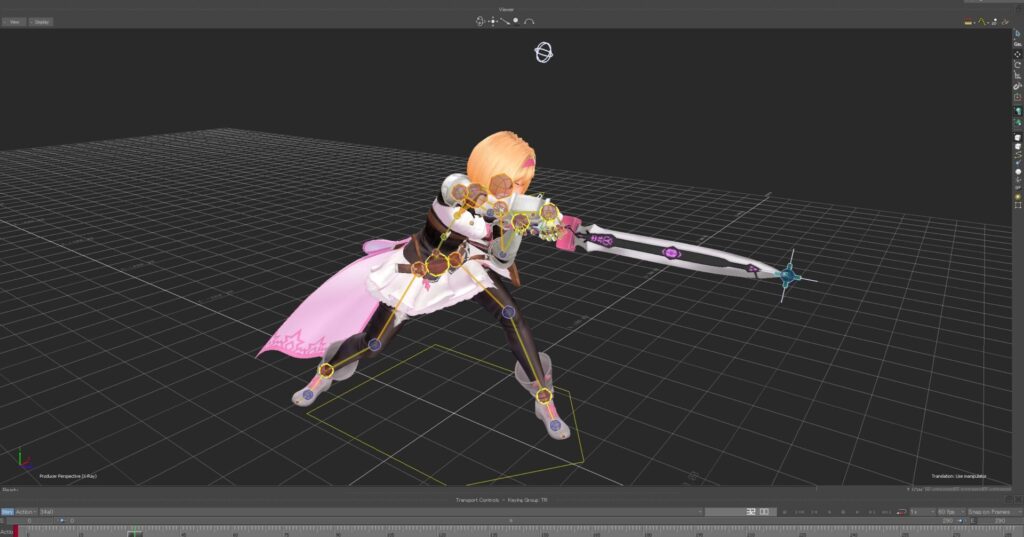
This game provides an experience which reproduces the thrilling action from the original in an entirely new dimension. One of the most impressive aspects is the animation smearing of a weapon when finishing an attack combo. This effect is actually created by deforming the weapon model itself so that its afterimage is visible along its trajectory. The mesh was divided so that the afterimage would appear smoothly, and the motion follow trajectory was enhanced to be more dynamic using constraints and other features in MotionBuilder to create a rig that allows the timing and duration in frames to be adjusted. “The action is so meticulously crafted that you could pause it at any frame, and the image would still look coherent,” said Kanda.
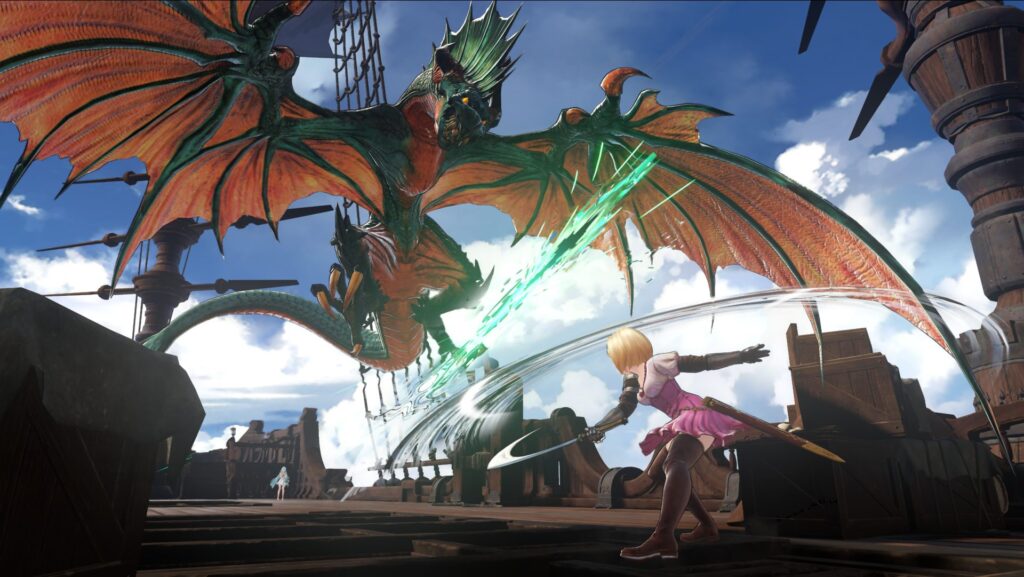
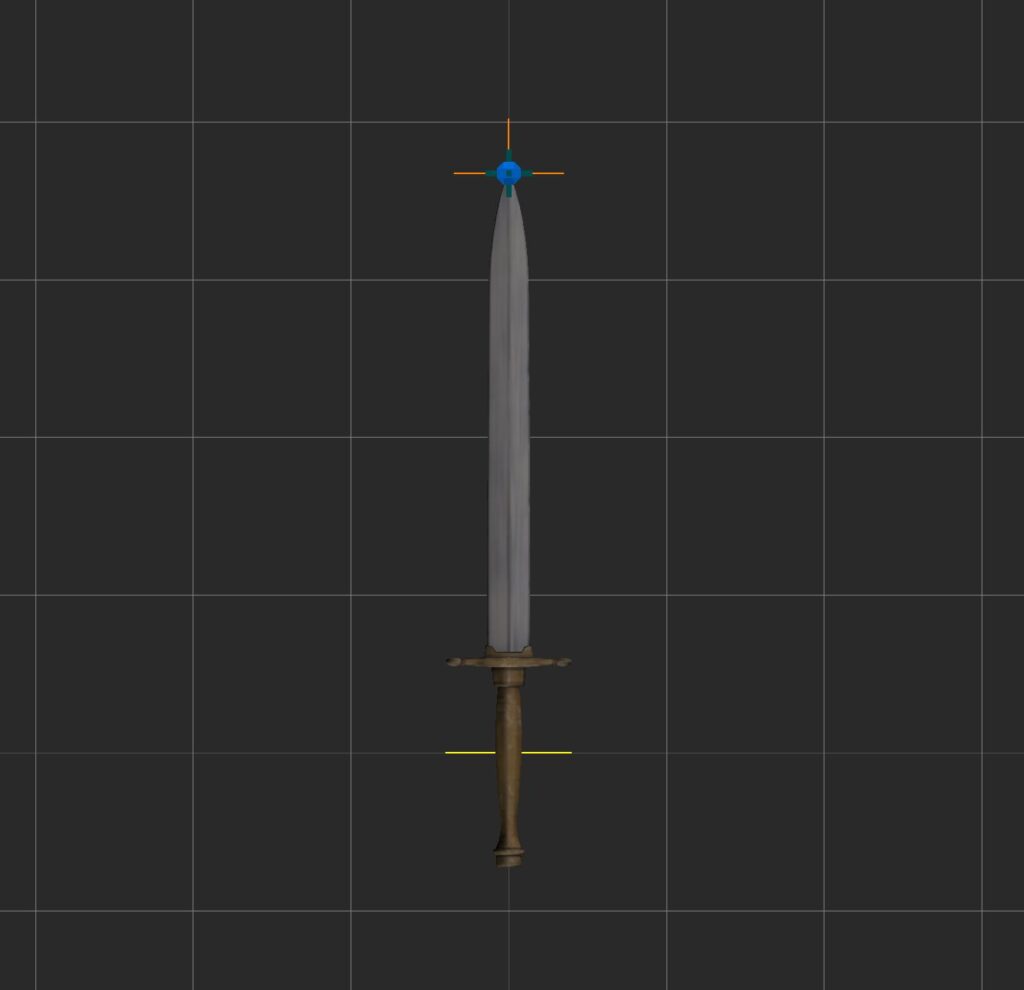
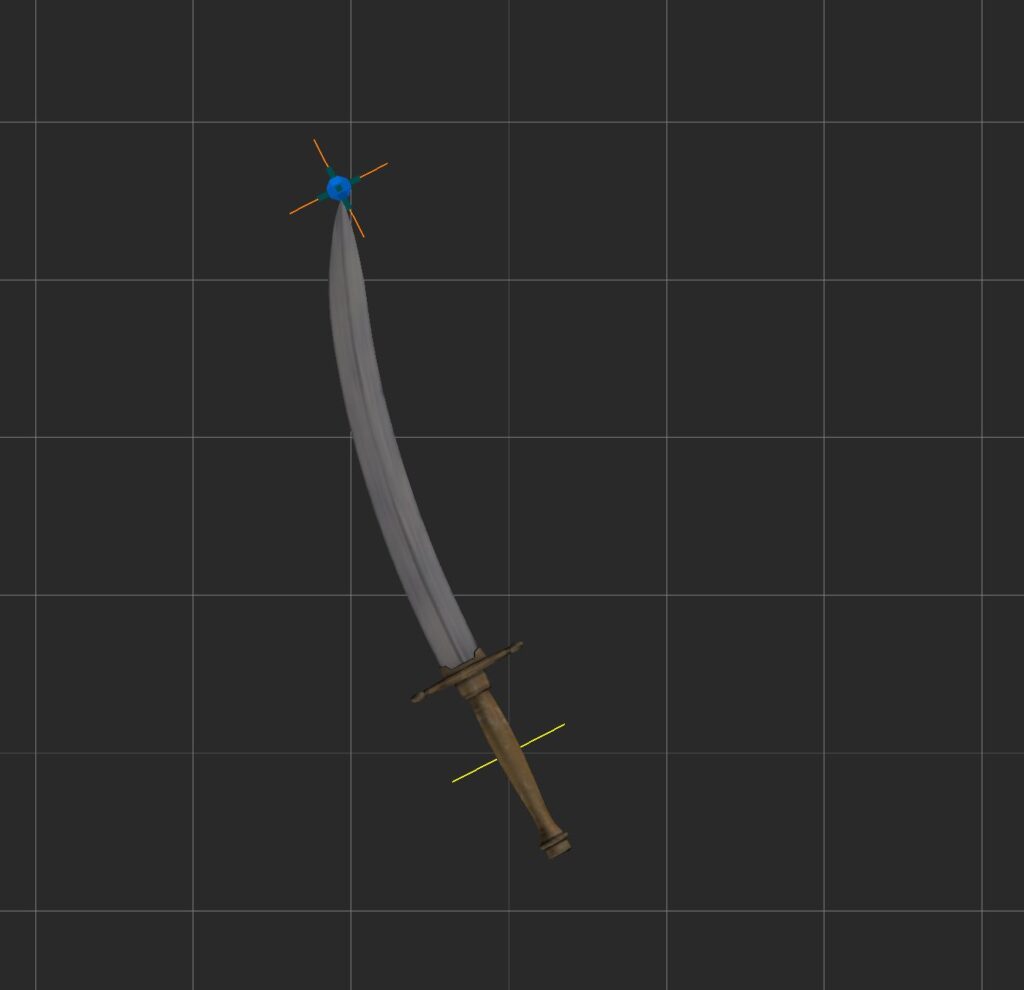
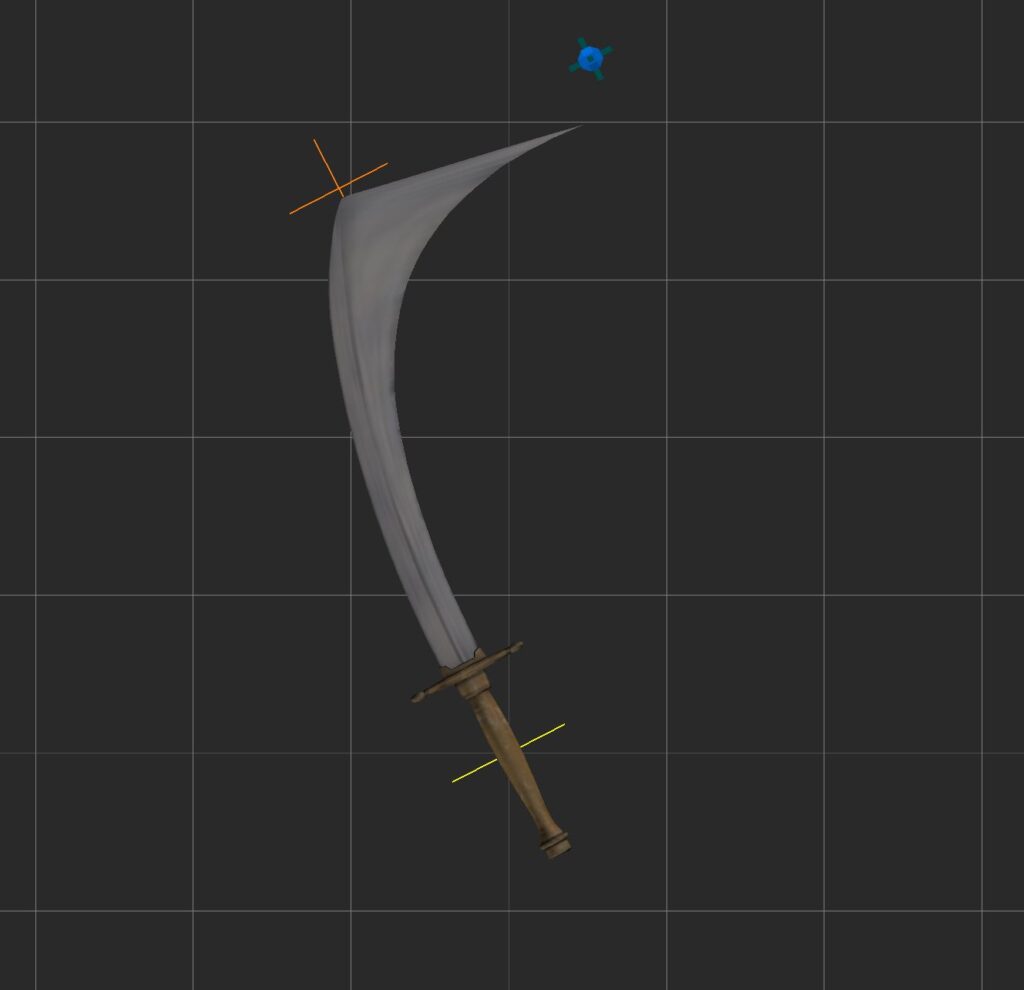
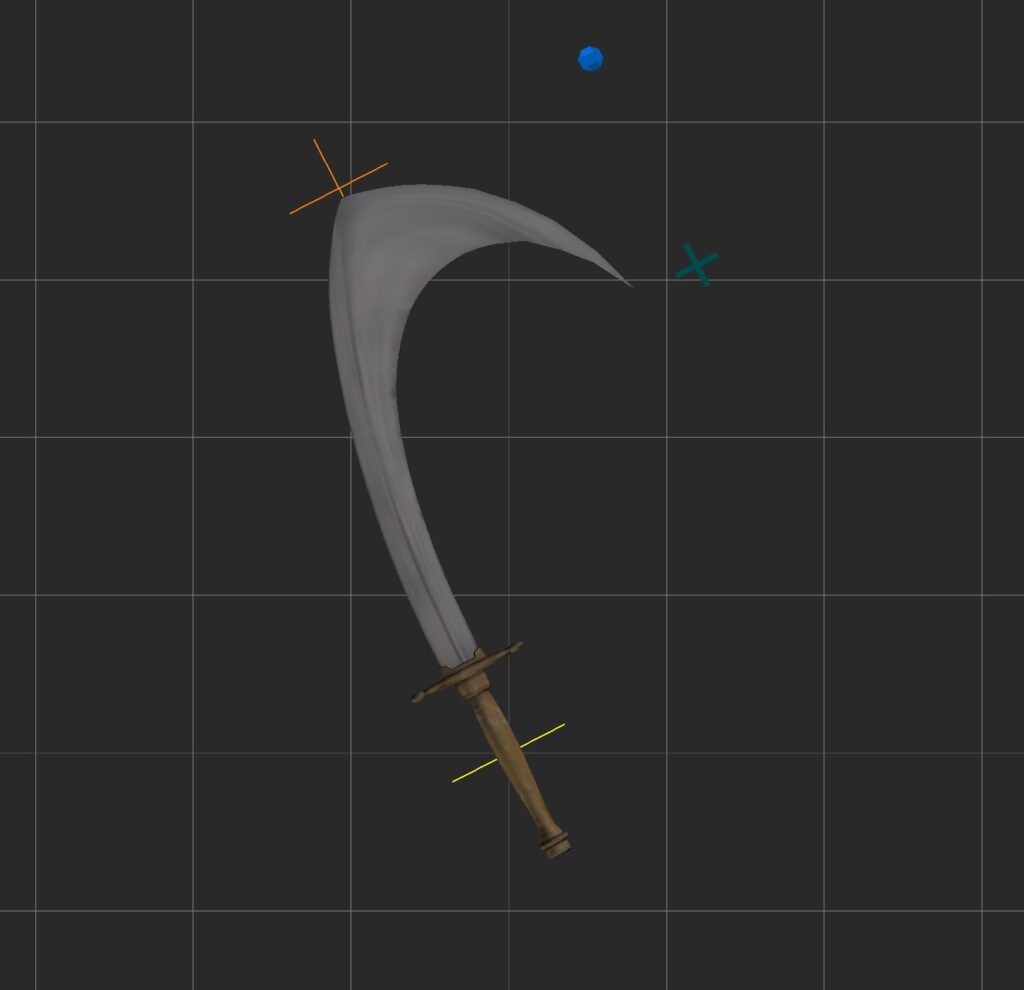
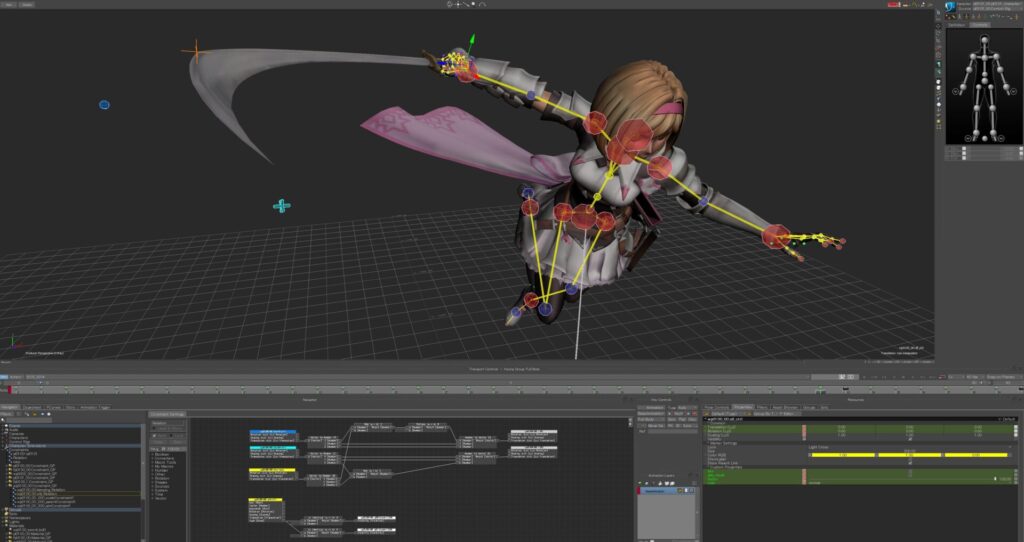
When each character fills their gauge, they can use a powerful “Skybound Art.” Each character’s unique action is based on motion capture, which an animator then polishes and finalizes in MotionBuilder.
Actions other than Skybound Arts are also created based on motion capture, but some movements cannot be entirely captured due to the game’s action RPG nature. For example, for air movements such as the air spin slash, only the initial jump and the finishing motion of landing and slashing are recorded in motion capture, and an animator adds the main air spin slash movement.
MotionBuilder also played a major role in workflow integration. Its native support for the FBX format is a major factor in linking with Maya. Kanda explains: “The rigging team interviewed the animators and proceeded with development while incorporating the opinions of both the motion team and cutscene team. During this time, MotionBuilder became a platform for mutual understanding, and we were able to proceed with the work while sharing this same understanding with each other. It was software that fit development needs, as it provided an environment where we could concentrate on animation production.”
A smoother game development pipeline with Autodesk tools
Shiba mentioned that it had been 10 years since he last used Maya, noting significant improvements in stability and smoother use of animation layers. He expressed his appreciation for the user interface’s ease of use and stated that editing the .ma data directly with a text editing tool in ASCII format saved him time on the technical aspects.
Kanda, who used both Maya and MotionBuilder, mentioned that Maya’s maturity as a platform brought an abundance of information and ease of development, and MotionBuilder’s performance was excellent. “MotionBuilder has the functions necessary for animation production, and I think the playback performance is very good. It would also be helpful if it had a reference function like Maya. I also hope it will be possible to use Python to store work history. Such features could make our workflow even more flexible. For this project, we created rigs for non-humanoid characters, such as unique IK spline rigs for tails and whips. With the help of technical artists, we developed plugins for helper joints that behave consistently across Maya, MotionBuilder, and in-game, truly enhancing rig functionality.”
Yasui said that MotionBuilder’s advantages are that “HumanIK makes it easy to switch between full body IK and rig FK/IK, and you can have multiple takes, so you can put together combo actions that are connected in one scene data, making it easy to create a start, loop, and end configuration.” He also listed the Story function: “It’s convenient to be able to load character motion data directly onto another character. For example, when trying out battle specifications, you can easily use a pre-existing character’s attack. It’s also convenient to start editing right away from the captured data. For short actions, you can create temporary data from the capture in as little as 15 minutes.”
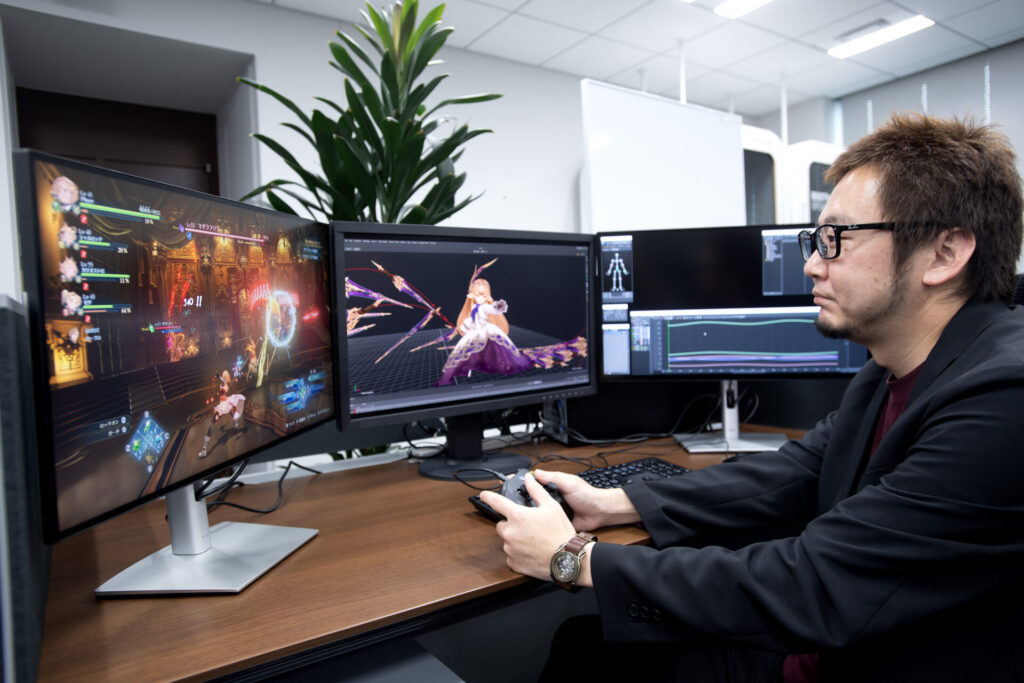
Cygames poured their heart and soul into developing this AAA console game, which has garnered widespread acclaim globally. Through the development of this project, Cygames has cultivated various Autodesk solutions, techniques, assets, and ideas they want to challenge. Fans globally are already eagerly anticipating the company’s next hit.
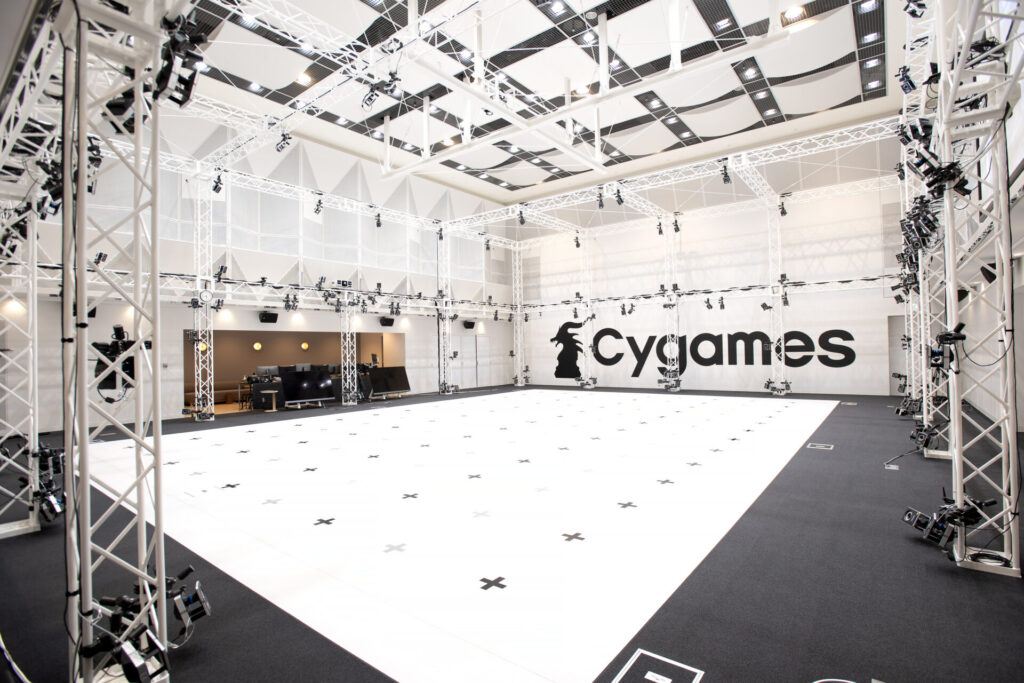
TEXT: Akiyoshi Hizume
EDIT: Cygames, Autodesk
© Cygames, Inc.
Unlock your full potential with Autodesk’s powerful solutions. Explore our Game Design and Development page to learn more!